Documentation
Introduction
NextGPT - Multi Model GPT Android App
Thank you for purchasing NextGPT script.
NextGPT is a cutting-edge Android application that brings the power of multiple AI models into one sleek, modern, and fully customizable app. Built with the latest Android development technologies, NextGPT allows users to interact with AI in versatile ways – from intelligent conversations to stunning AI-generated text.
- Version: 1.0
- Author: morningstarcode
- Created: 27 April 2025
- Update: 27 April 2025
Please feel free to contact us via Item Support Page for any query related to script.
Introduction on Local
To operate PHP Laravel locally, it's essential to have a server environment such as XAMPP, MAMP,
or LAMP installed on your machine. Without one of these servers, running a PHP Laravel
application on your local device would be impossible. Follow the links below for installation
instructions tailored to different operating systems.
You must acquire a web server to execute the application.
- For macOS, obtain MAMP or XAMPP Server.
- For Windows OS, obtain MAMP or XAMPP Server.
- For Linux OS, obtain LAMP or XAMPP Server.
- MAMP Server is available for download at https://www.mamp.info/en/mamp for both Windows and Mac systems.
- XAMPP Server can be downloaded from https://www.apachefriends.org/download.html, supporting Windows, Linux, and Mac operating systems.
PHP Version Requirement
Required PHP version: >= 8.1
To verify the installed PHP version on your server, execute the command below in your terminal or command prompt:
php -v
If PHP is not installed, please install the necessary version first.
Required PHP Extensions
- bcmath PHP Extension
- gd PHP Extension
- ctype PHP Extension
- curl PHP Extension
- fileinfo PHP Extension
- json PHP Extension
- mbstring PHP Extension
- OpenSSL PHP Extension
- pcre PHP Extension
- pdo PHP Extension
- tokenizer PHP Extension
- pdo_mysql PHP Extension
- xml PHP Extension
- zip PHP Extension
Composer Installation
Composer is a prerequisite for running Laravel applications. If Composer is not yet installed on your machine, follow the installation instructions for different operating systems below:
- For Mac, initiate Composer installation by clicking here.
- Windows users can complete Composer setup by clicking here.
- For Ubuntu users, learn more about Composer installation and use by clicking here.
Running Laravel on Local
-
This guide assumes you have PHP and Composer installed on your system. If not, please refer to the official documentation to install PHP and Composer.
Step 1: Database Configuration
First, create a new database for your Laravel application locally. After creating the database, import the gptappdb.sql file in phpmyadmin from the database folder in your downloaded directory.
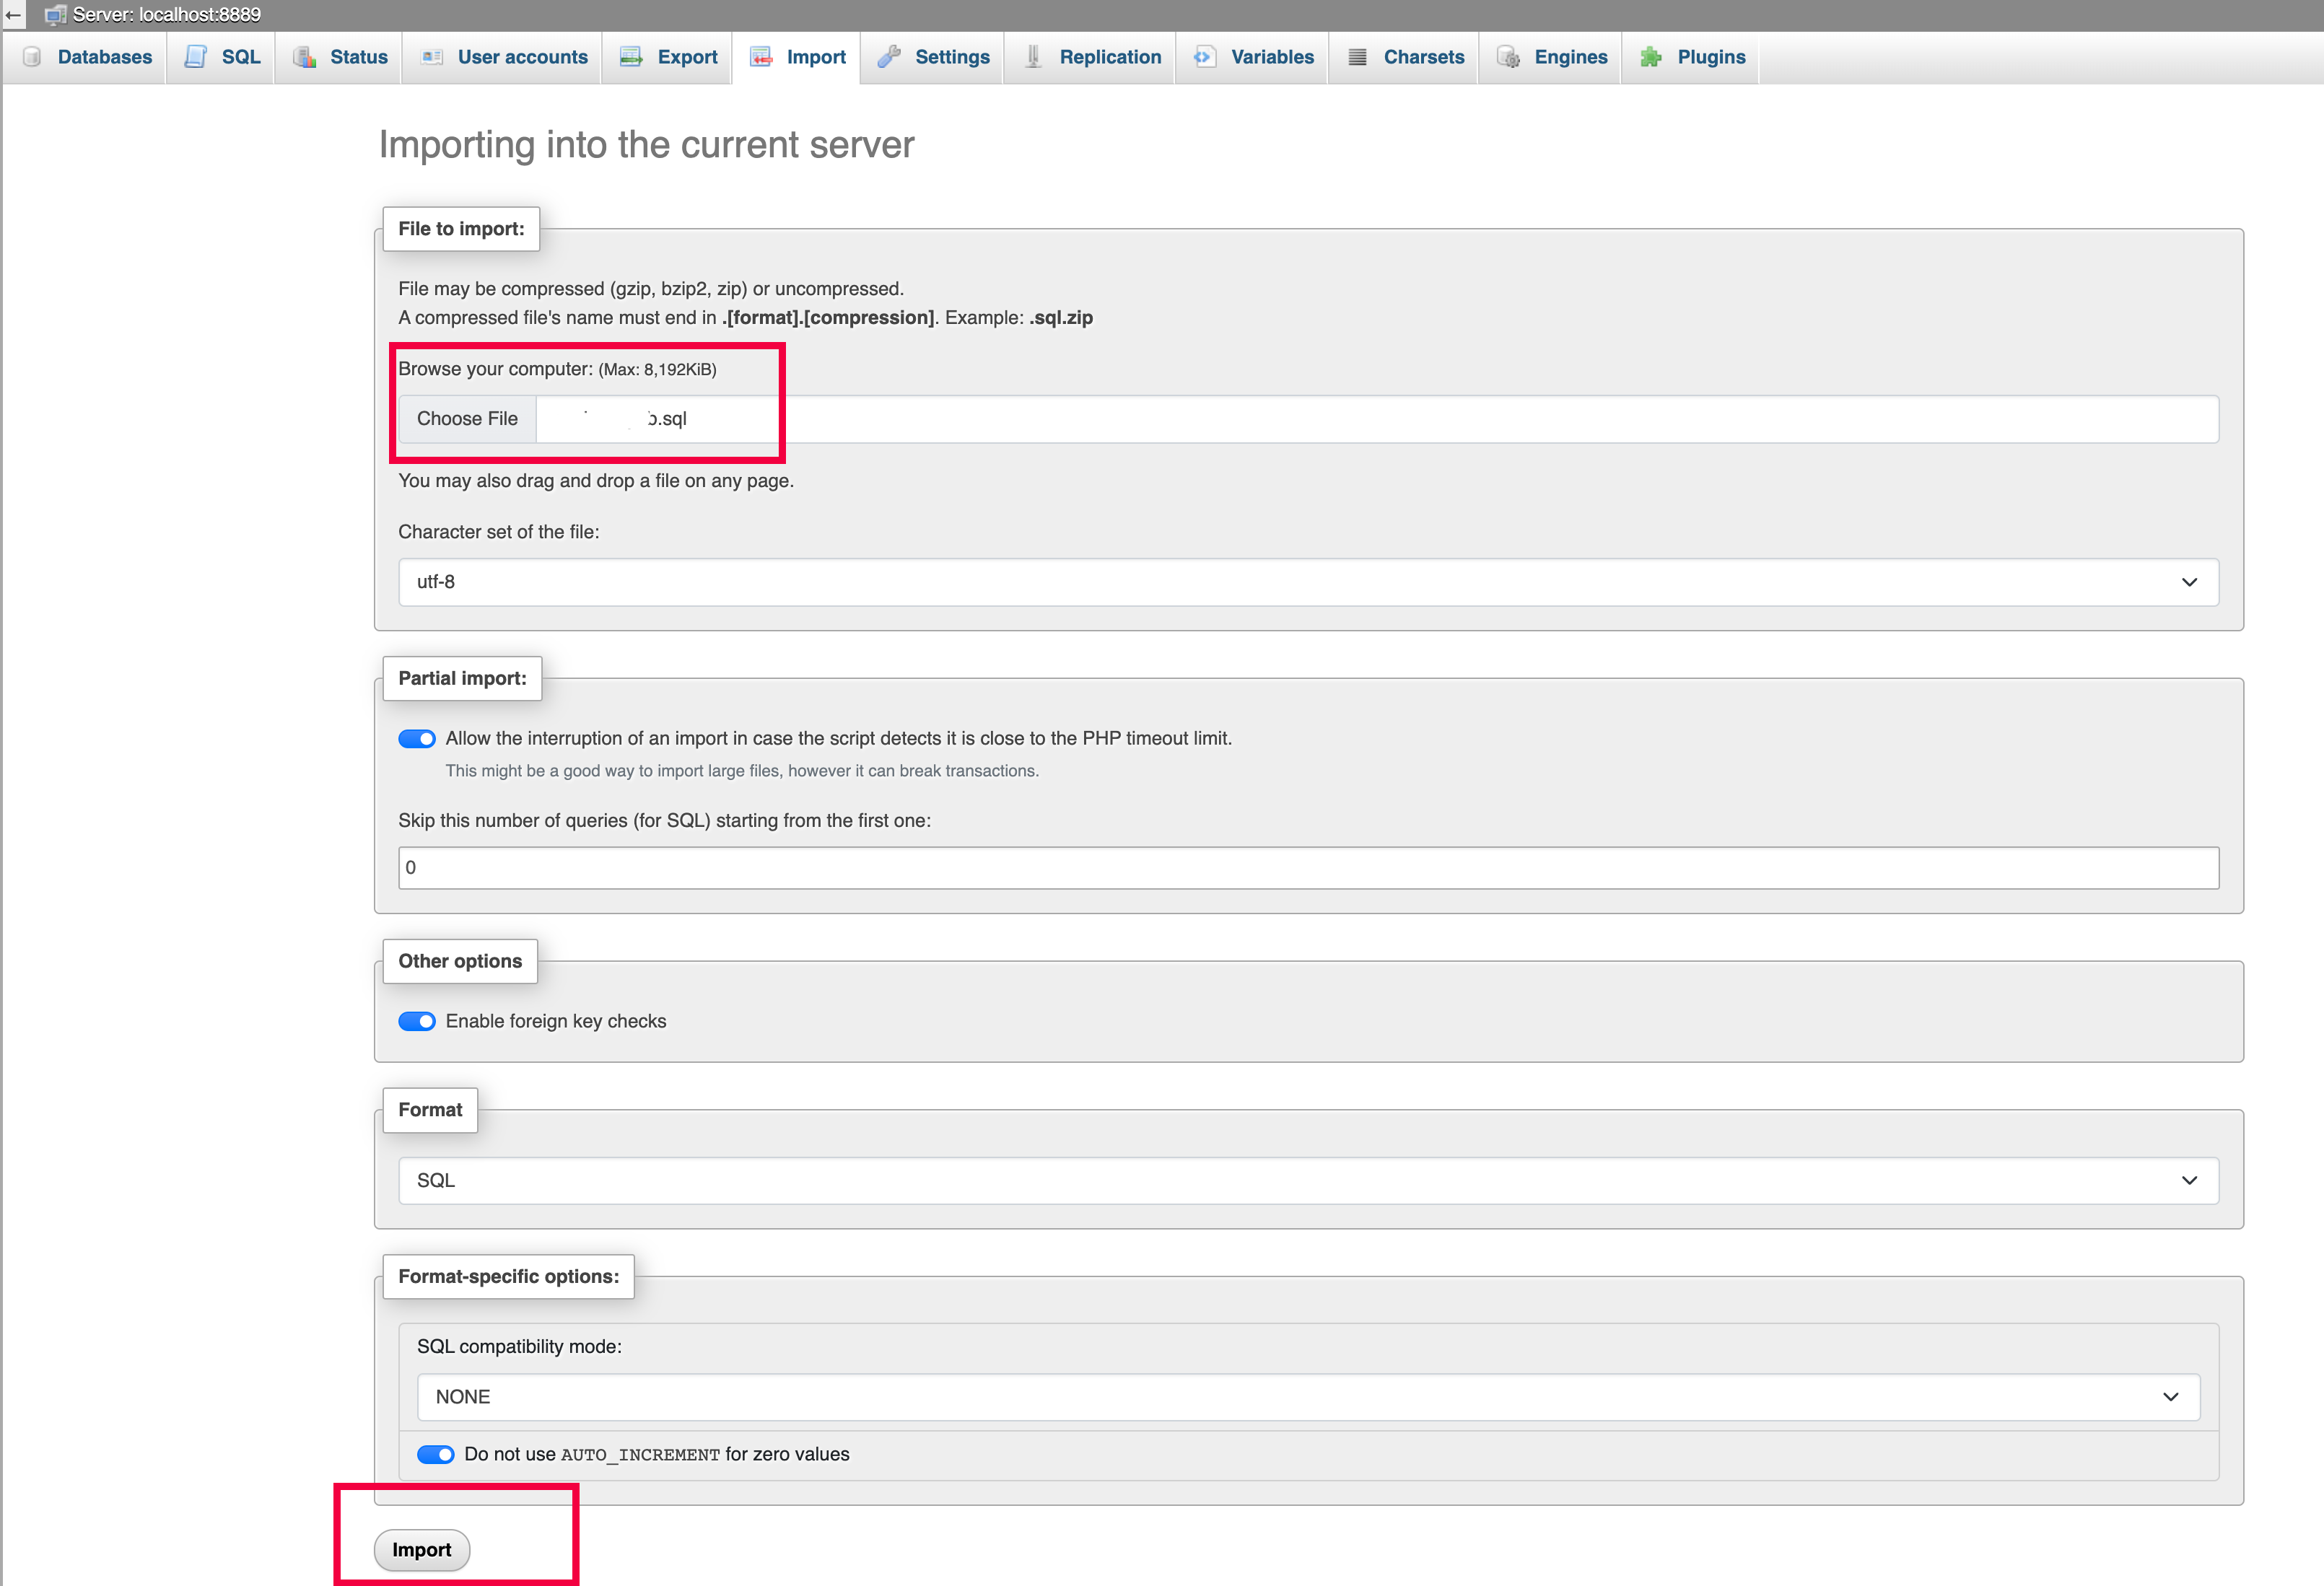
Open the .env file in your project root and update the database settings accordingly.
DB_CONNECTION=mysql
DB_HOST=127.0.0.1
DB_PORT=3306
DB_DATABASE=root
DB_USERNAME=root
DB_PASSWORD=
Step 2: Serve the Application
Once the database import is complete, navigate into admin panel folder from your downloaded directory on terminal:
cd gpt-app-admin-panelTo start the Laravel development server, run:
php artisan serveThis command will start a development server at http://127.0.0.1:8000/en. Open http://127.0.0.1:8000/en/dashboard in your web browser to see your Laravel application. Login with following credentials' info.
admin@admin.com : password
For further development and deployment instructions, refer to the official Laravel documentation.
Deploying to Shared Hosting
This guide also applies to other hosting providers.
After downloading the package from the marketplace, you will find a folder named
'gpt-app-admin-panel'. This folder contains the Laravel project.
Recommended (via GIT)
After purchasing this item, you will gain access to our private GitHub repository (a GitHub account is required). This allows you to receive the latest updates instantly without waiting for them to be released. We highly recommend using this repository for deployment on your hosting platform, ensuring you always have the most up-to-date version without any conflicts or the need for manual updates.
How to Use GitHub for Beginners https://www.youtube.com/watch?v=BovIkSKStPwVPS
How to Deploy Laravel Project on a Virtual Private Server https://www.hostinger.com/tutorials/how-to-deploy-laravel
Shared Hosting
Deploy Laravel App in Shared Host Linux | HostGator | Namecheap | Bluehost https://www.youtube.com/watch?v=kYjGyLDK3Ec
Deploy to Hostinger
- Transfer Files to Shared Hosting:
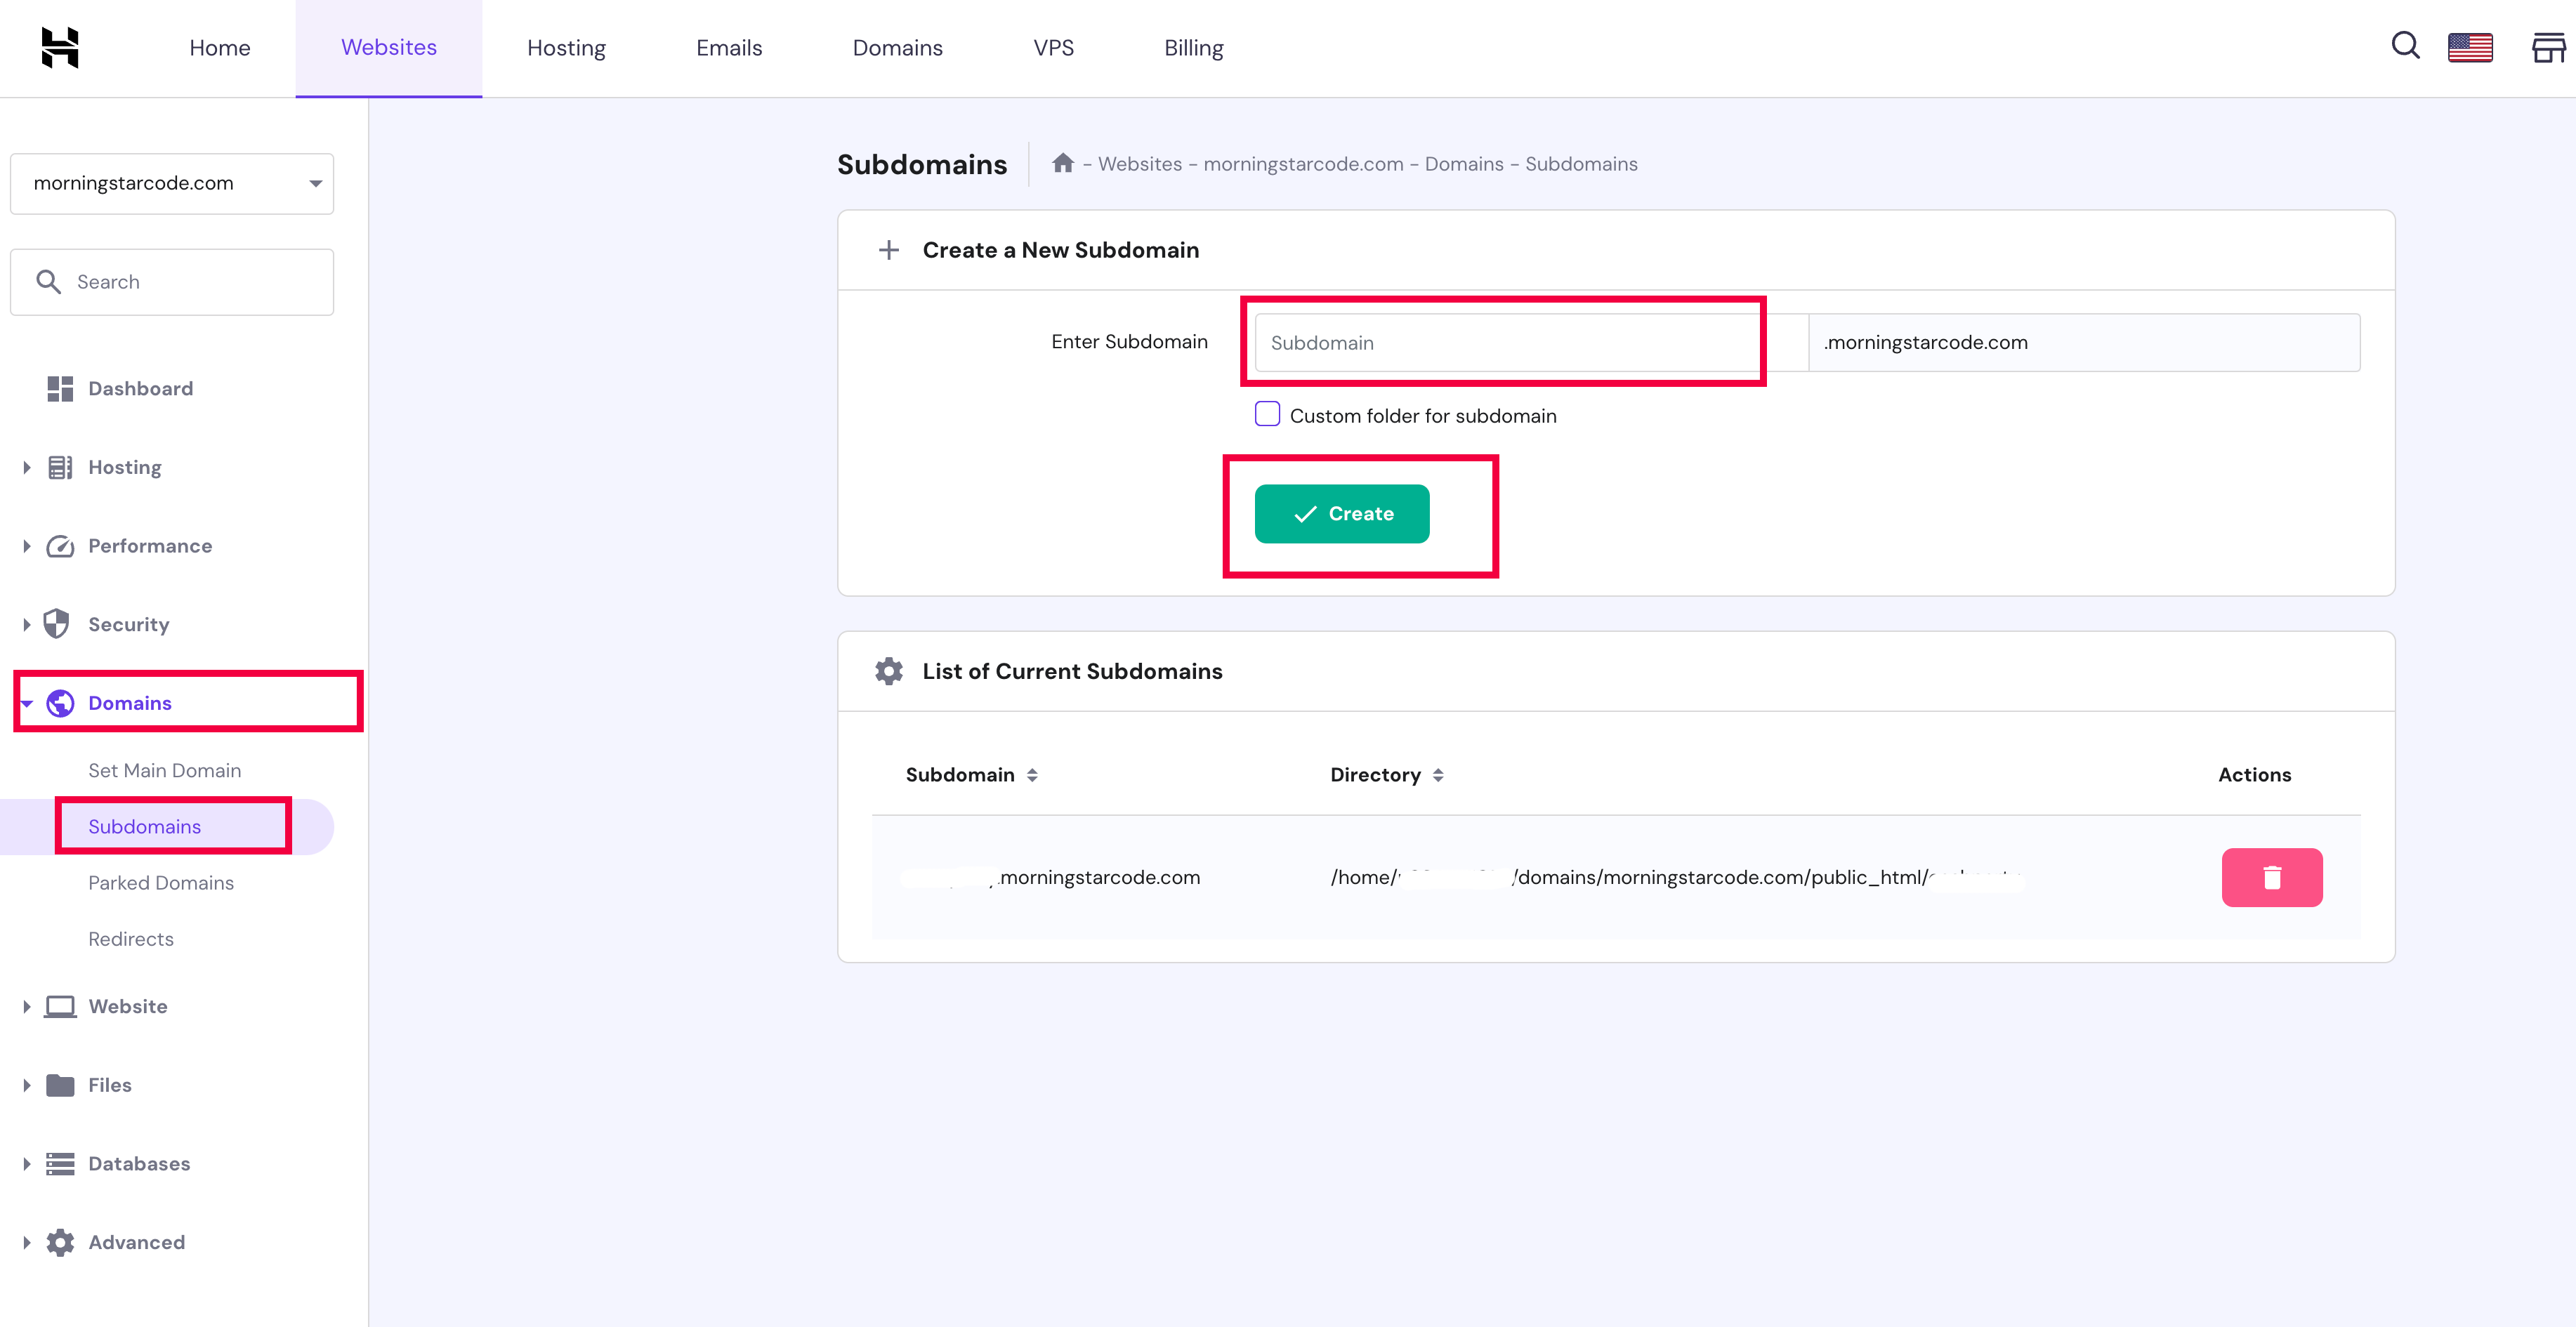
- Create a domain or subdomain in your hosting panel:
- Compress your Laravel project into a .zip or .tar.gz archive.
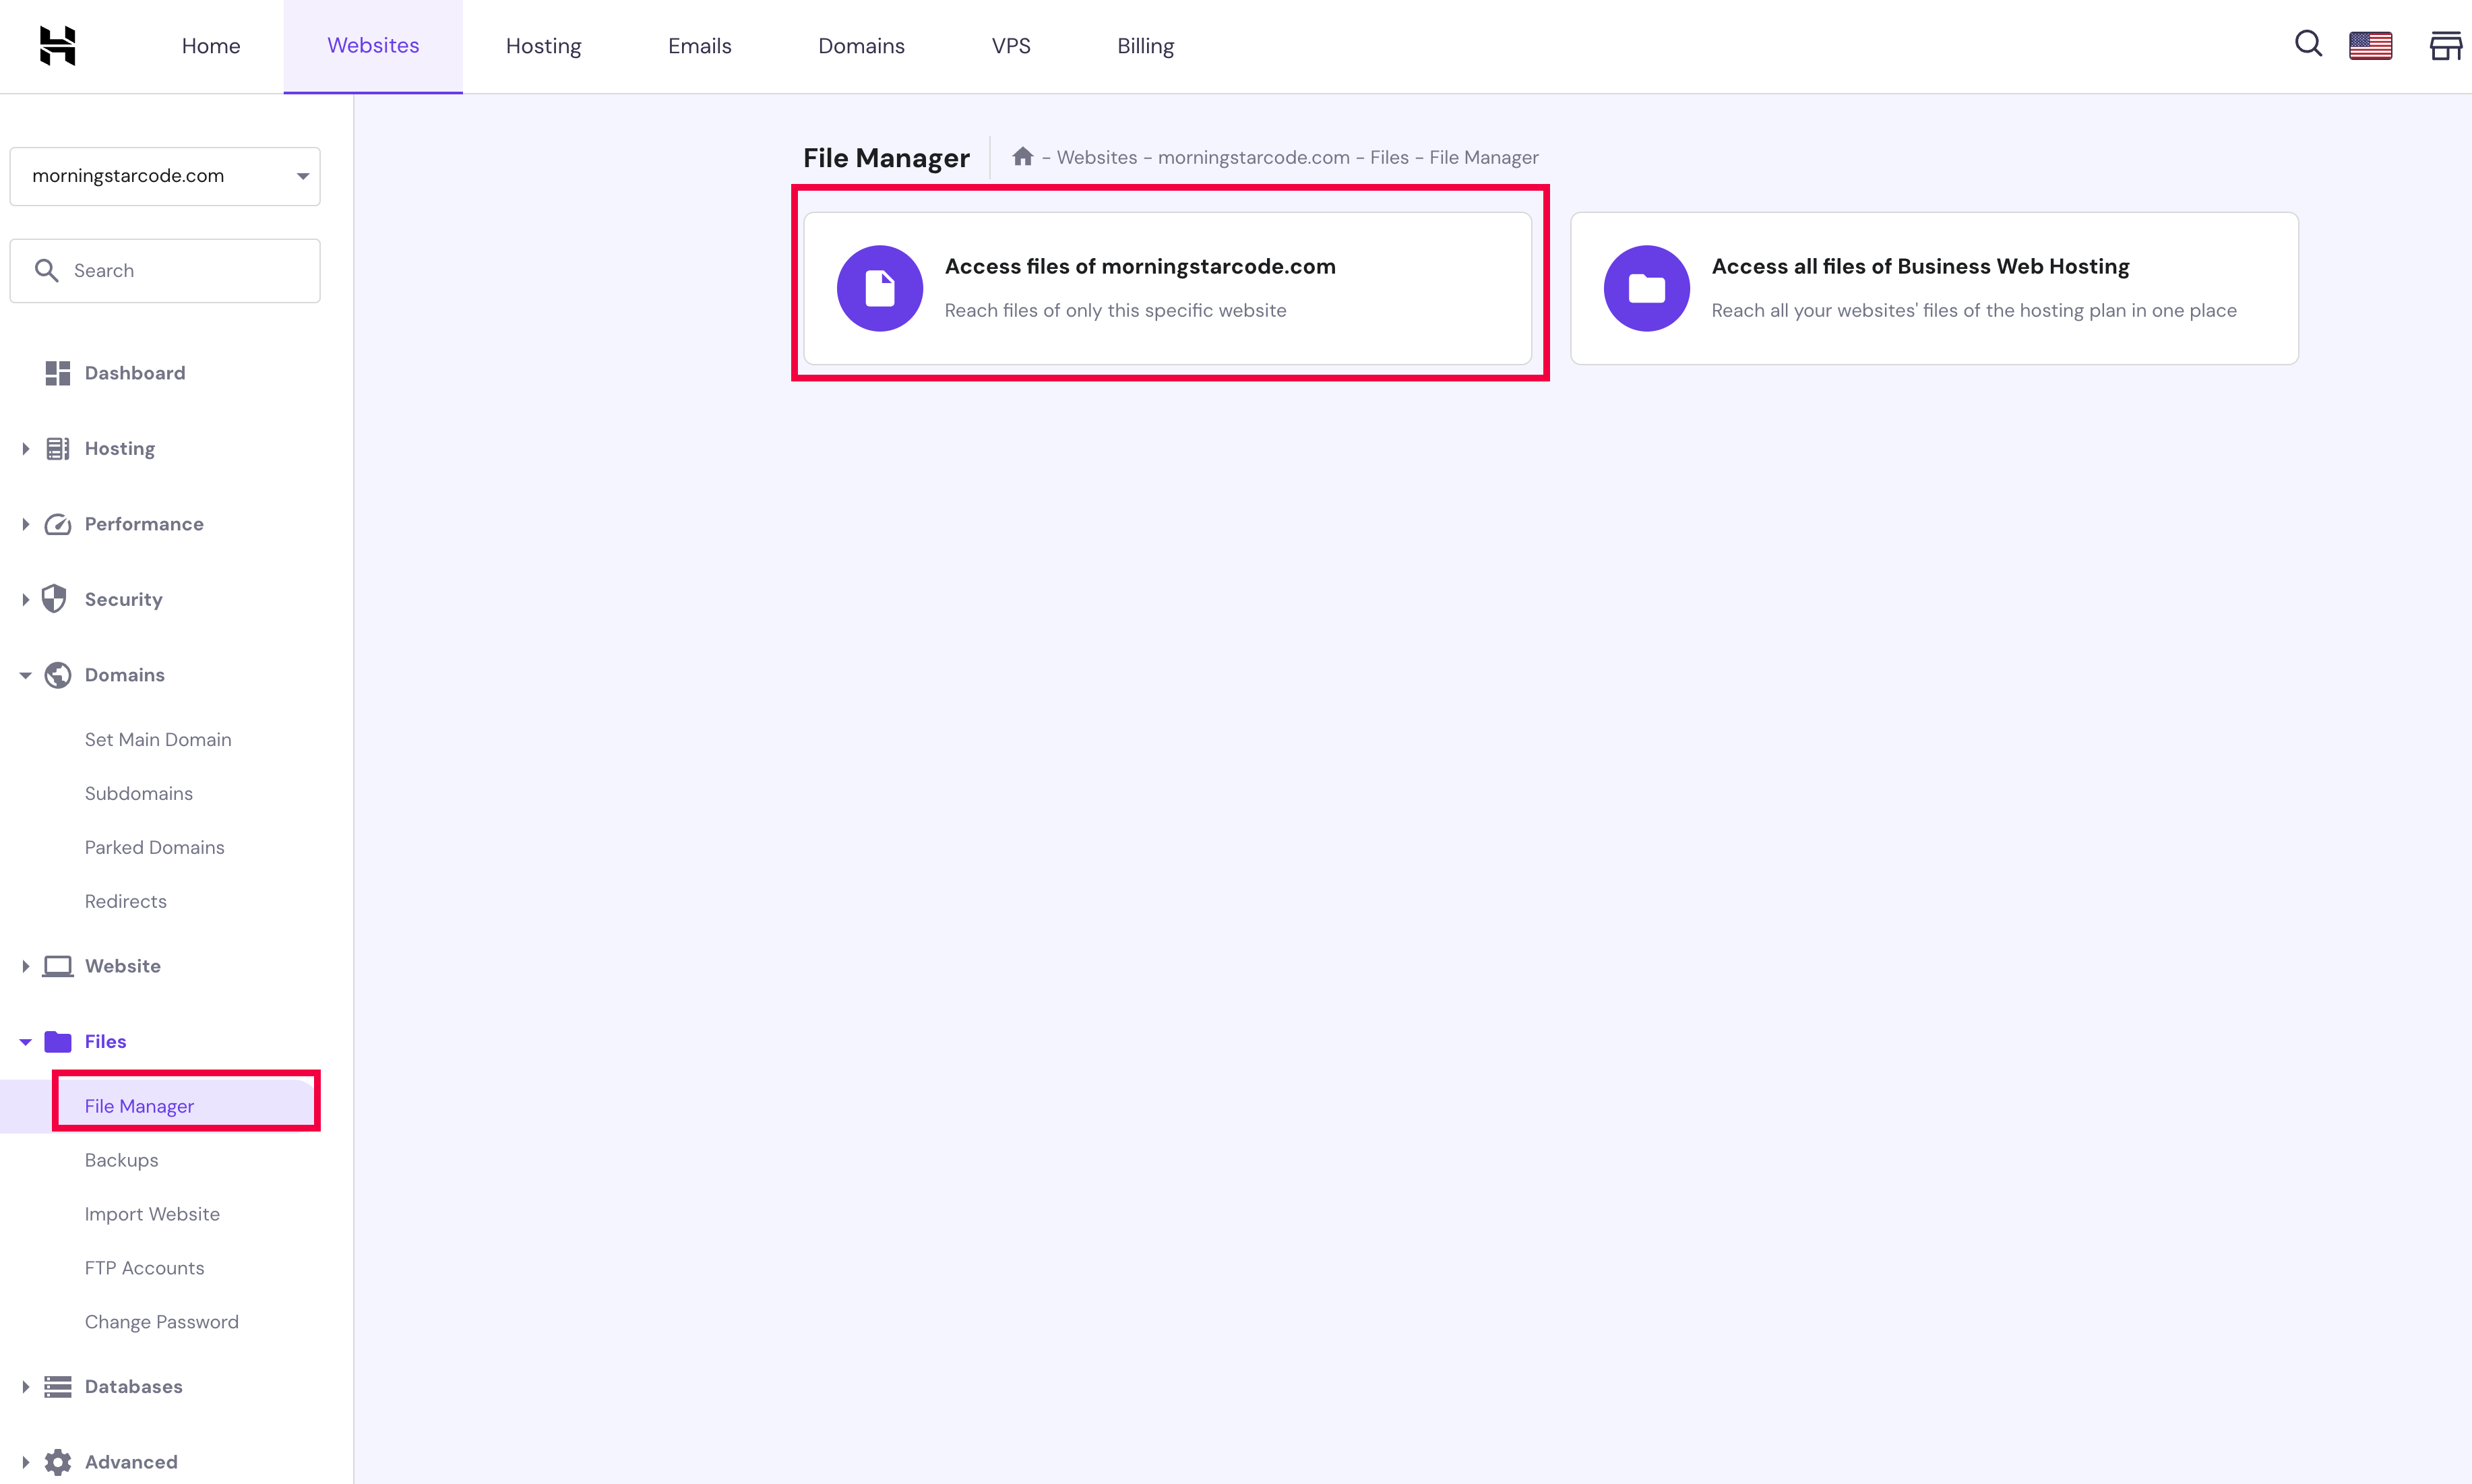
- Using your shared hosting control panel (e.g., cPanel), navigate to the File Manager.
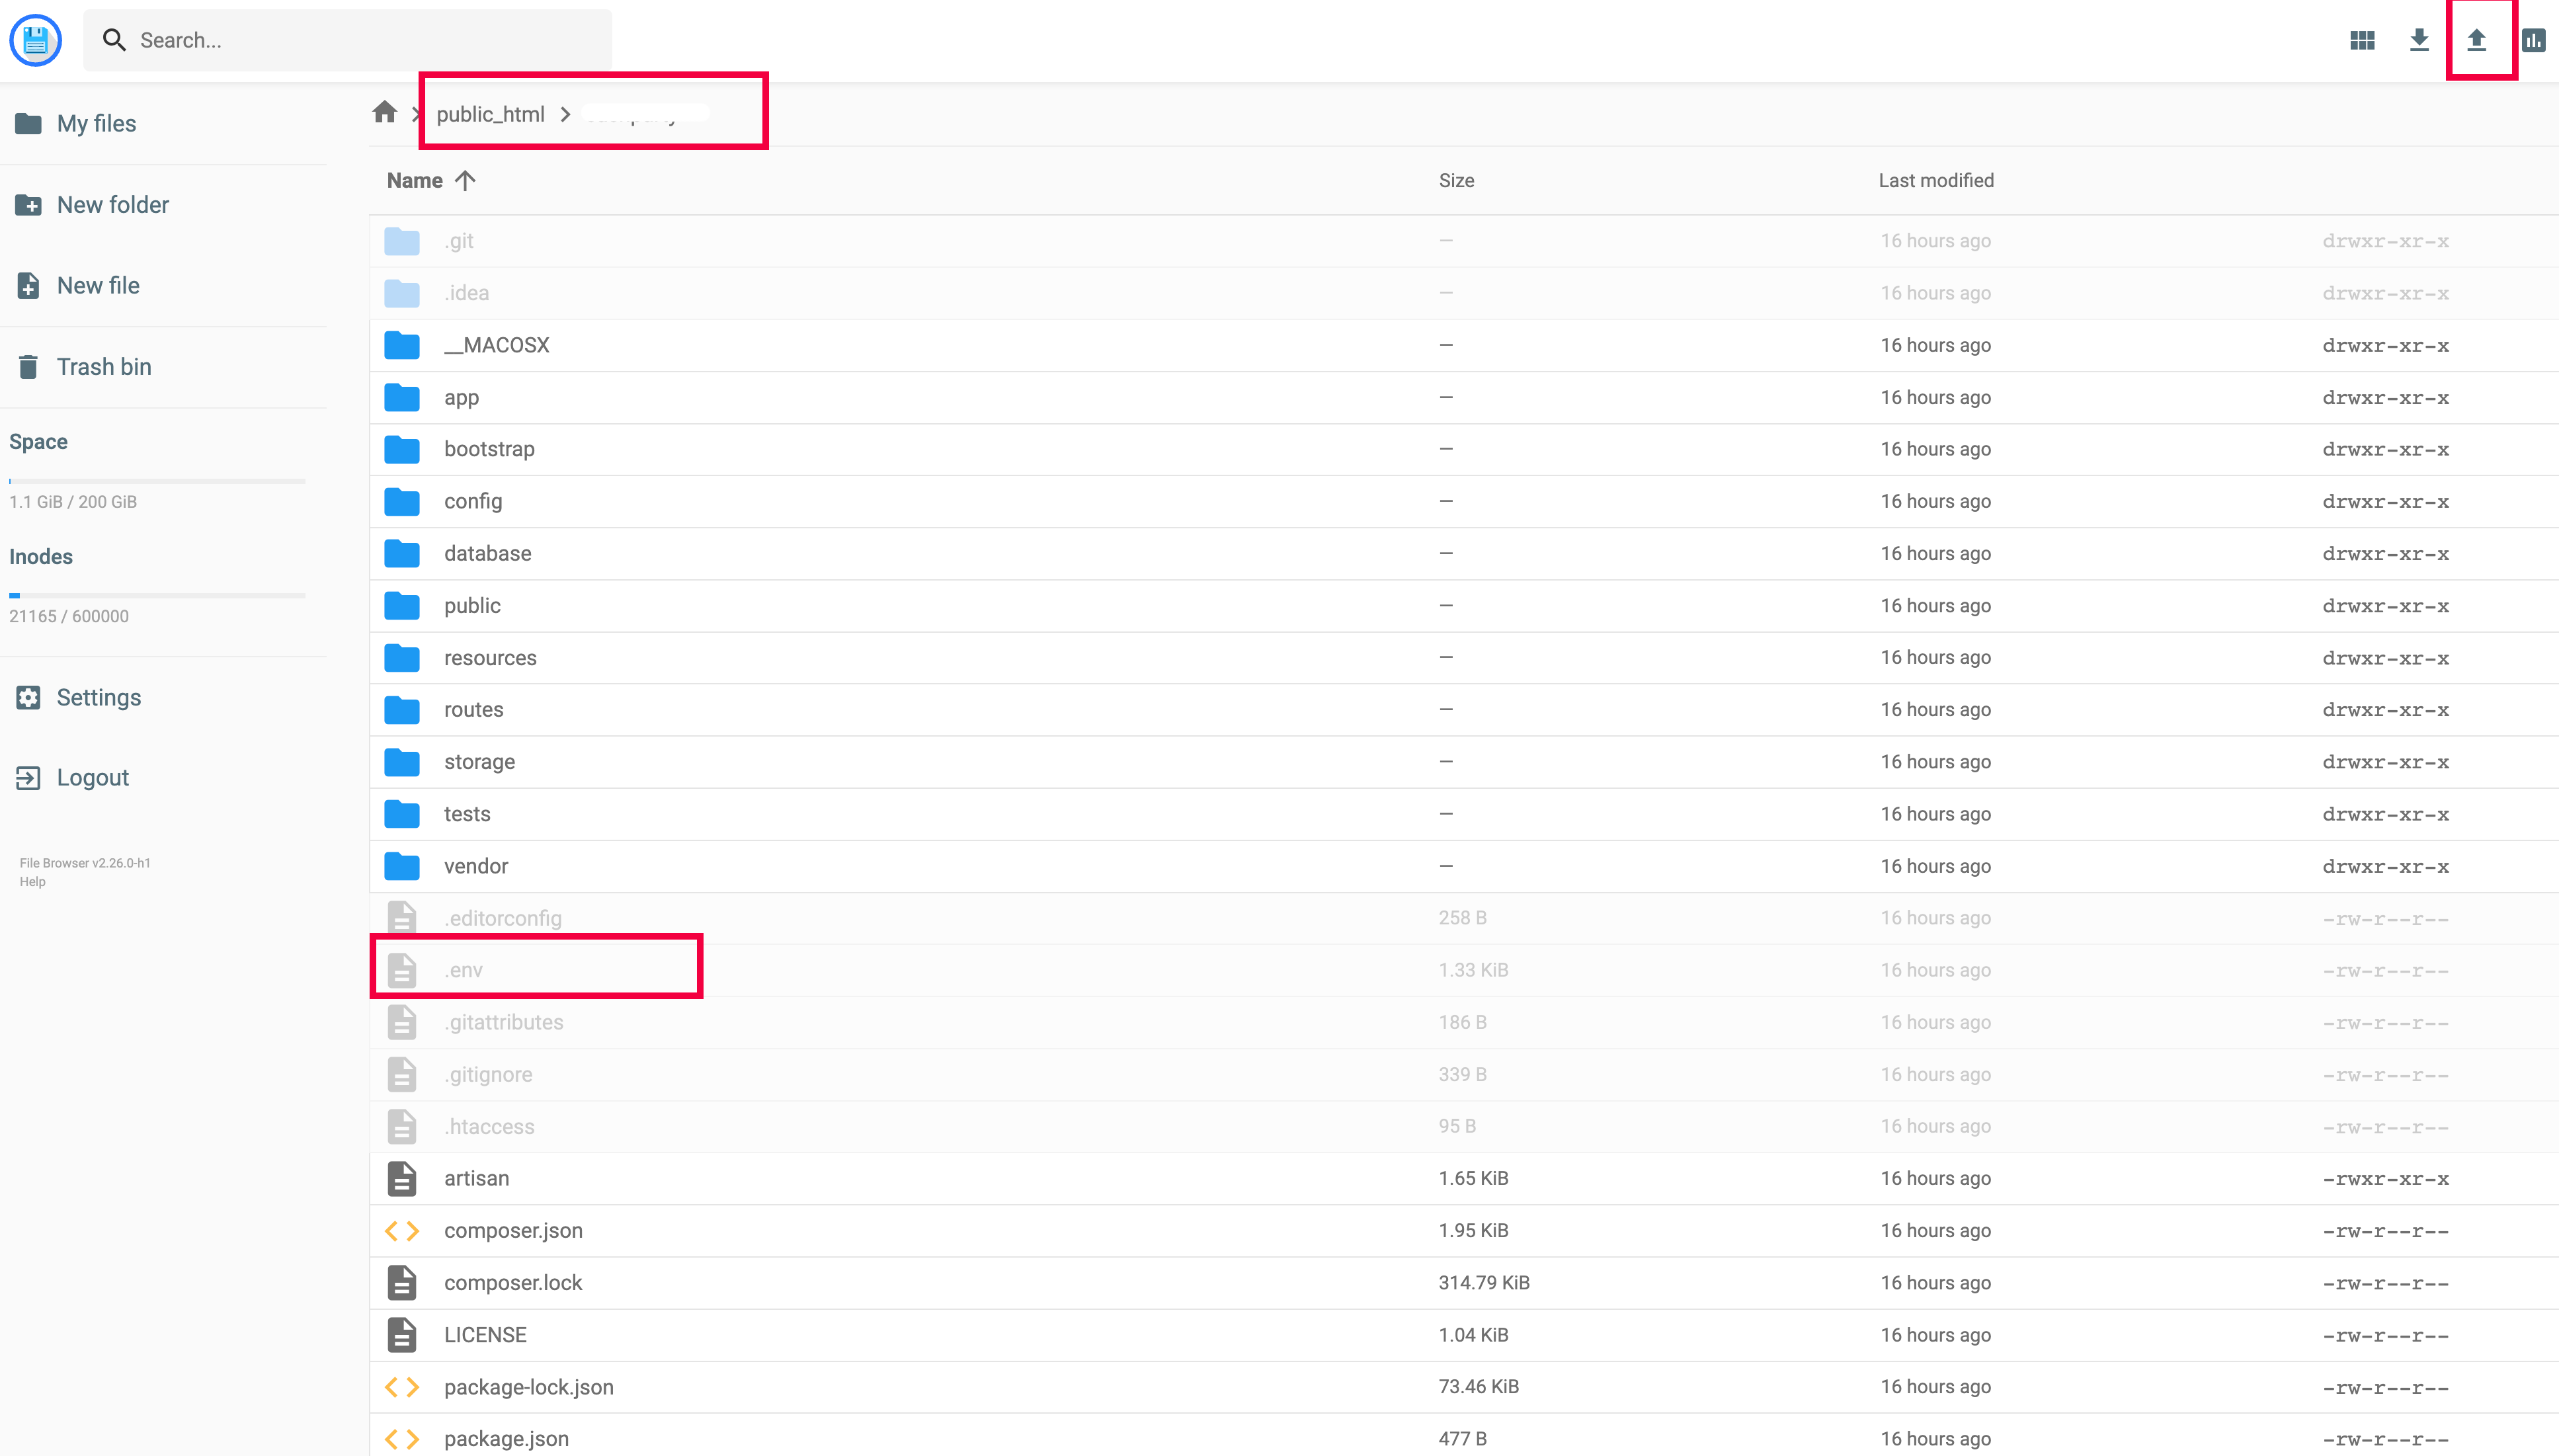
- Upload the compressed archive to the root or subdirectory.
- Extract the files.
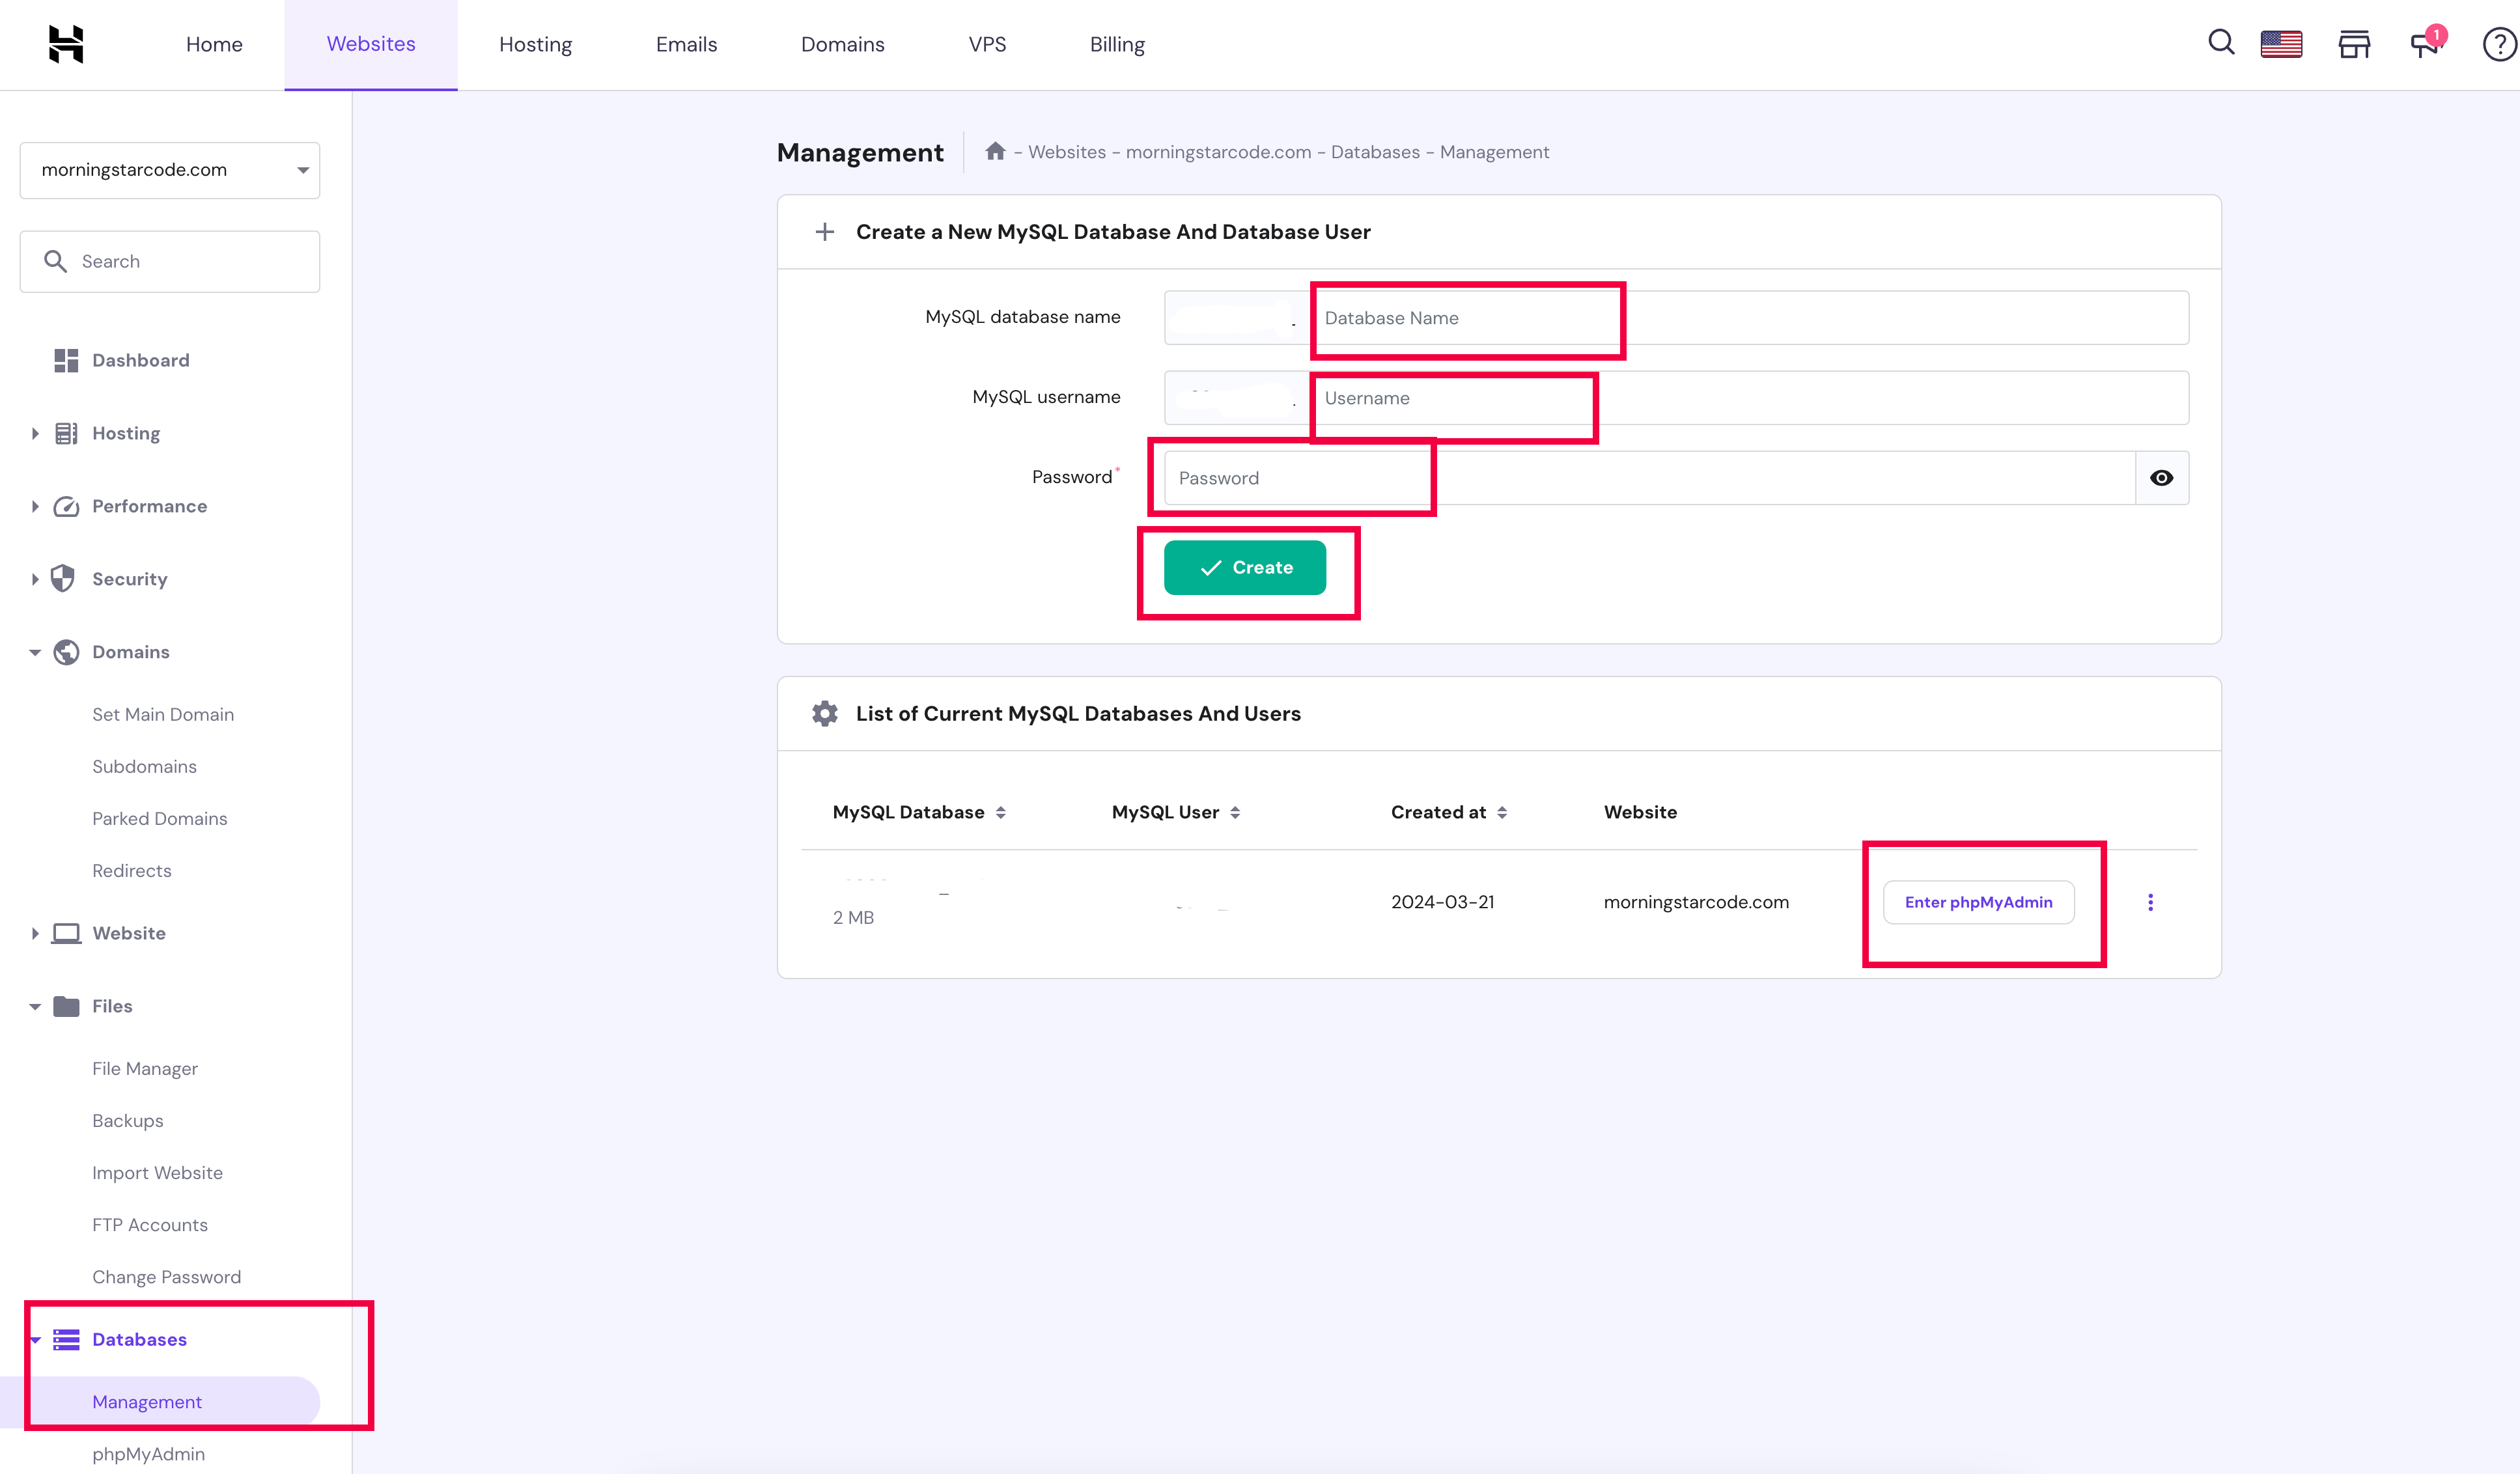
- Database Configuration:
- Create a new database and user using the cPanel database wizard (or another method).
-
After creating the database, import the gptappdb.sql file in phpmyadmin from the database folder in your downloaded directory. Same as local installation.
- Update the .env file with the appropriate database information.
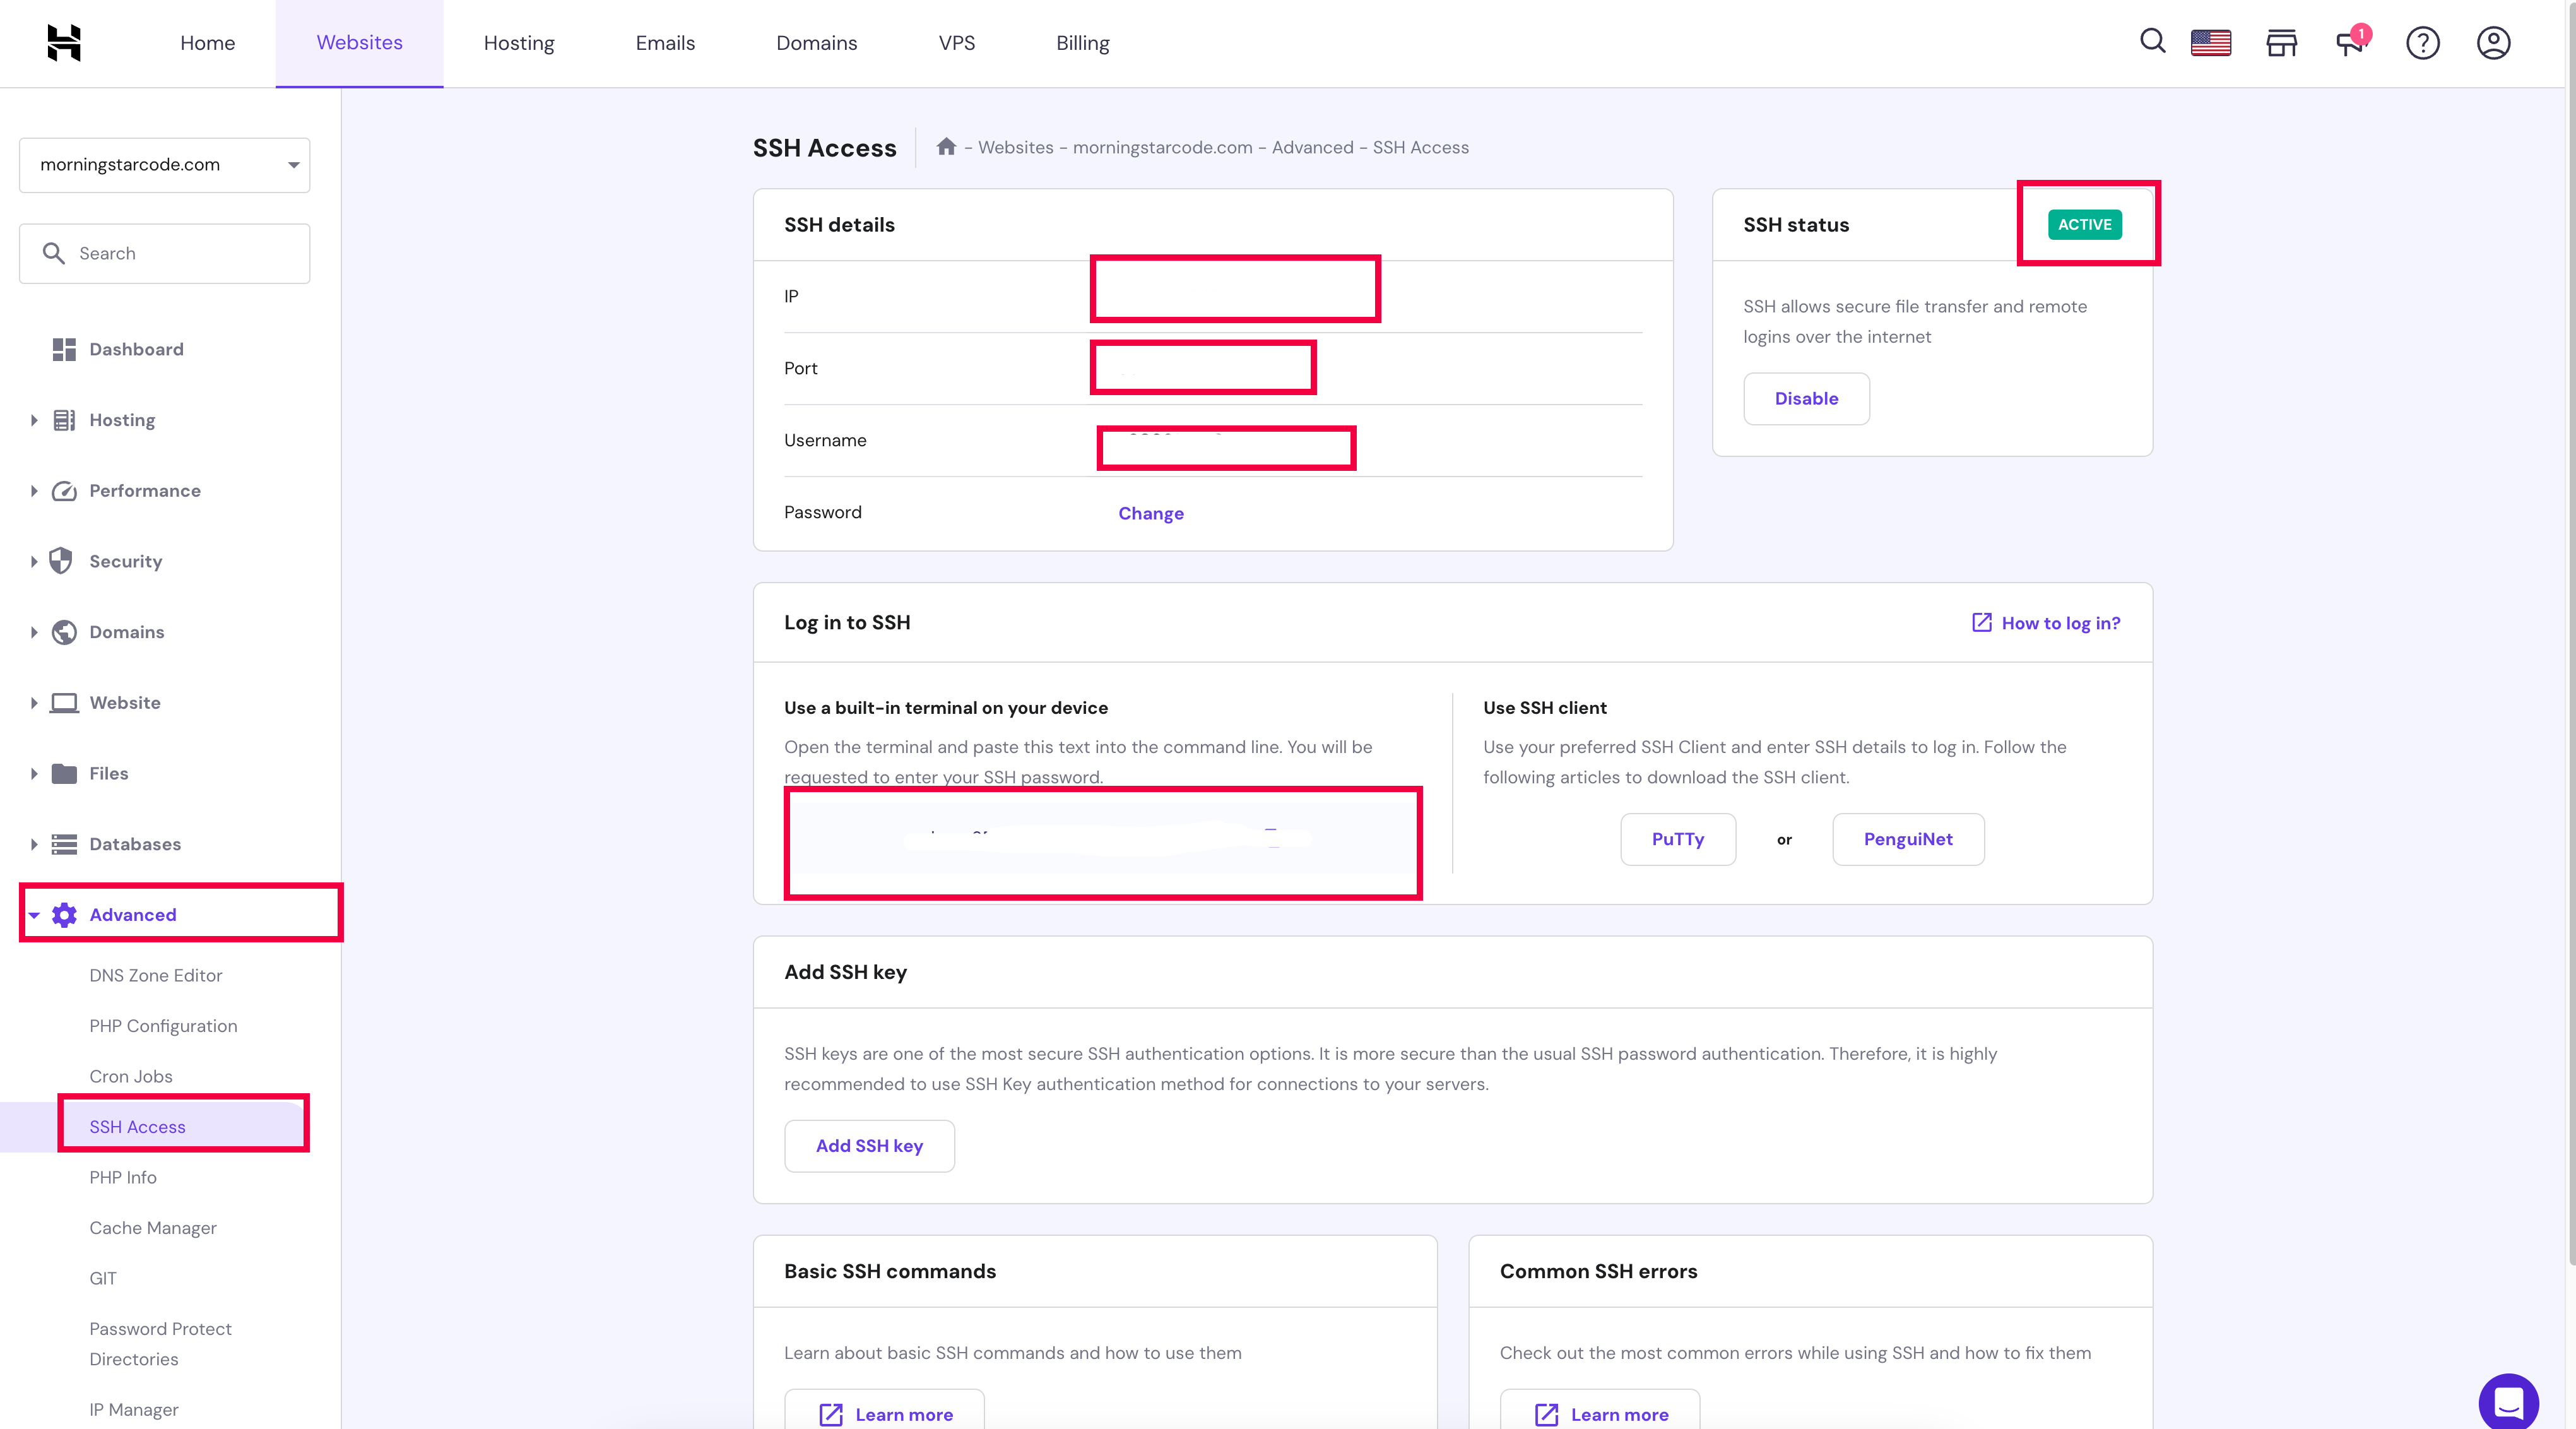
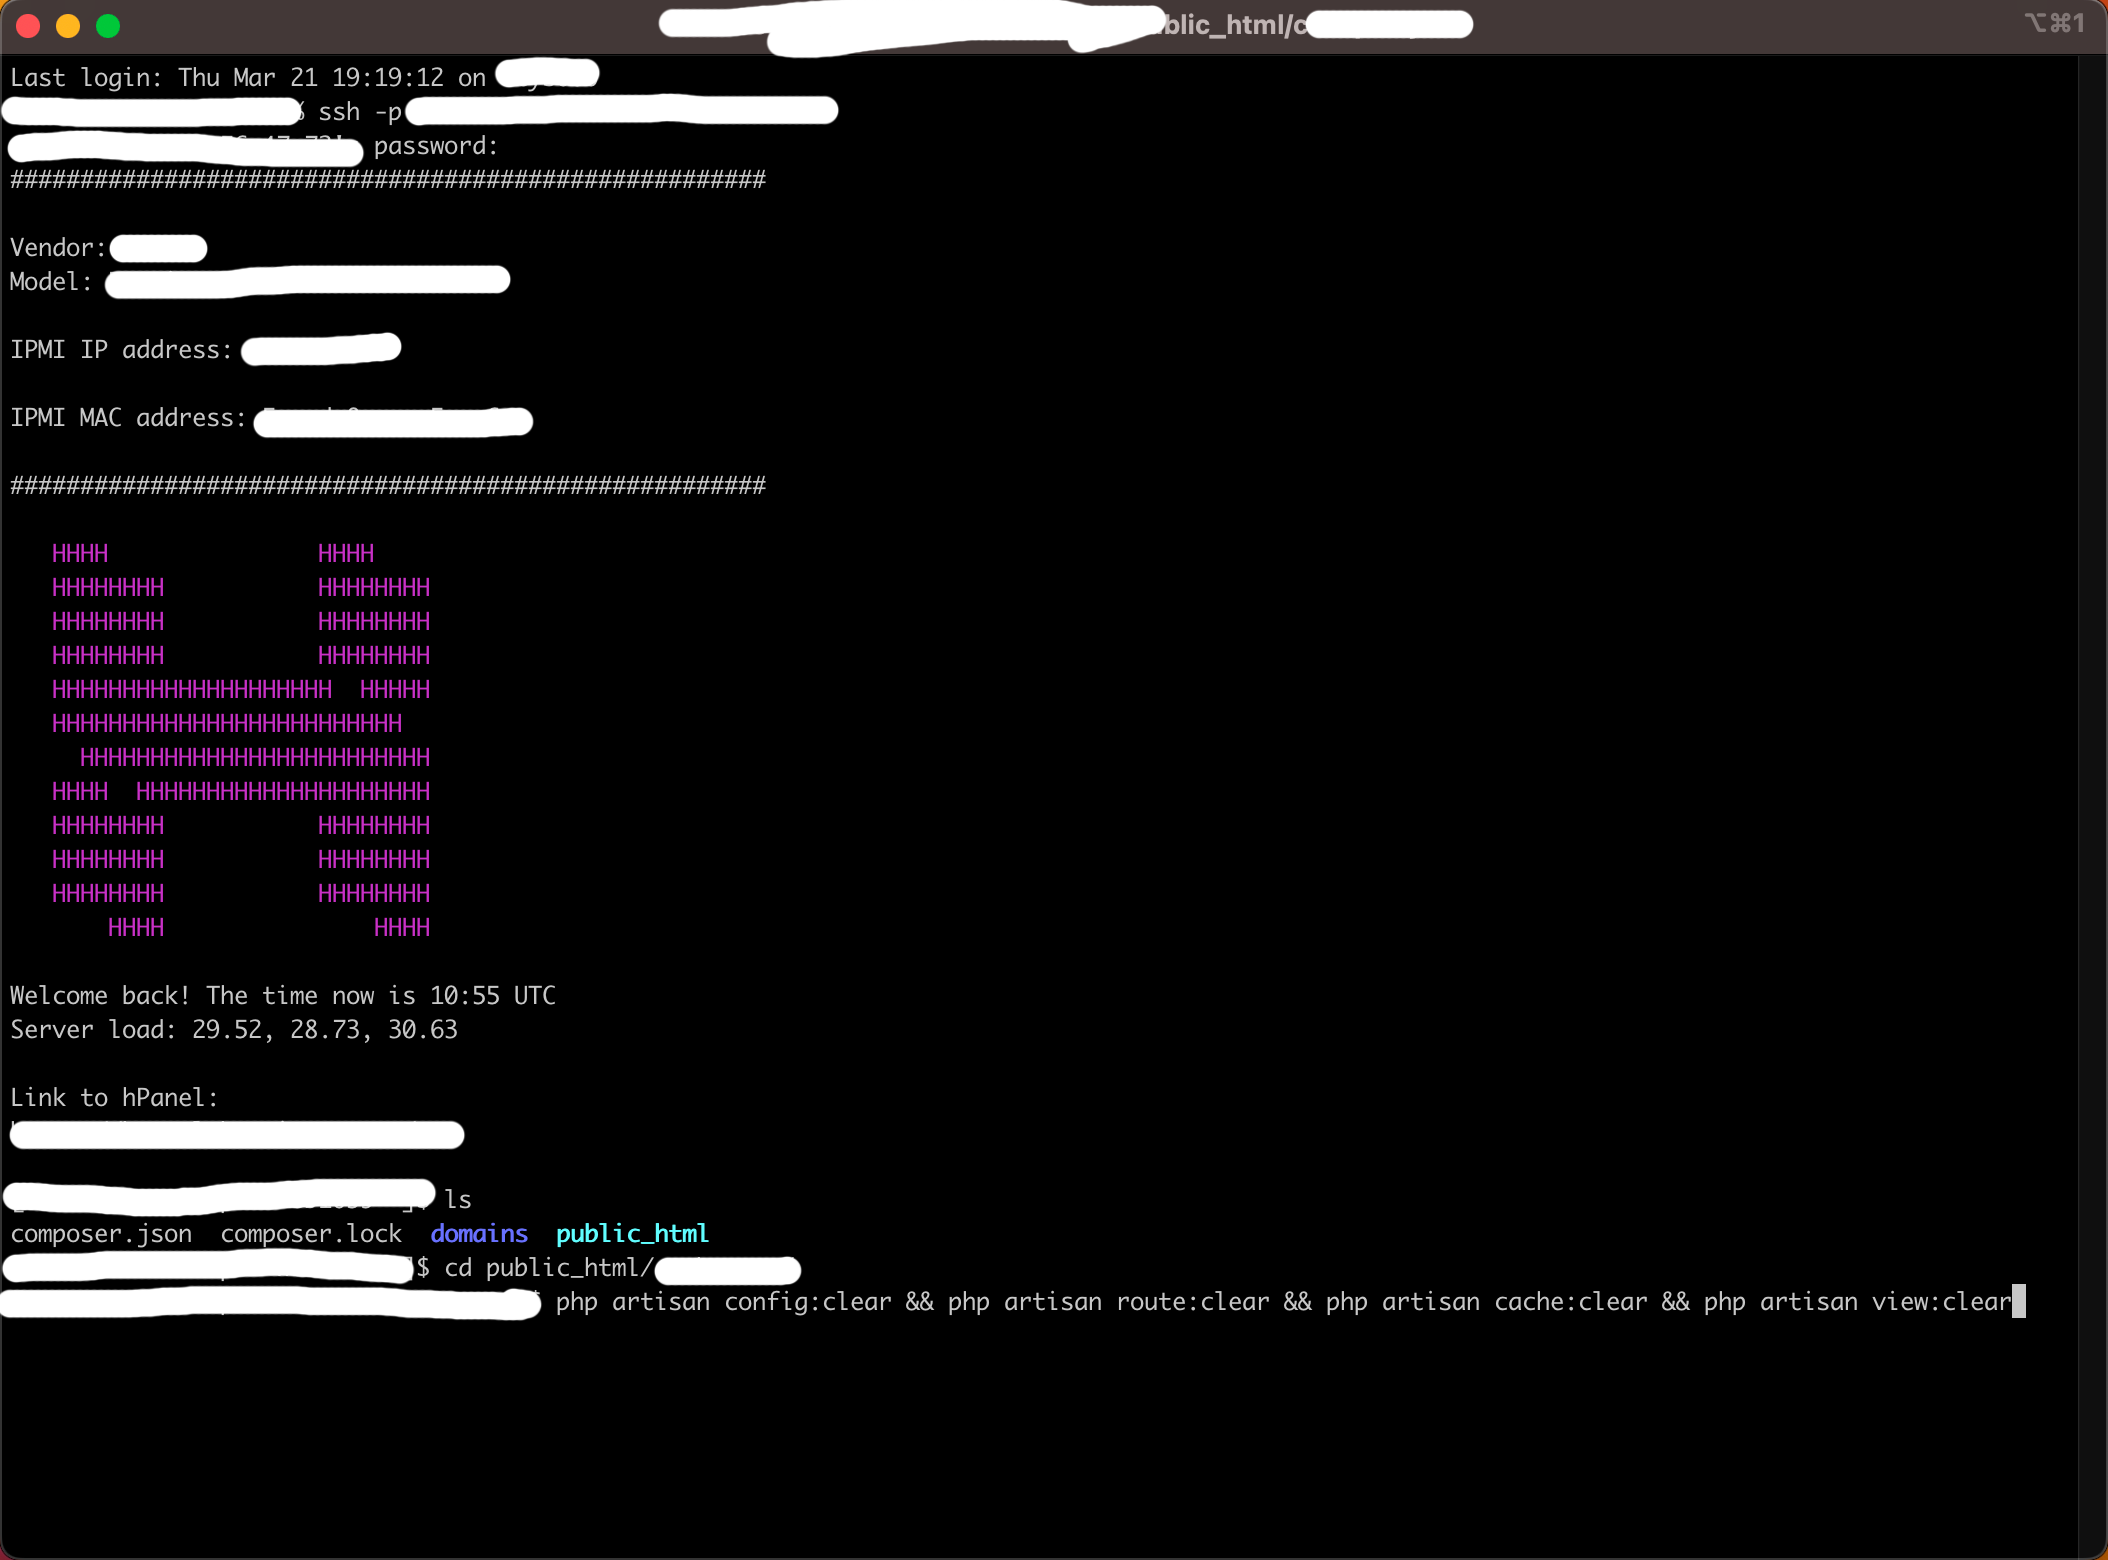
- Connect to your server via SSH and run php artisan config:clear && php artisan route:clear && php artisan cache:clear && php artisan view:clear

- Update File Permissions:
- Directories within storage and bootstrap/cache should be writable by the server. You may need to adjust permissions to 755 or 777 (though 755 is generally safer).
- Deploy to Hostinger : https://www.youtube.com/watch?v=zmwdzDWtth0
- Test Your Website:
Now, visit your website's domain or URL to ensure everything works as expected.
Our demo admin panel website is https://gptapp.morningstarcode.com/en/dashboard
admin@admin.com : password
Deploying to Cloud Systems
After downloading the package from the marketplace, you will find a folder named 'gpt-app-admin-panel'. This folder contains the Laravel project.
- AWS Elastic Beanstalk:
https://www.honeybadger.io/blog/laravel-php-elastic-beanstalk
- Install the AWS EB CLI and configure it with 'eb init'.
- Create a new environment with 'eb create'.
- Once the environment is set up, deploy your application using 'eb deploy'.
- DigitalOcean + Laravel Forge:
https://snapshooter.com/blog/how-to-deploy-laravel-on-digitalocean-with-forge
- Create a DigitalOcean Droplet.
- Sign up for Laravel Forge and link it to your DigitalOcean account.
- Through Forge, create a new server using your Droplet.
- Once the server is set up, link your Git repository with the Laravel application and deploy from the Forge dashboard.
- Heroku:
https://devcenter.heroku.com/articles/getting-started-with-laravel
- Install the Heroku CLI and run heroku login.
- Create a new app using heroku create.
- Add a database if required with Heroku Postgres.
- Set environment variables using heroku config:set KEY=VALUE.
- Commit your code and push it to Heroku using git push heroku master.
Prepare Android App and Publish on Google Play Store
Please make sure you have already deployed Laravel Admin Panel on your server.
Import the gpt-app-android project from downloaded directory into Android Studio.
Use latest Android Studio version to open the project. Download Android Studio
Android Studio
Important
Please make sure you have already installed Java on your computer here. It will help you install Java on your computer.
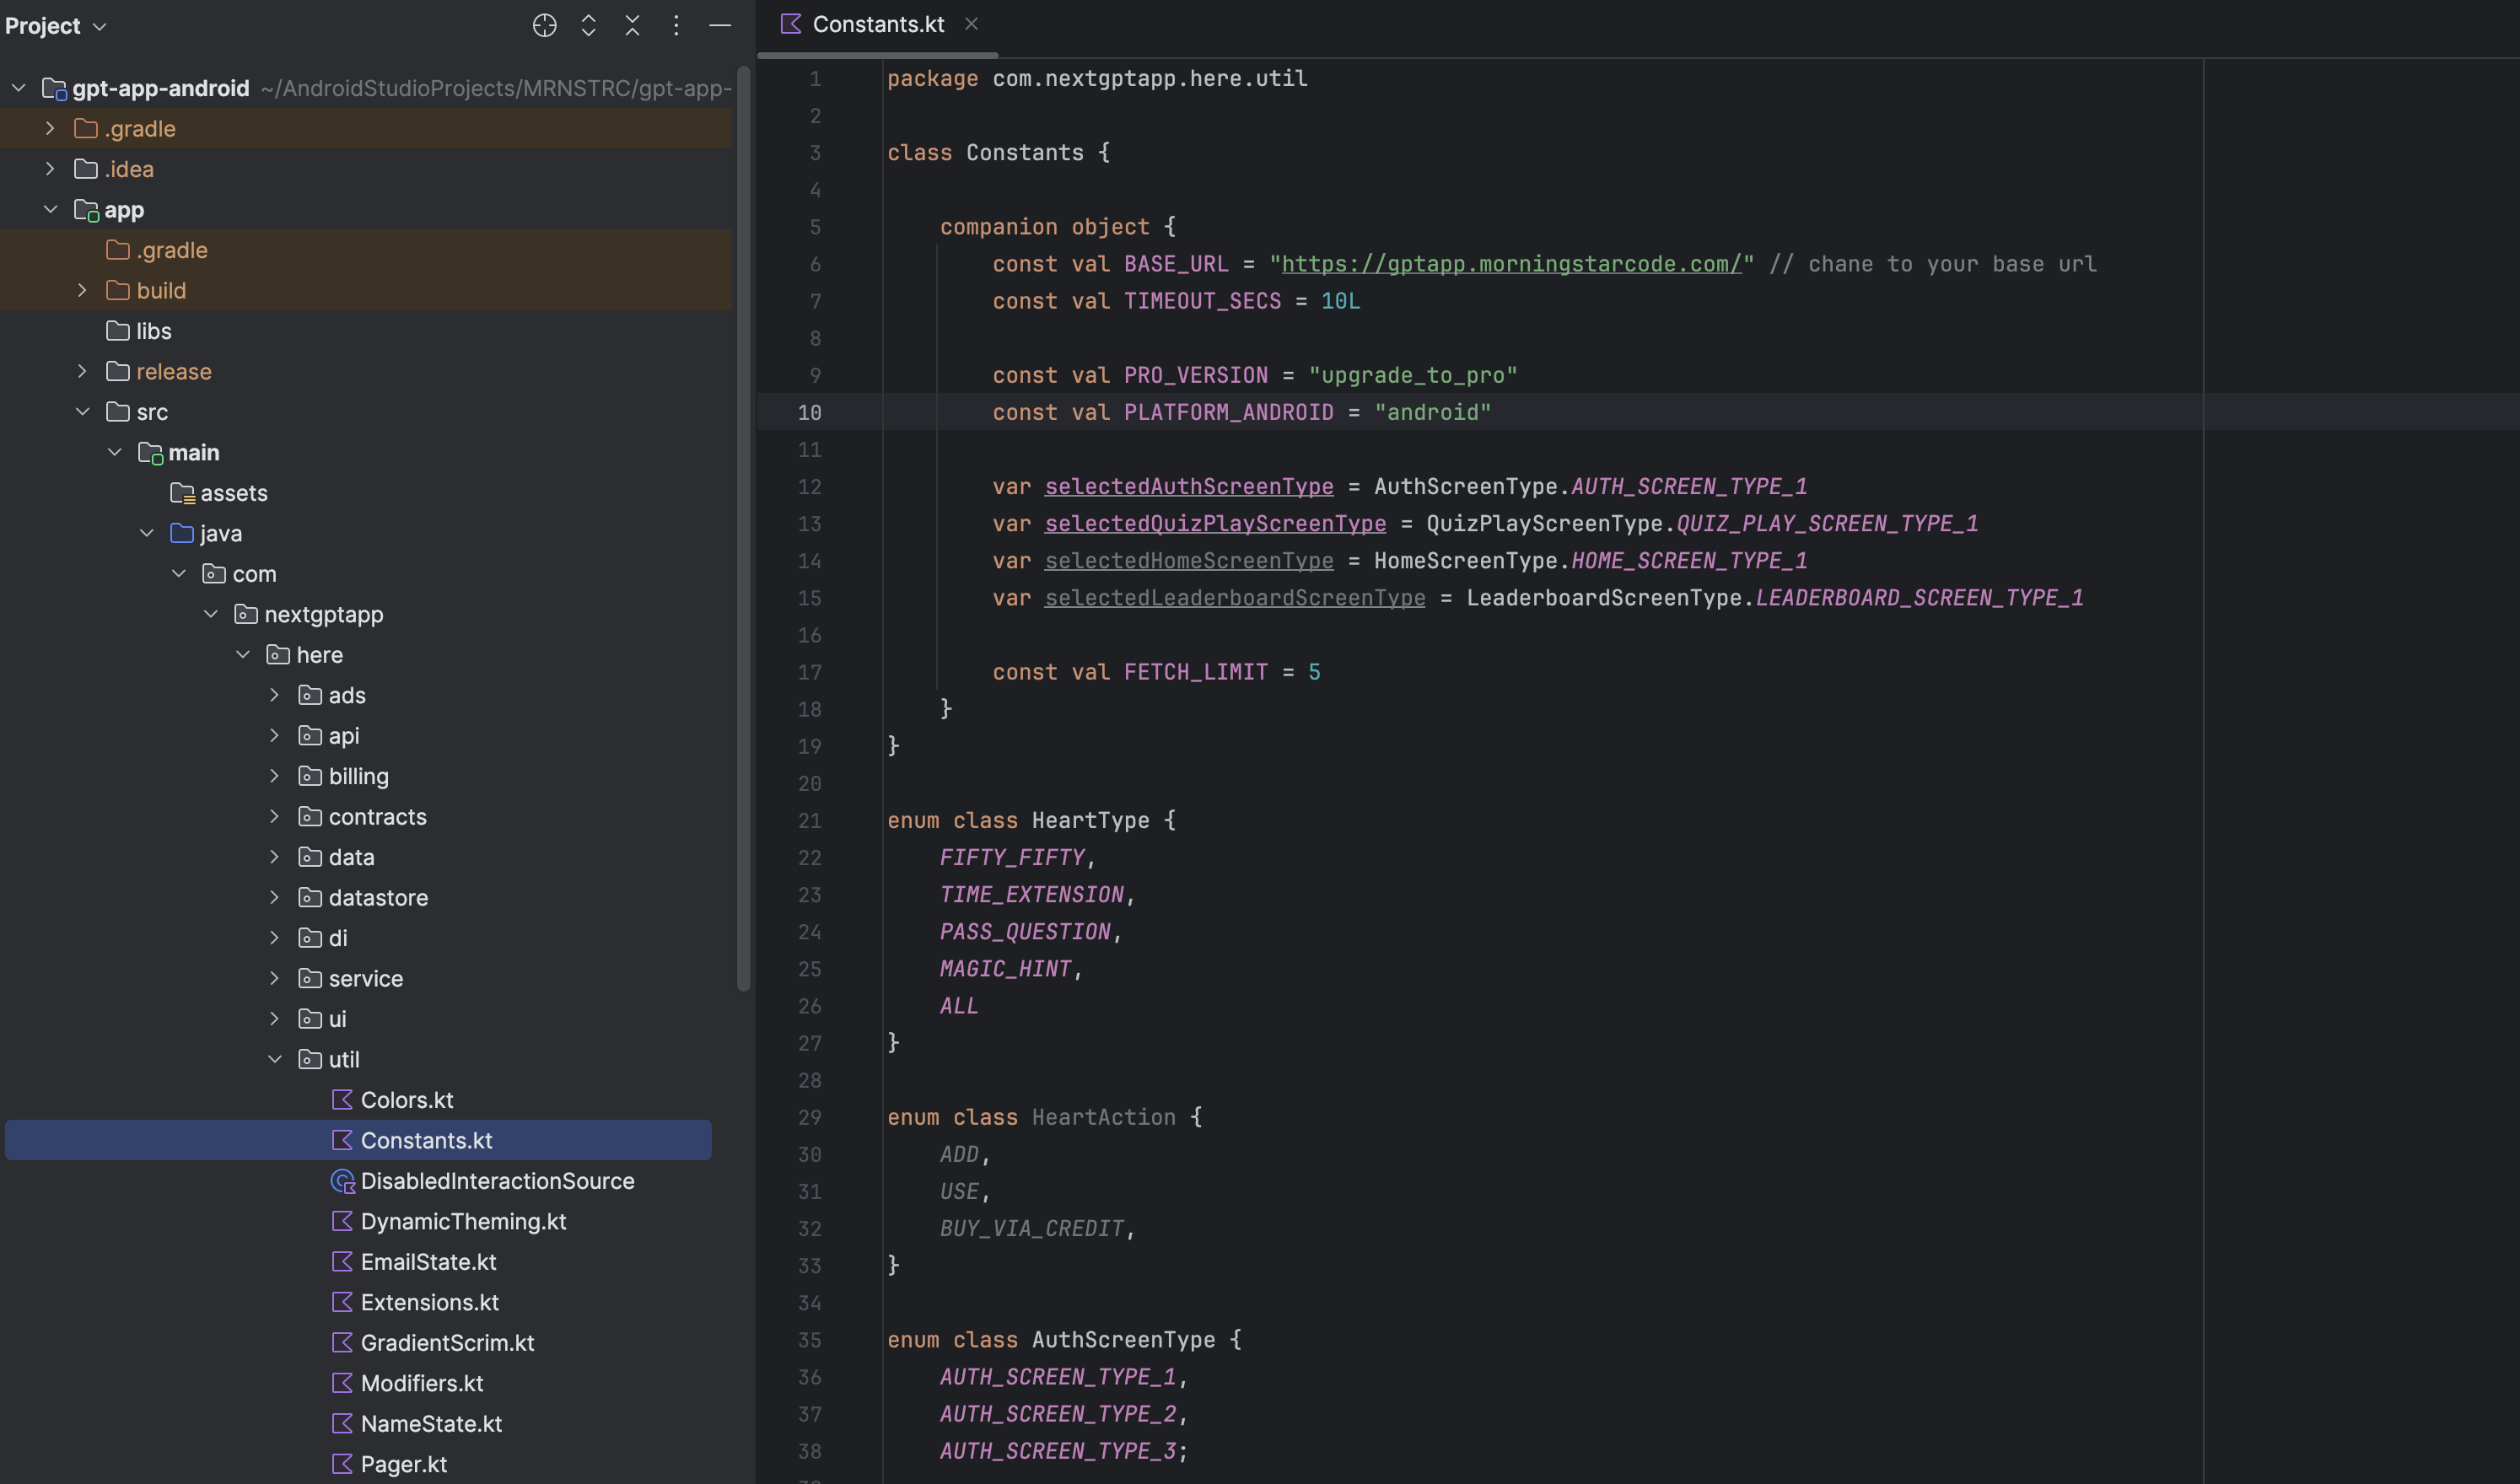
Open gpt-app-android/app/src/main/java/com/morningstarcode/nextgptapp/util/Constants.kt file and update BASE_URL with your server URL.
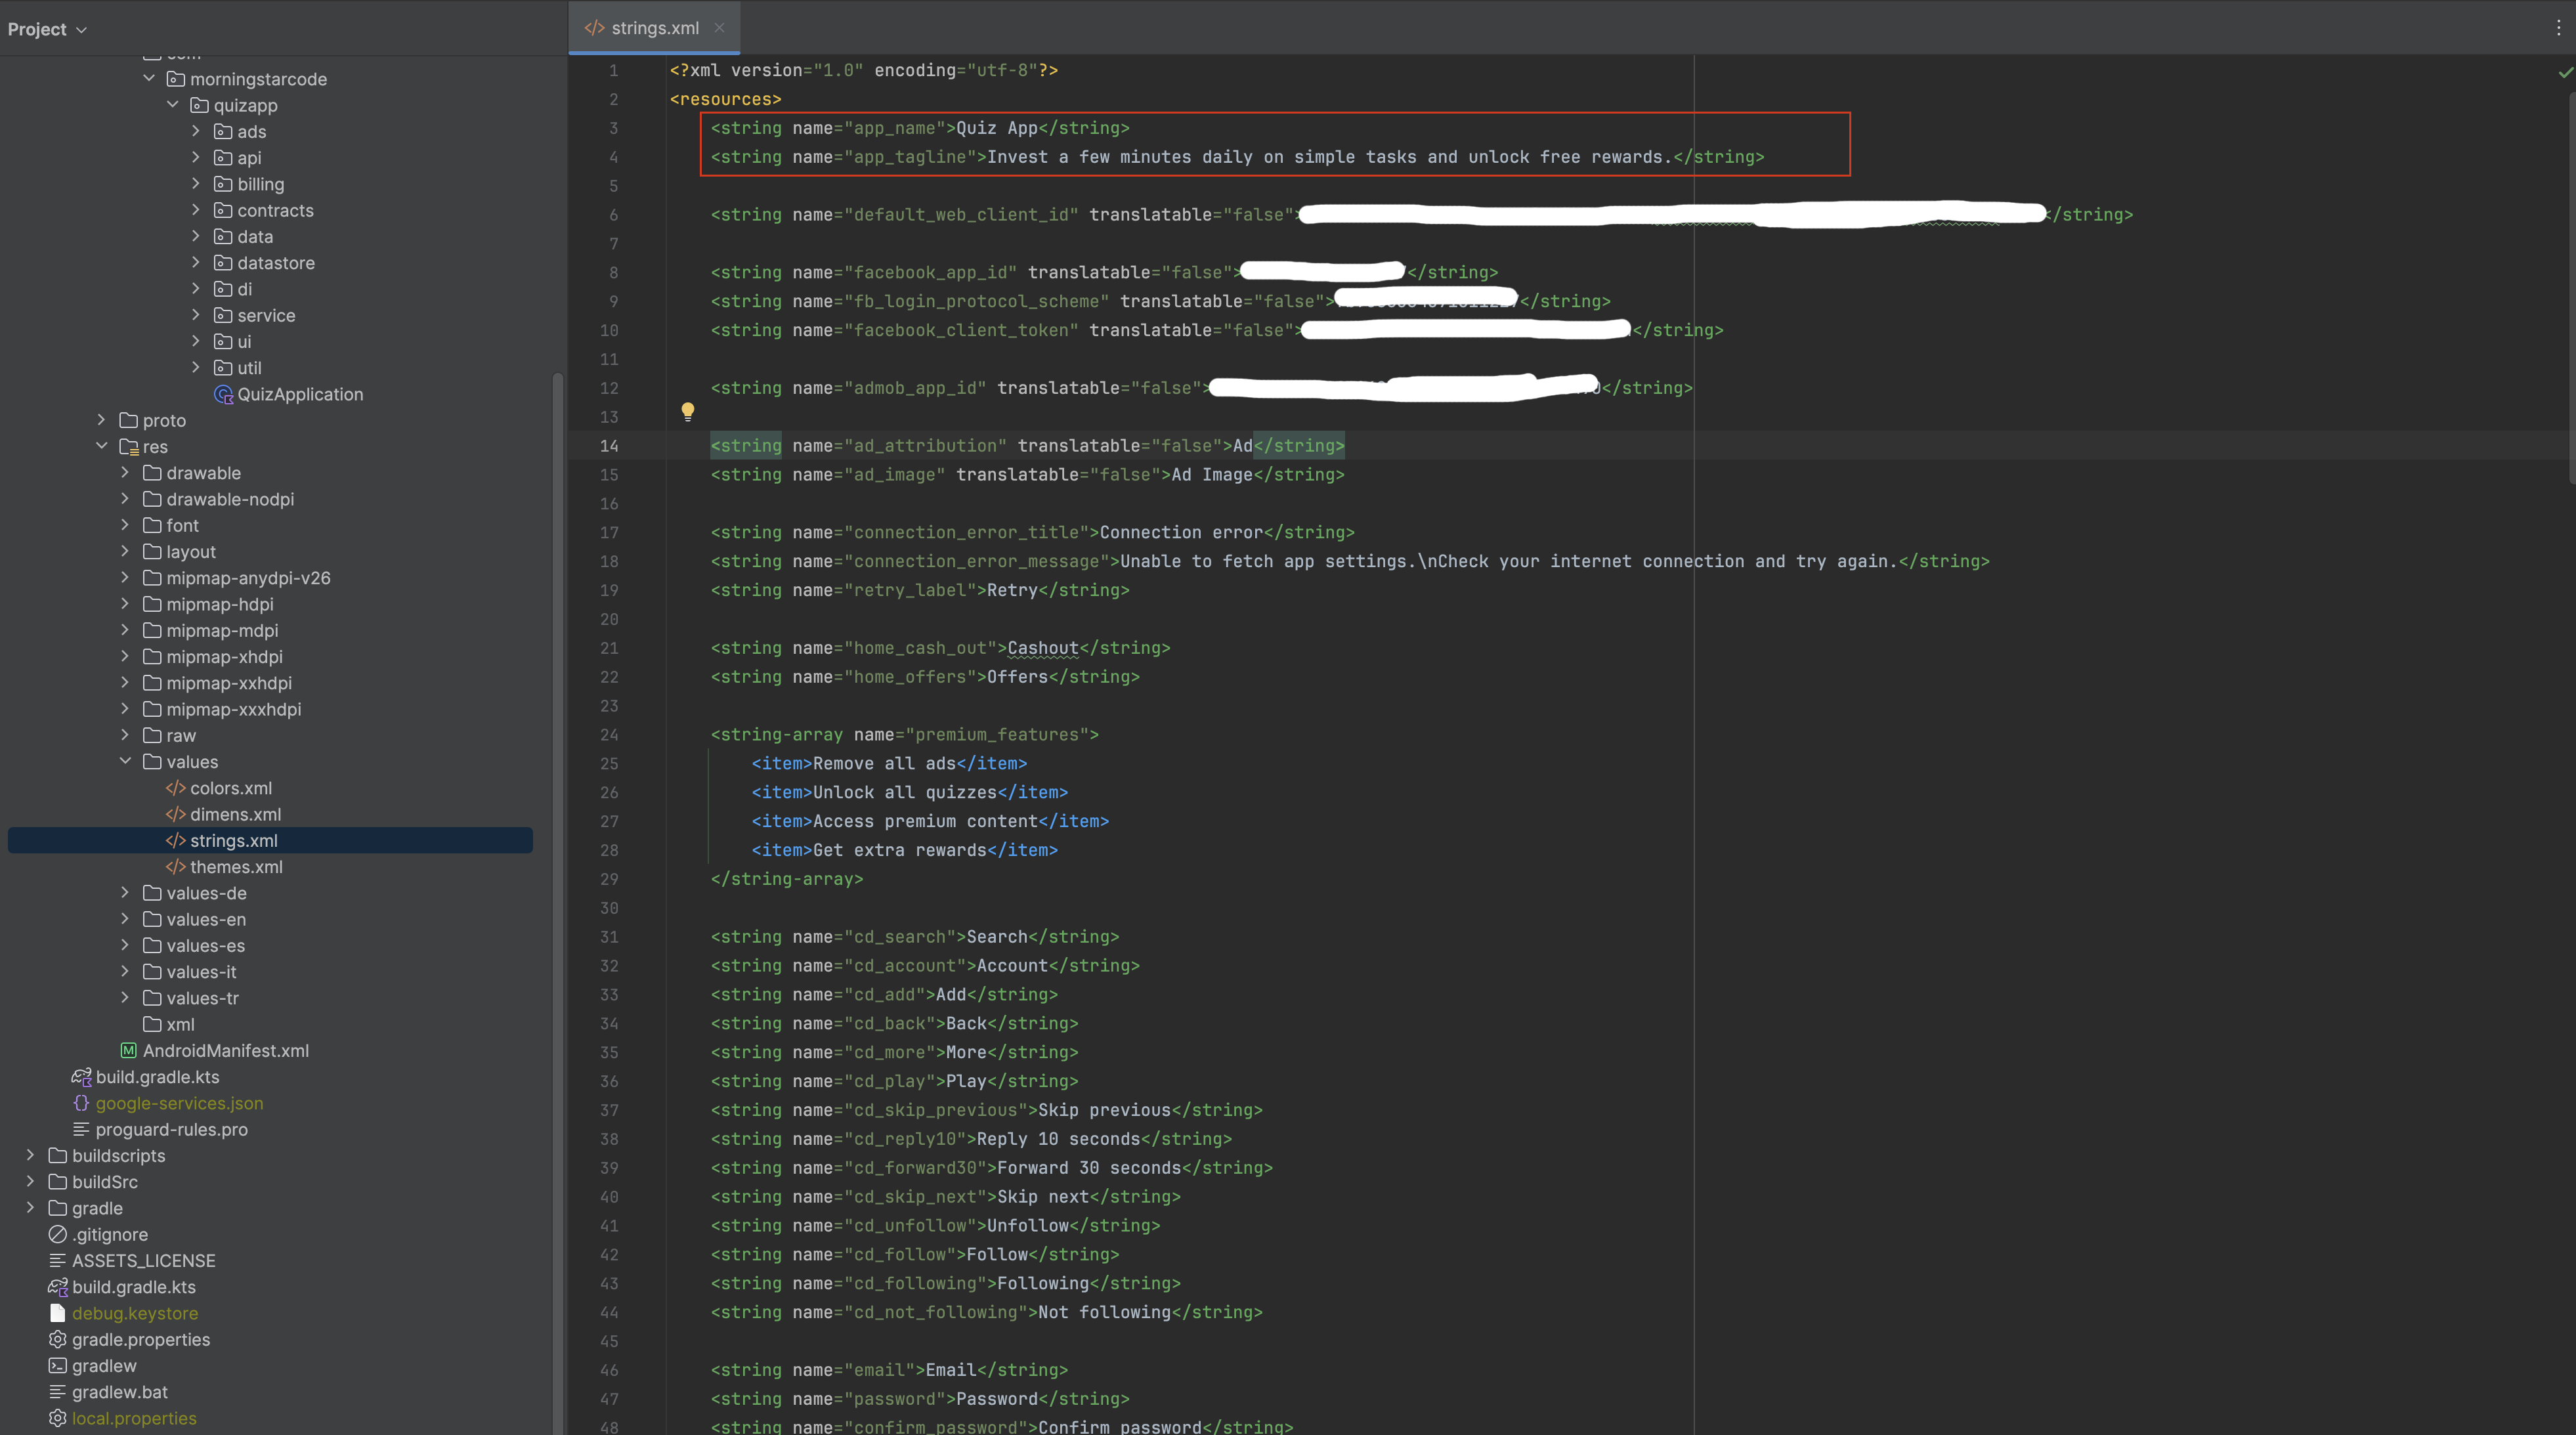
Change app_name from gpt-app-android/app/src/main/res/values/strings.xml file. Change app_tagline from gpt-app-android/app/src/main/res/values/strings.xml file.
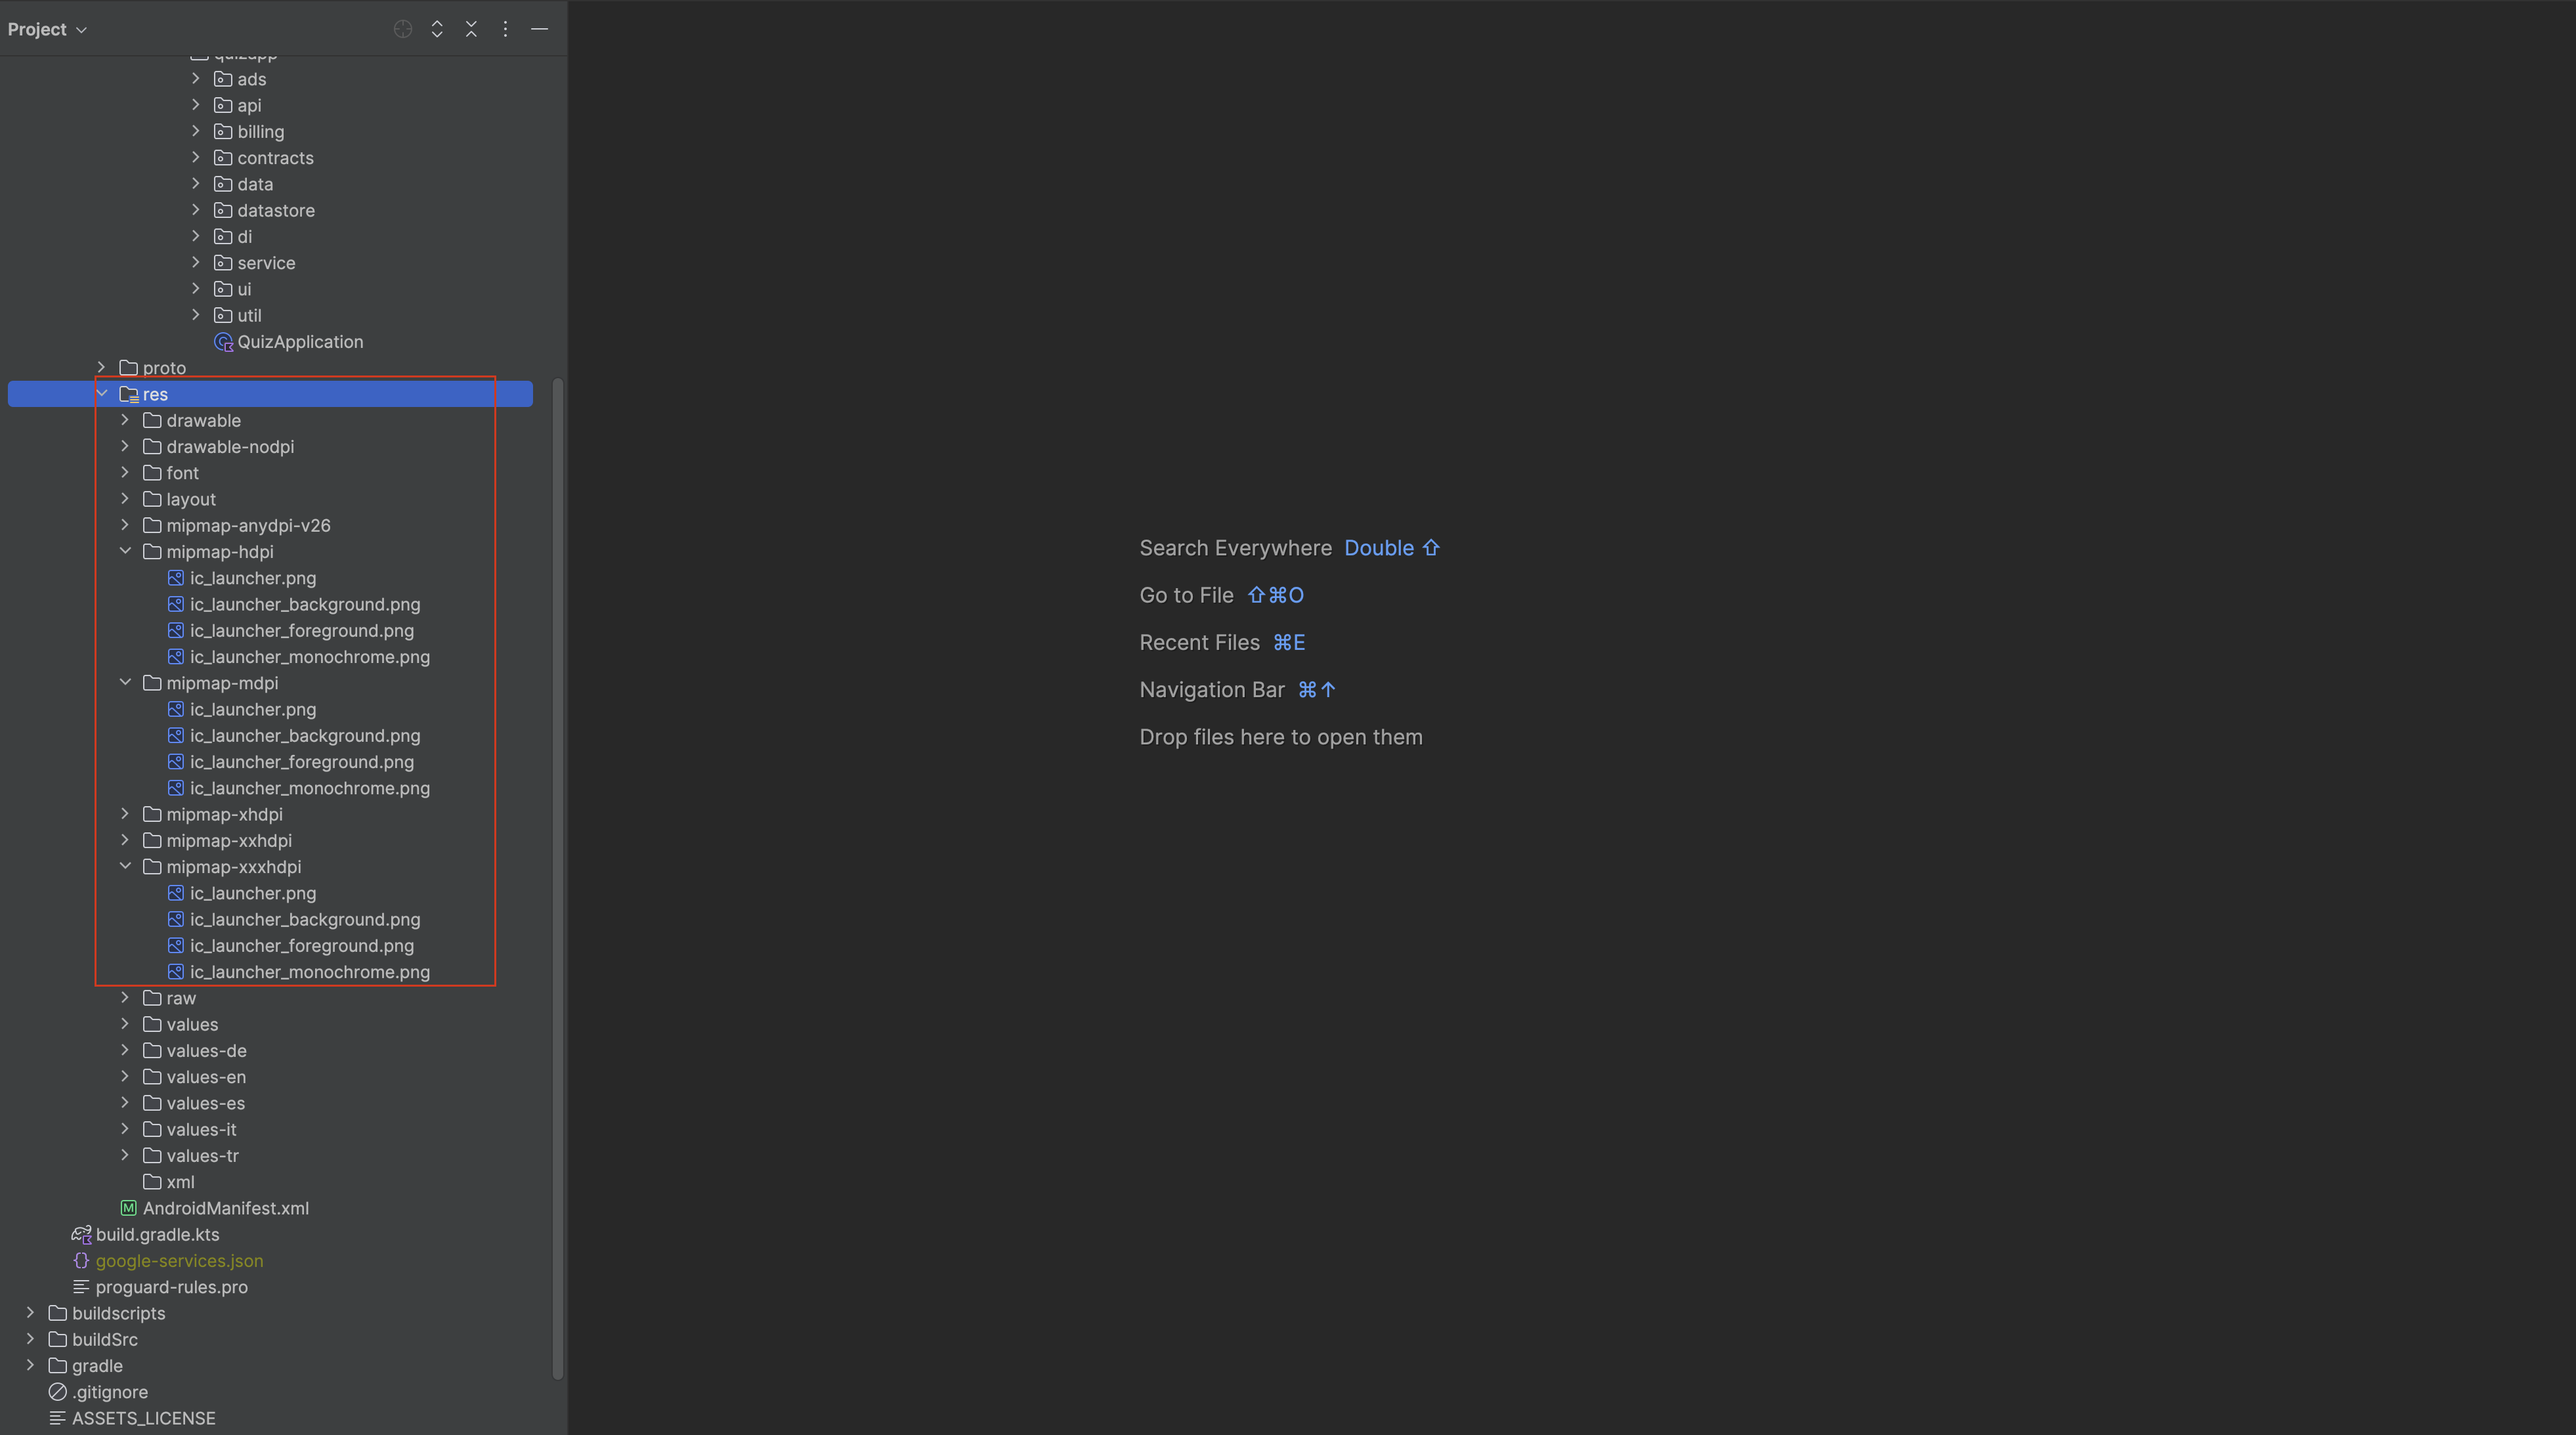
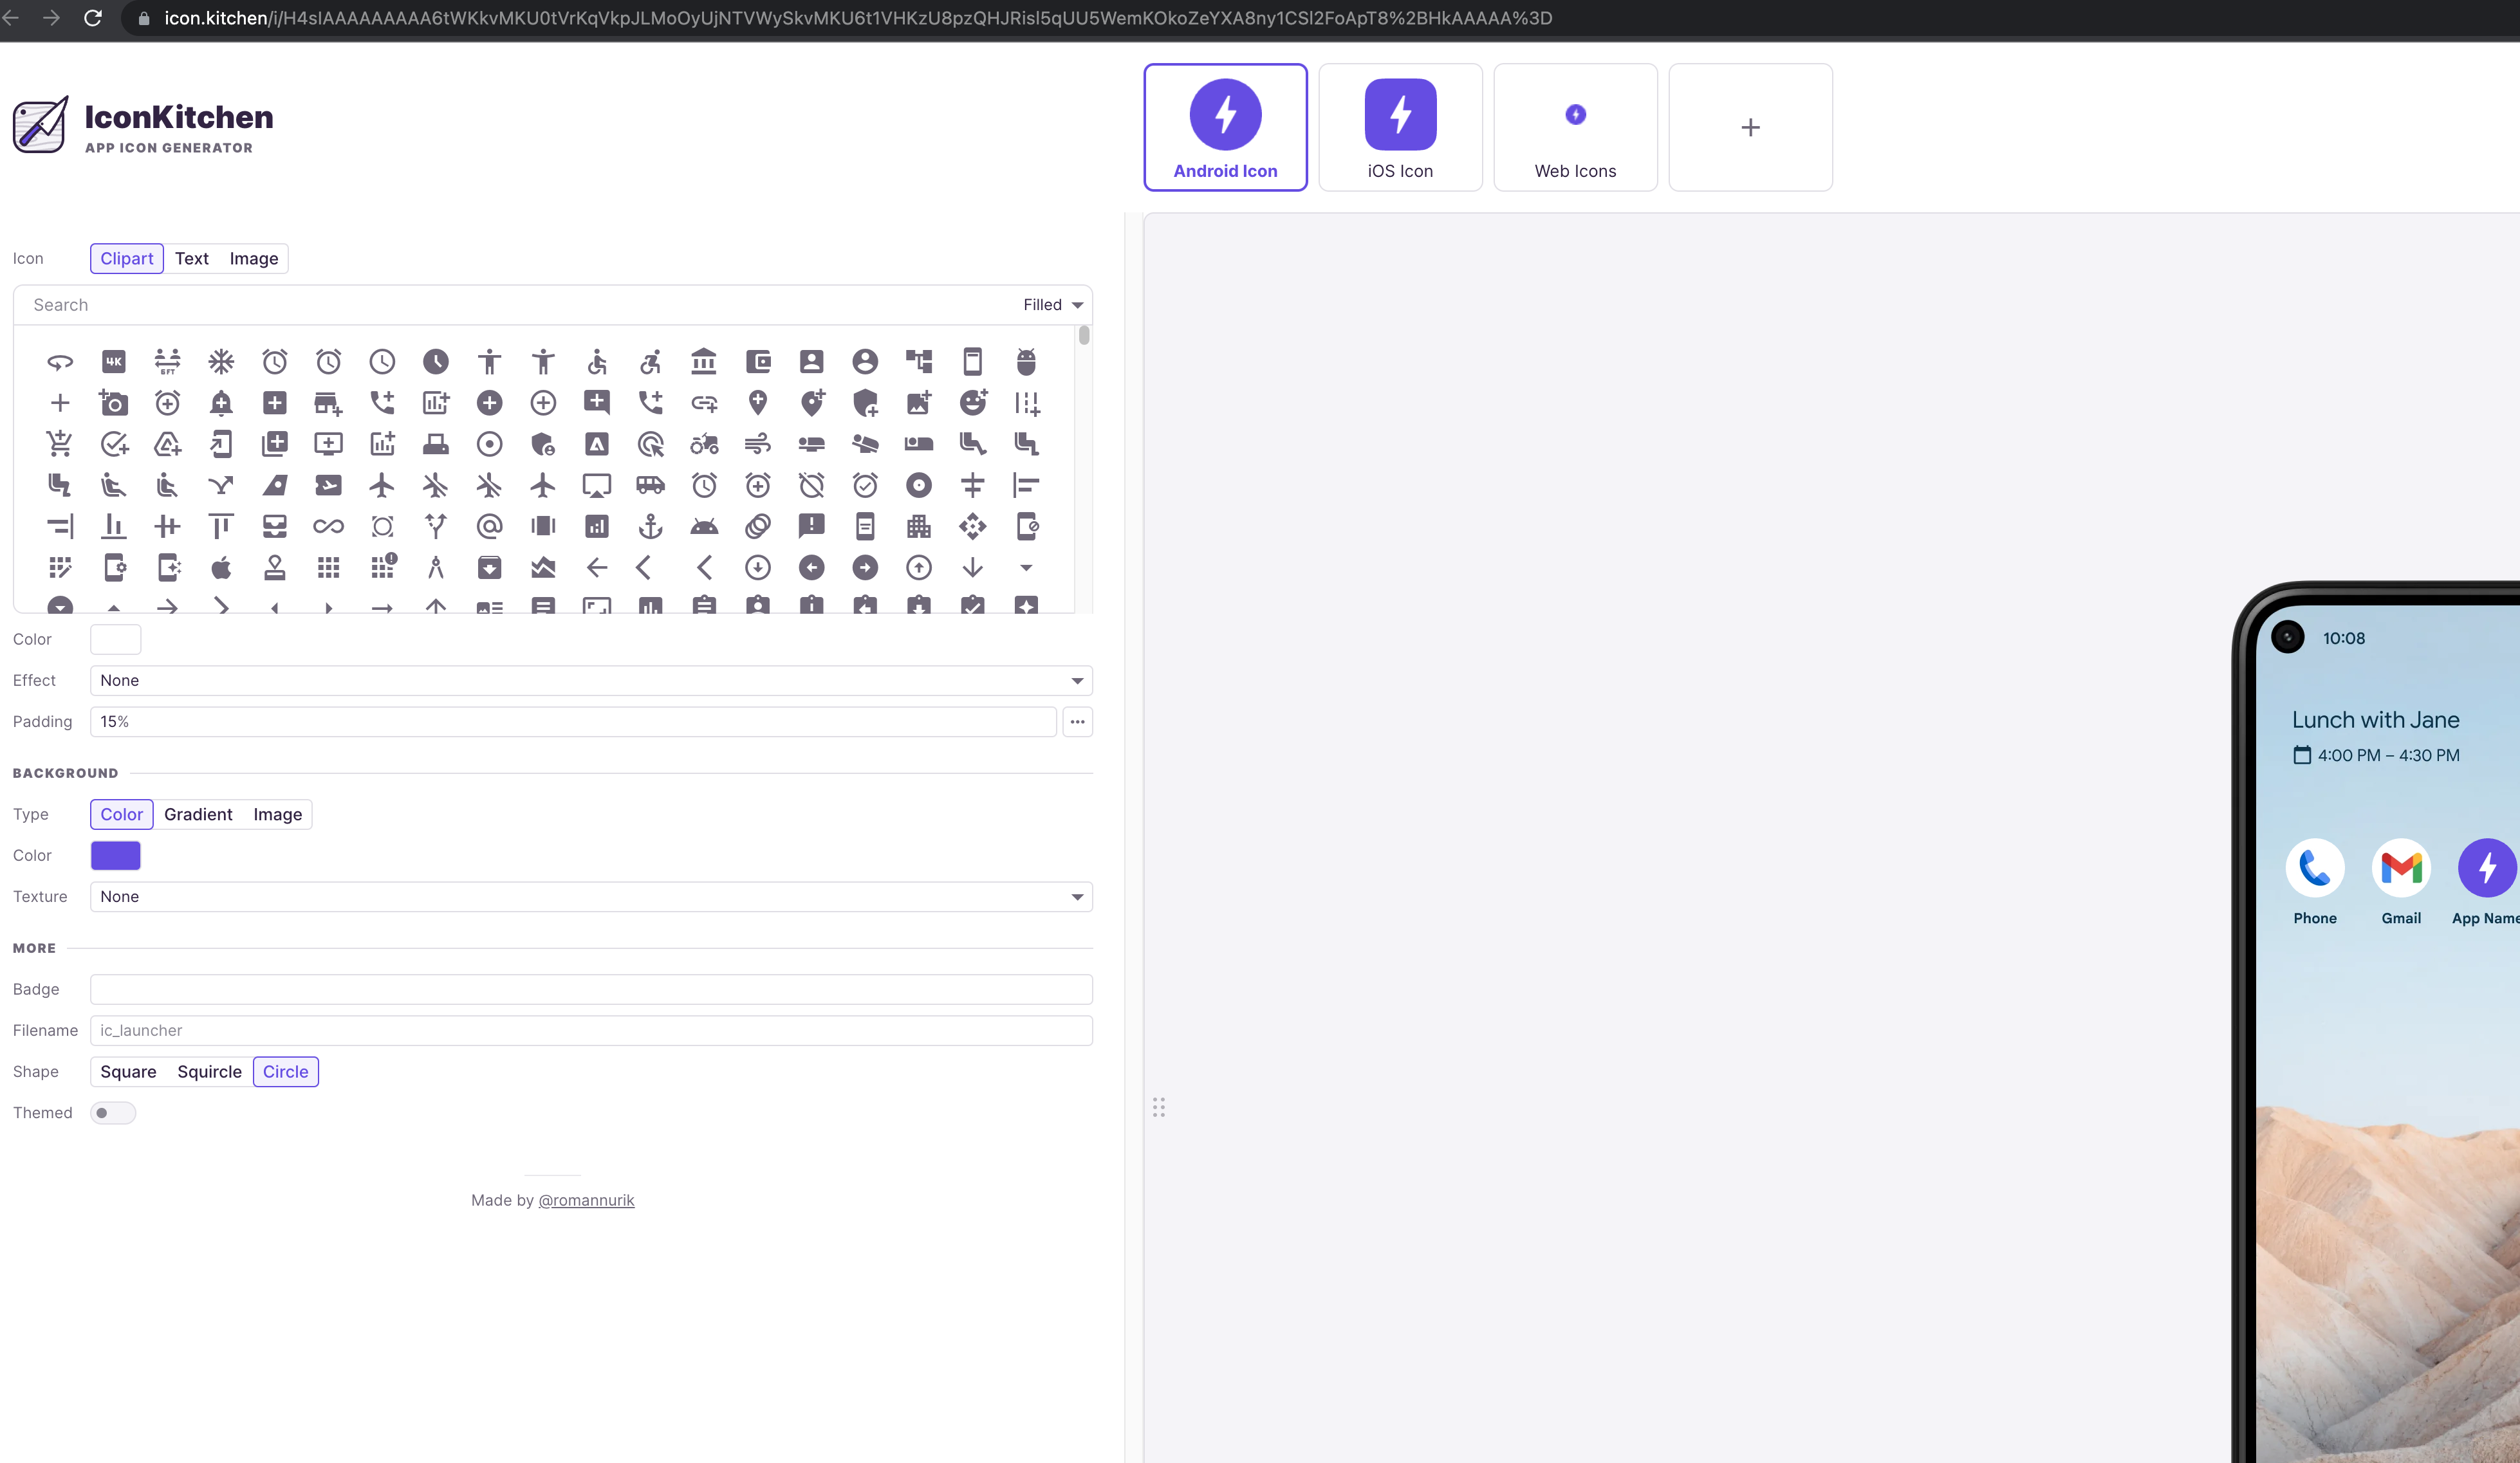
Change app_icon from gpt-app-android/app/src/main/res/drawable/ic_launcher file.
You can generate app icon from here.
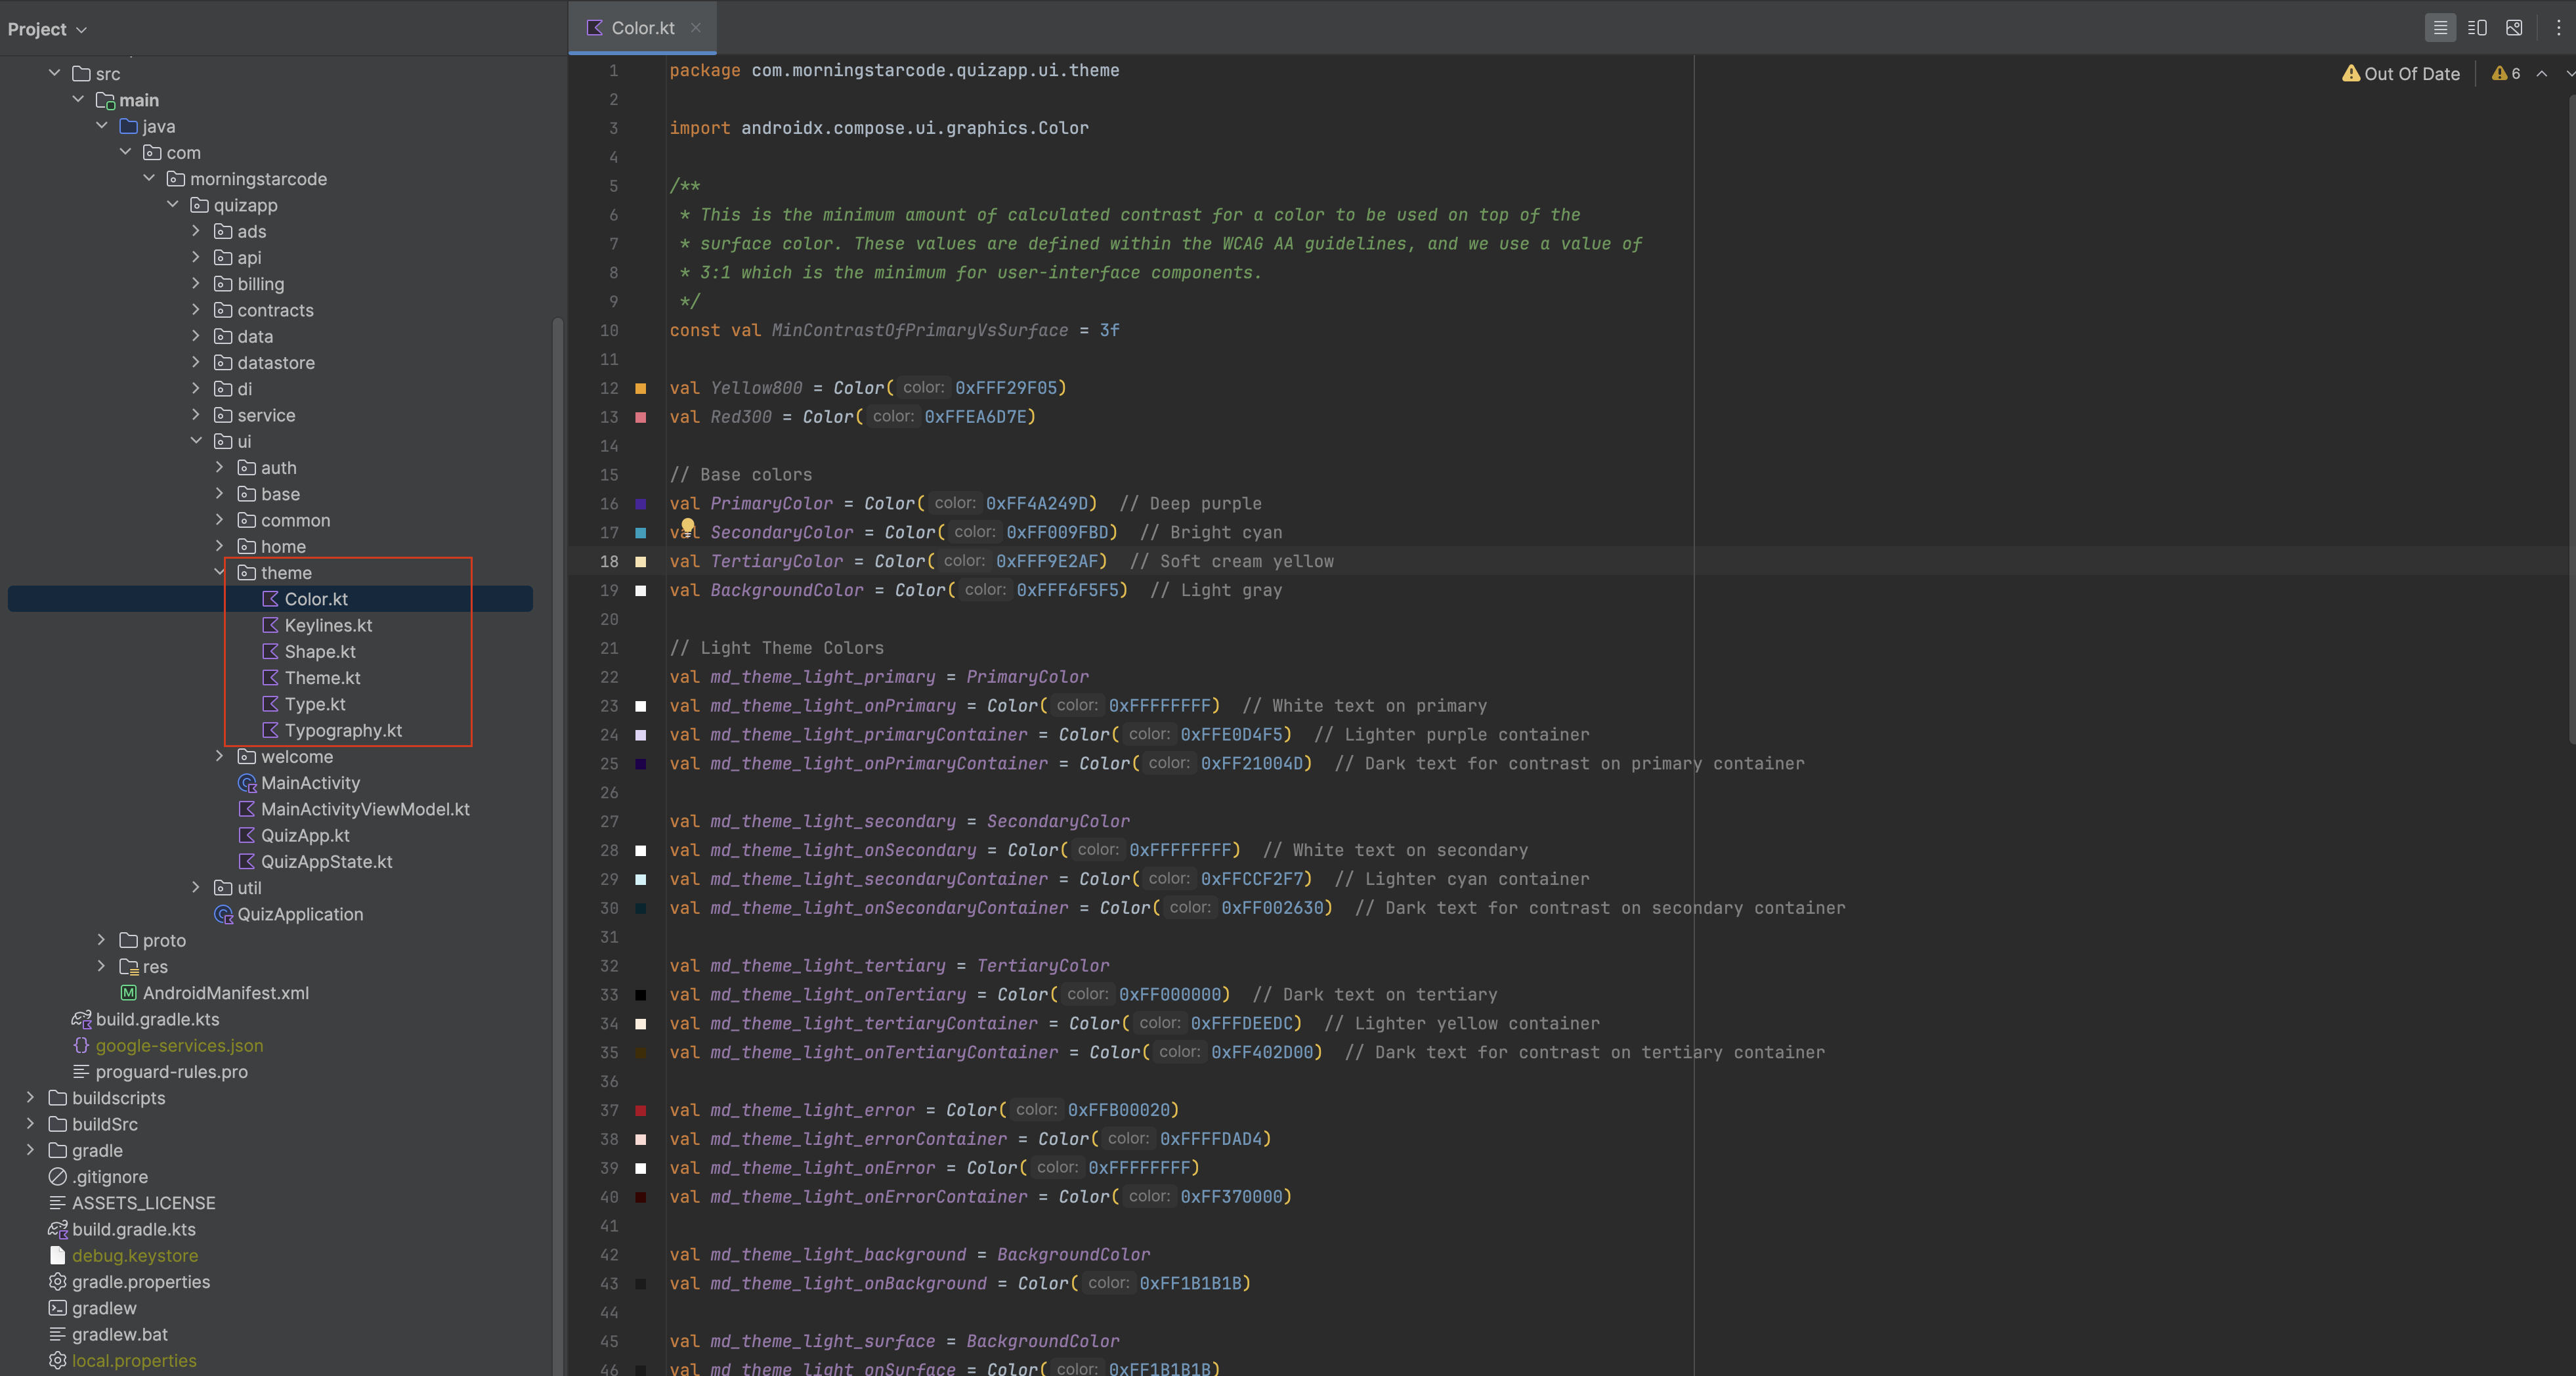
You can change colors from gpt-app-android/app/src/main/java/com/morningstarcode/nextgptapp/ui/theme/Color.kt file.
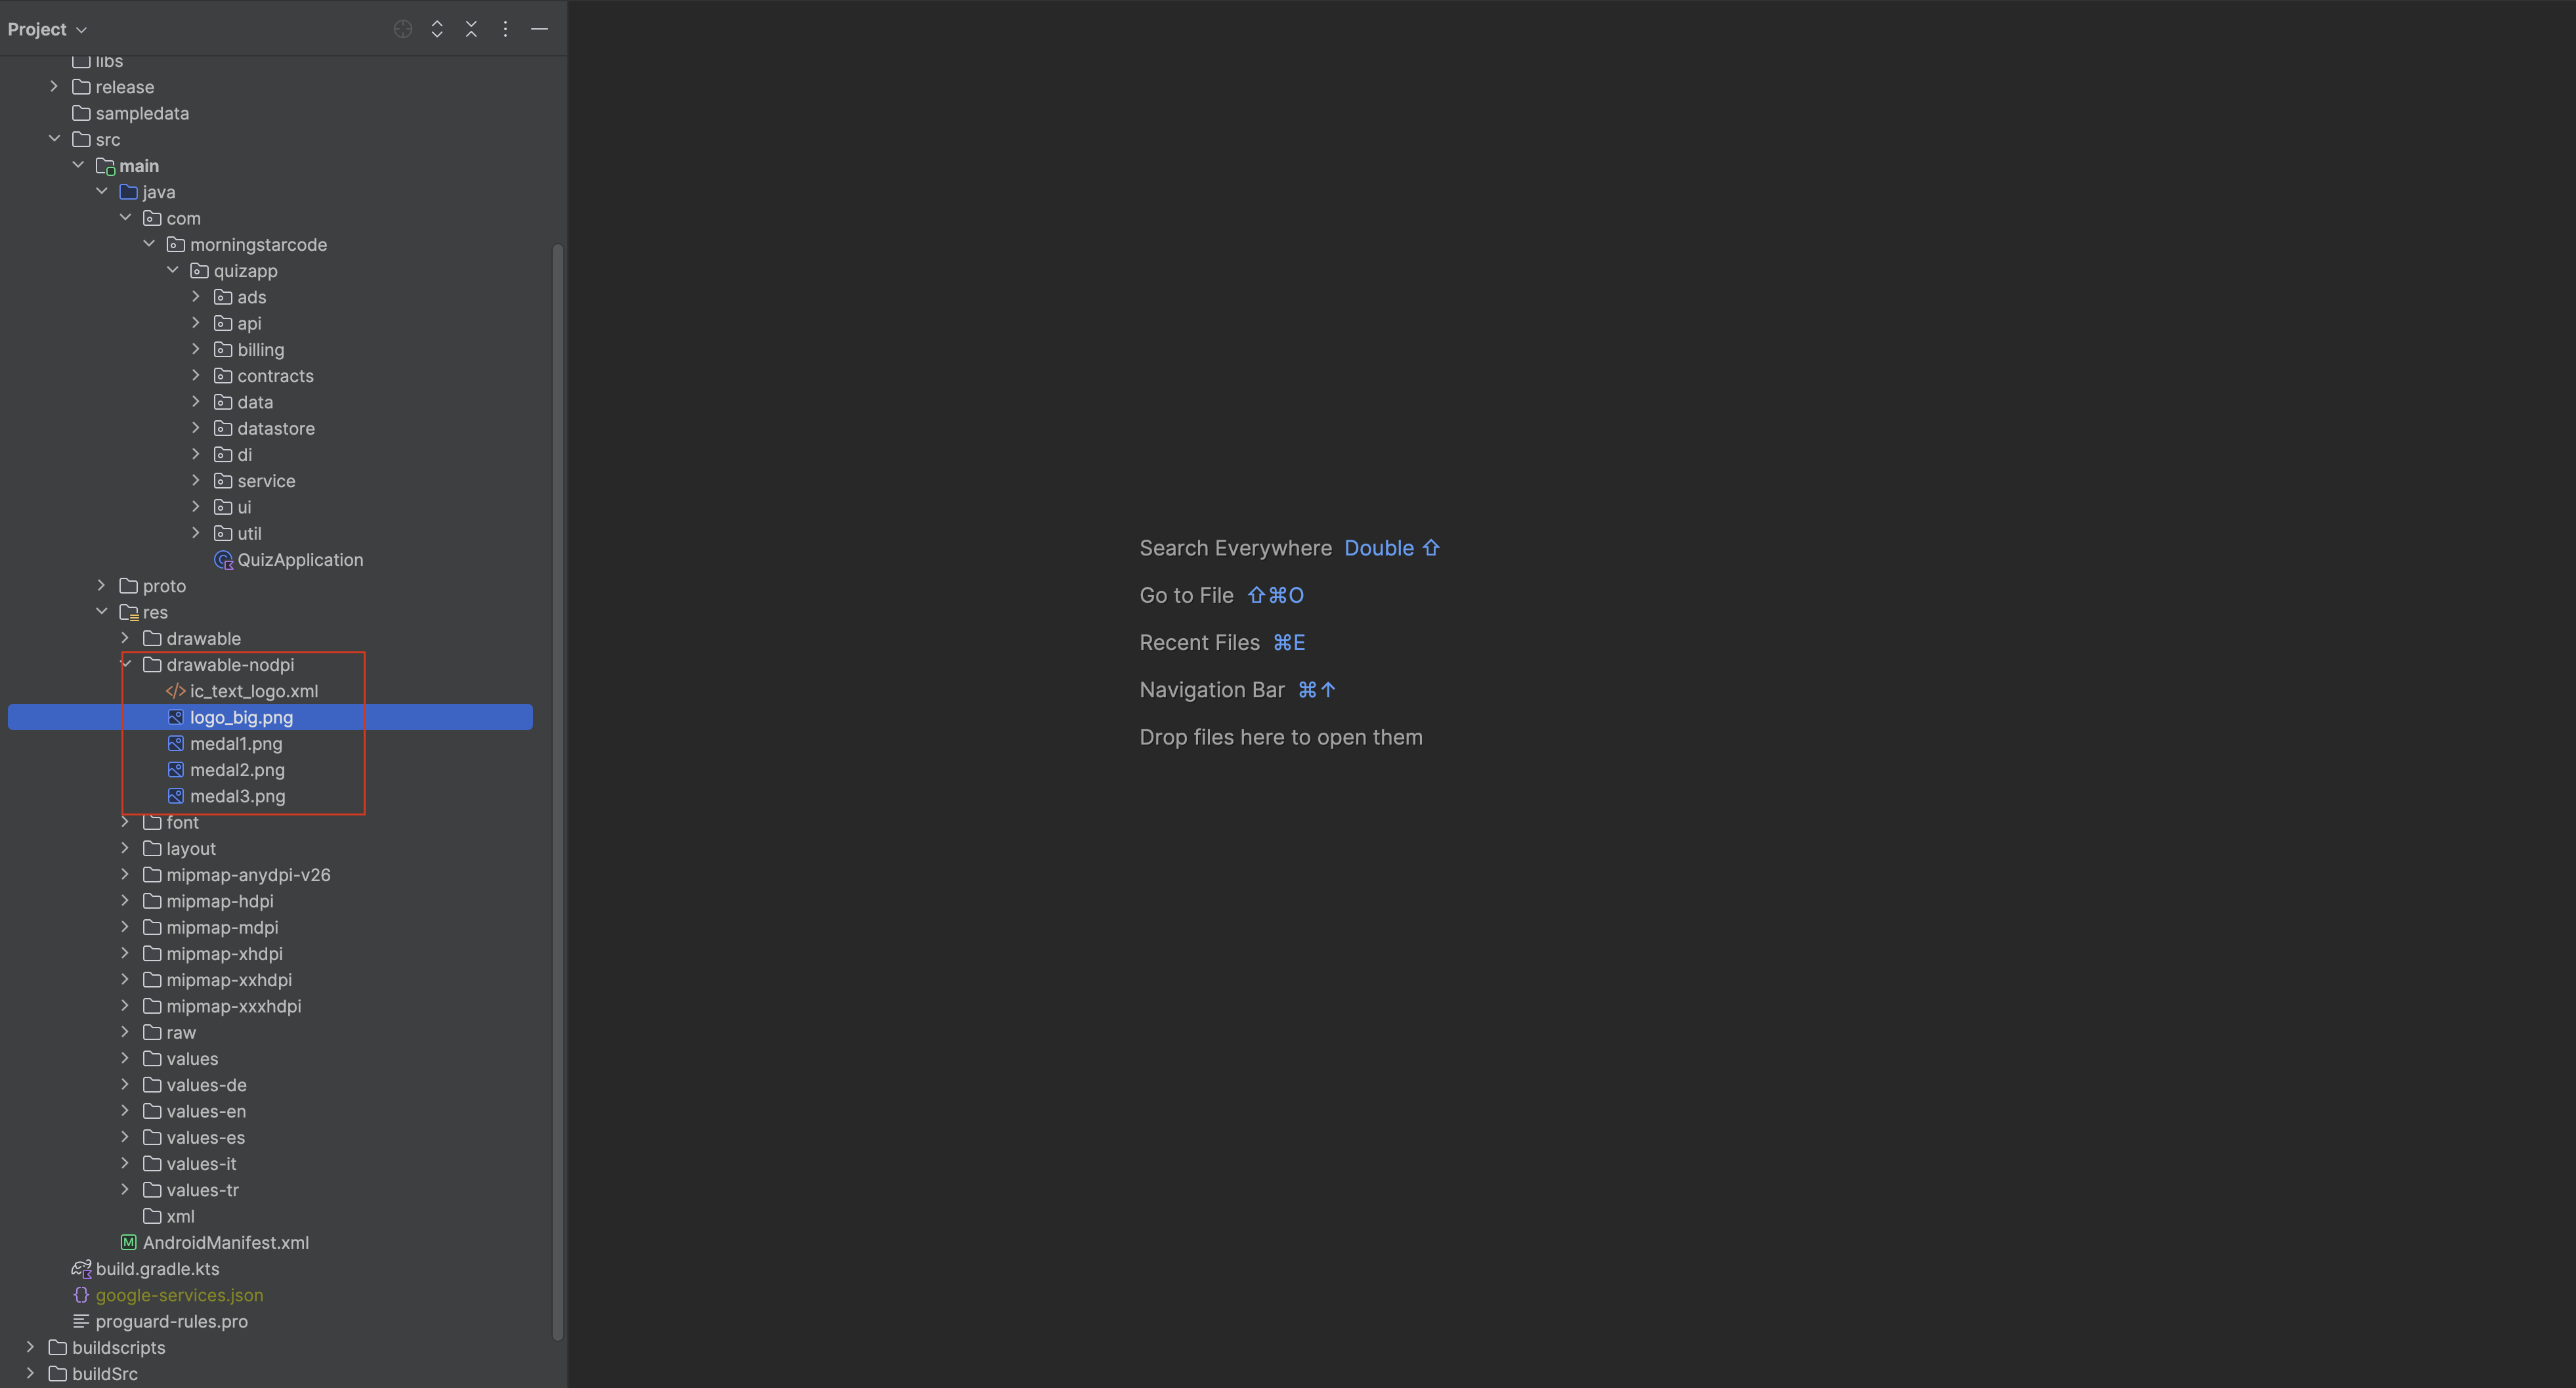
You can change app logo from gpt-app-android/app/src/main/res/drawable-nodpi/logo_big.png file.
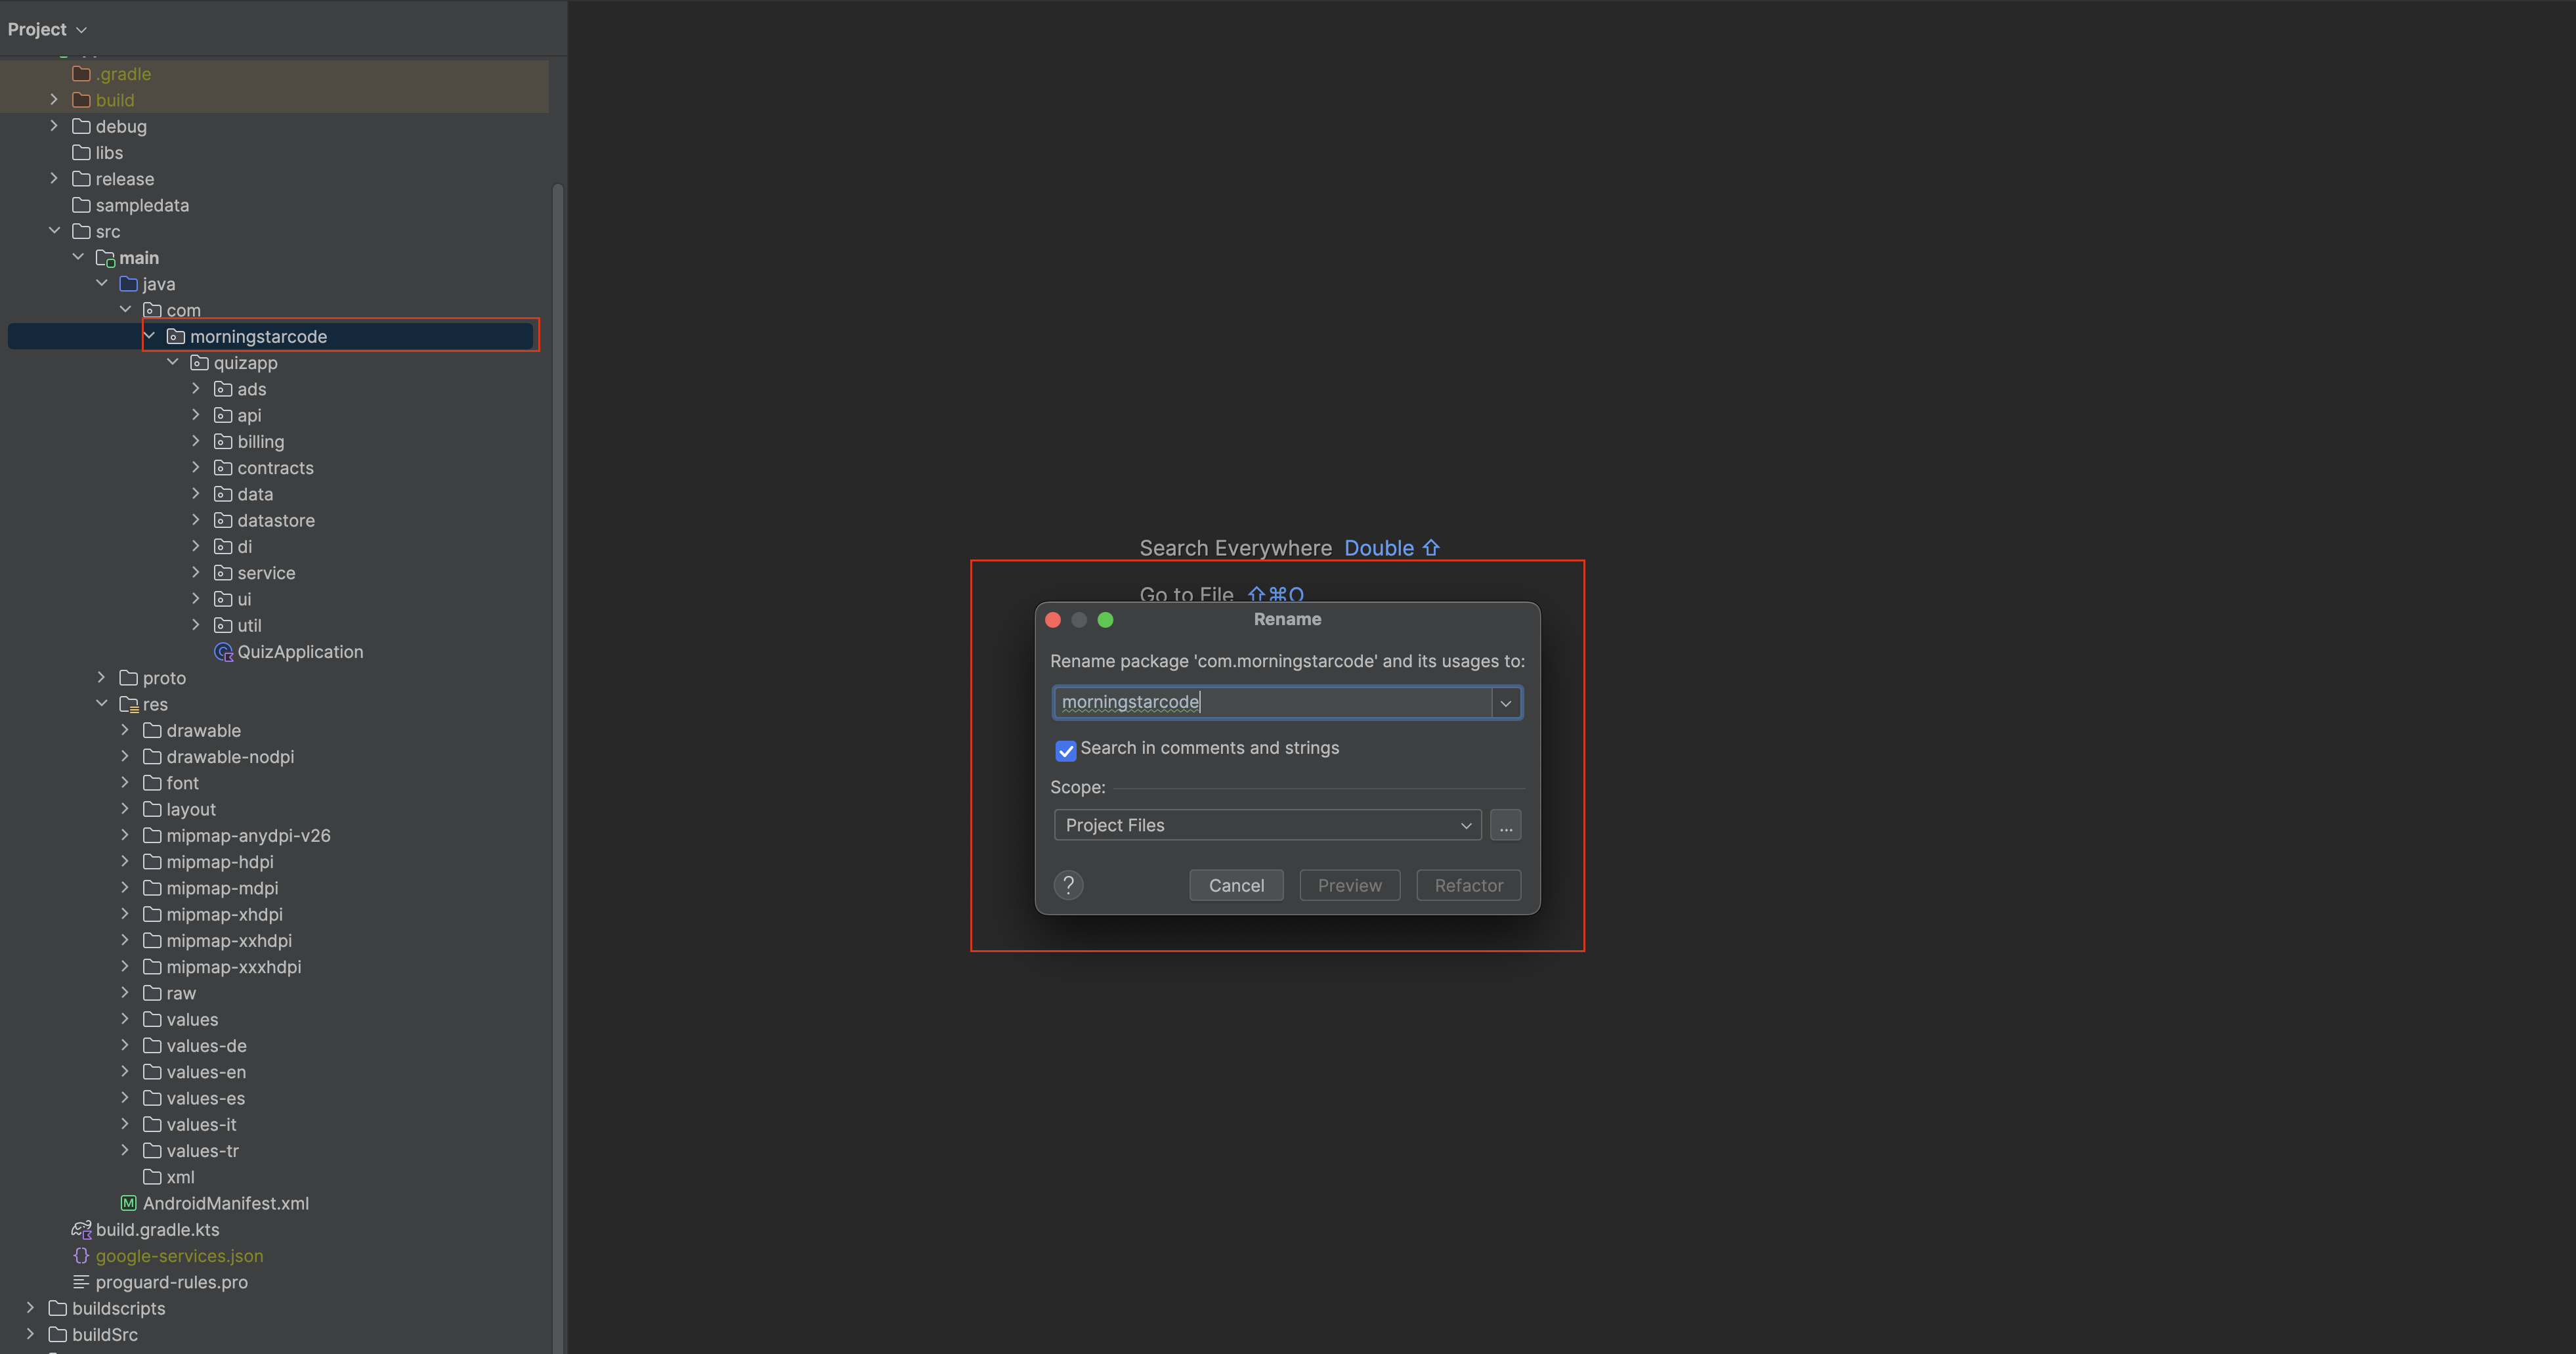
You have to change package name from gpt-app-android/app/build.gradle file.
Google Login Setup
To enable Google login, you need to create a project in the Google Developer Console and configure the OAuth 2.0 client ID.
First, create a new project in the Google Developer Console:

After creating project, go to Credentials and create OAuth 2.0 client ID. https://console.developers.google.com/apis/credentials
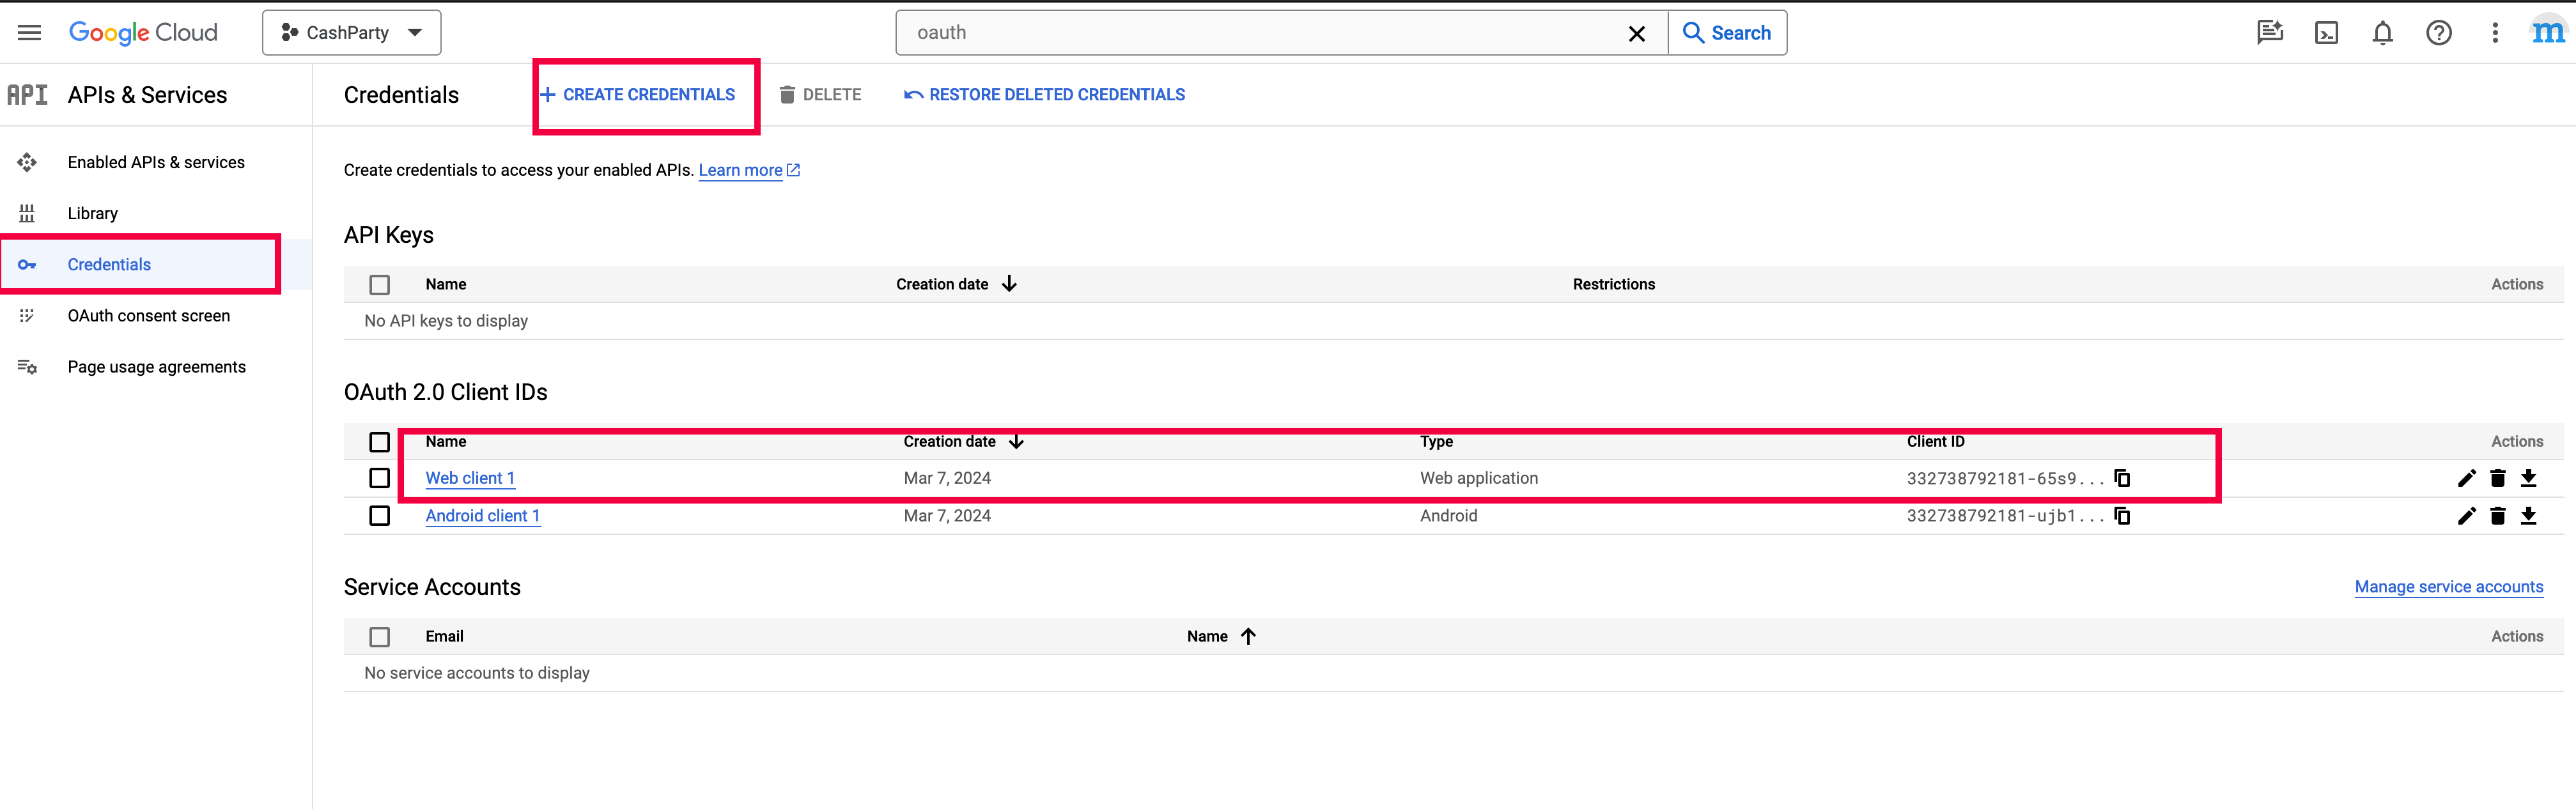
Create credentials and select OAuth client ID.
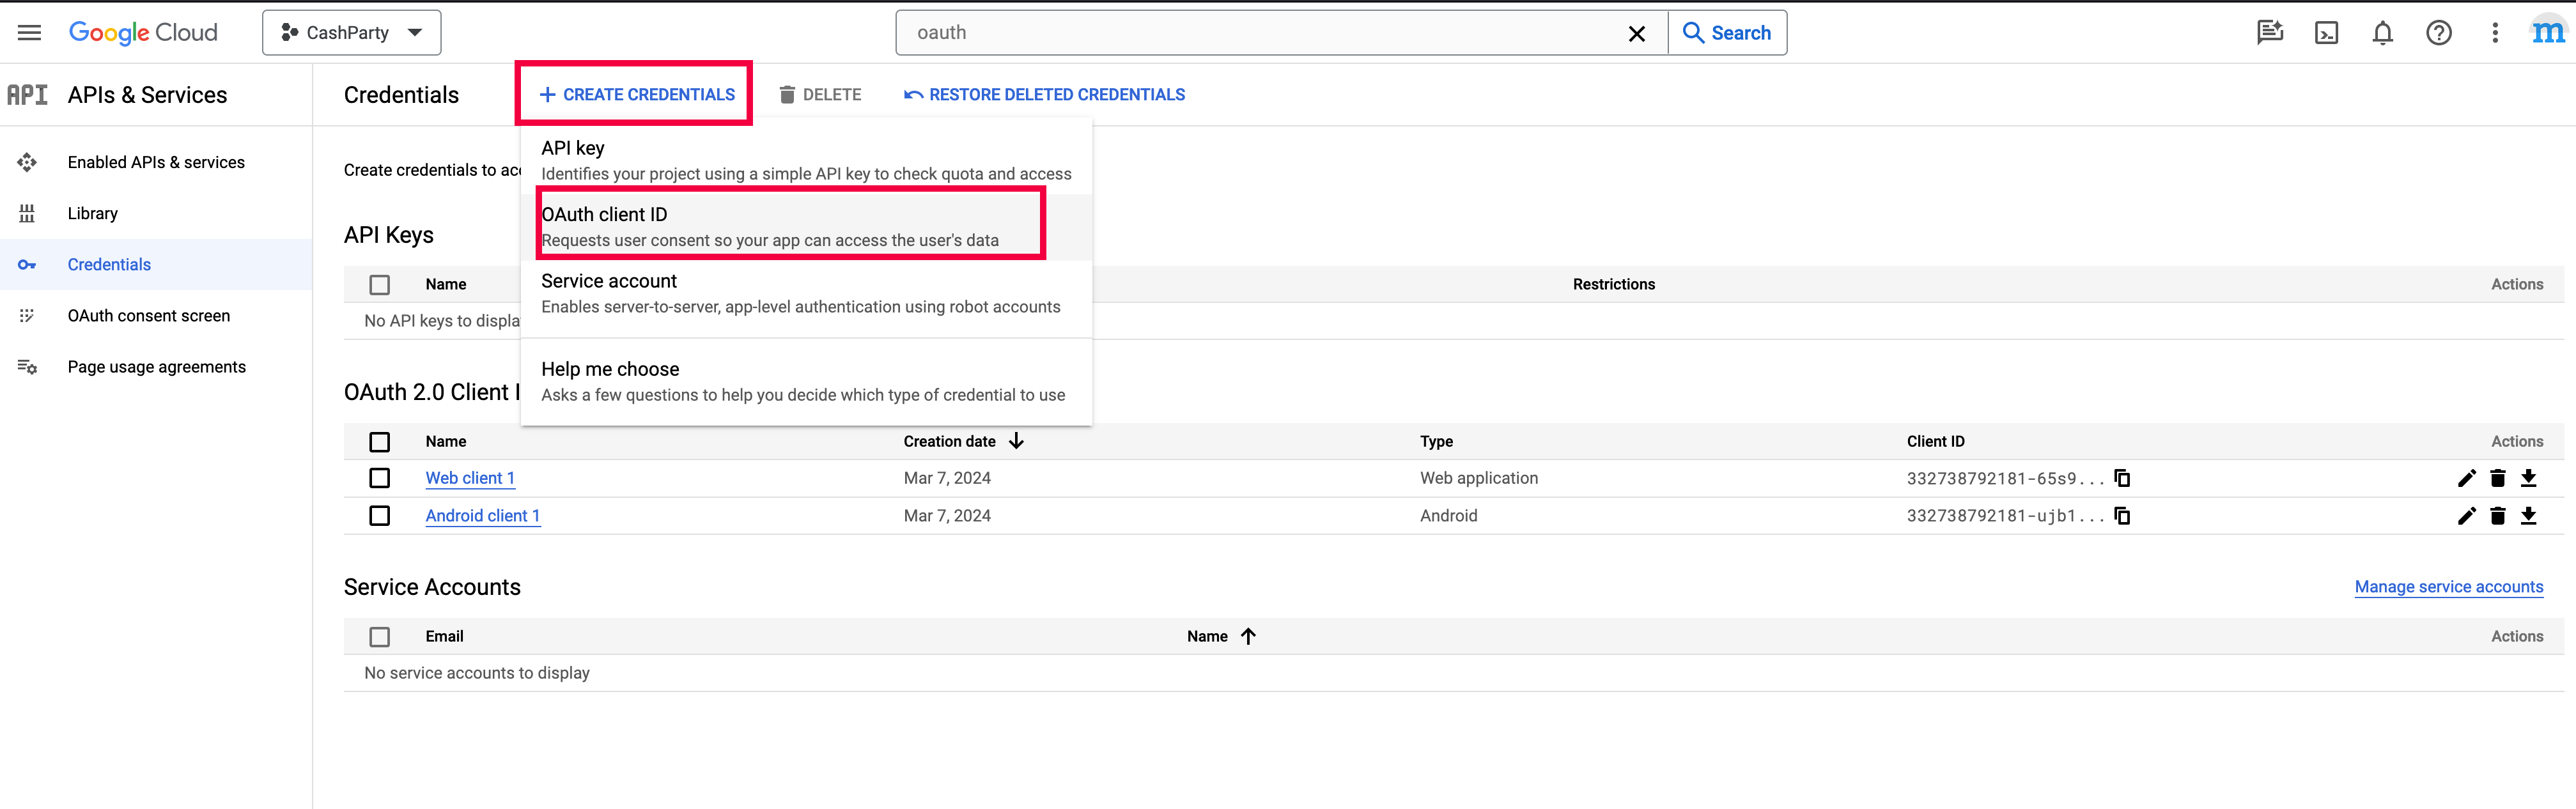
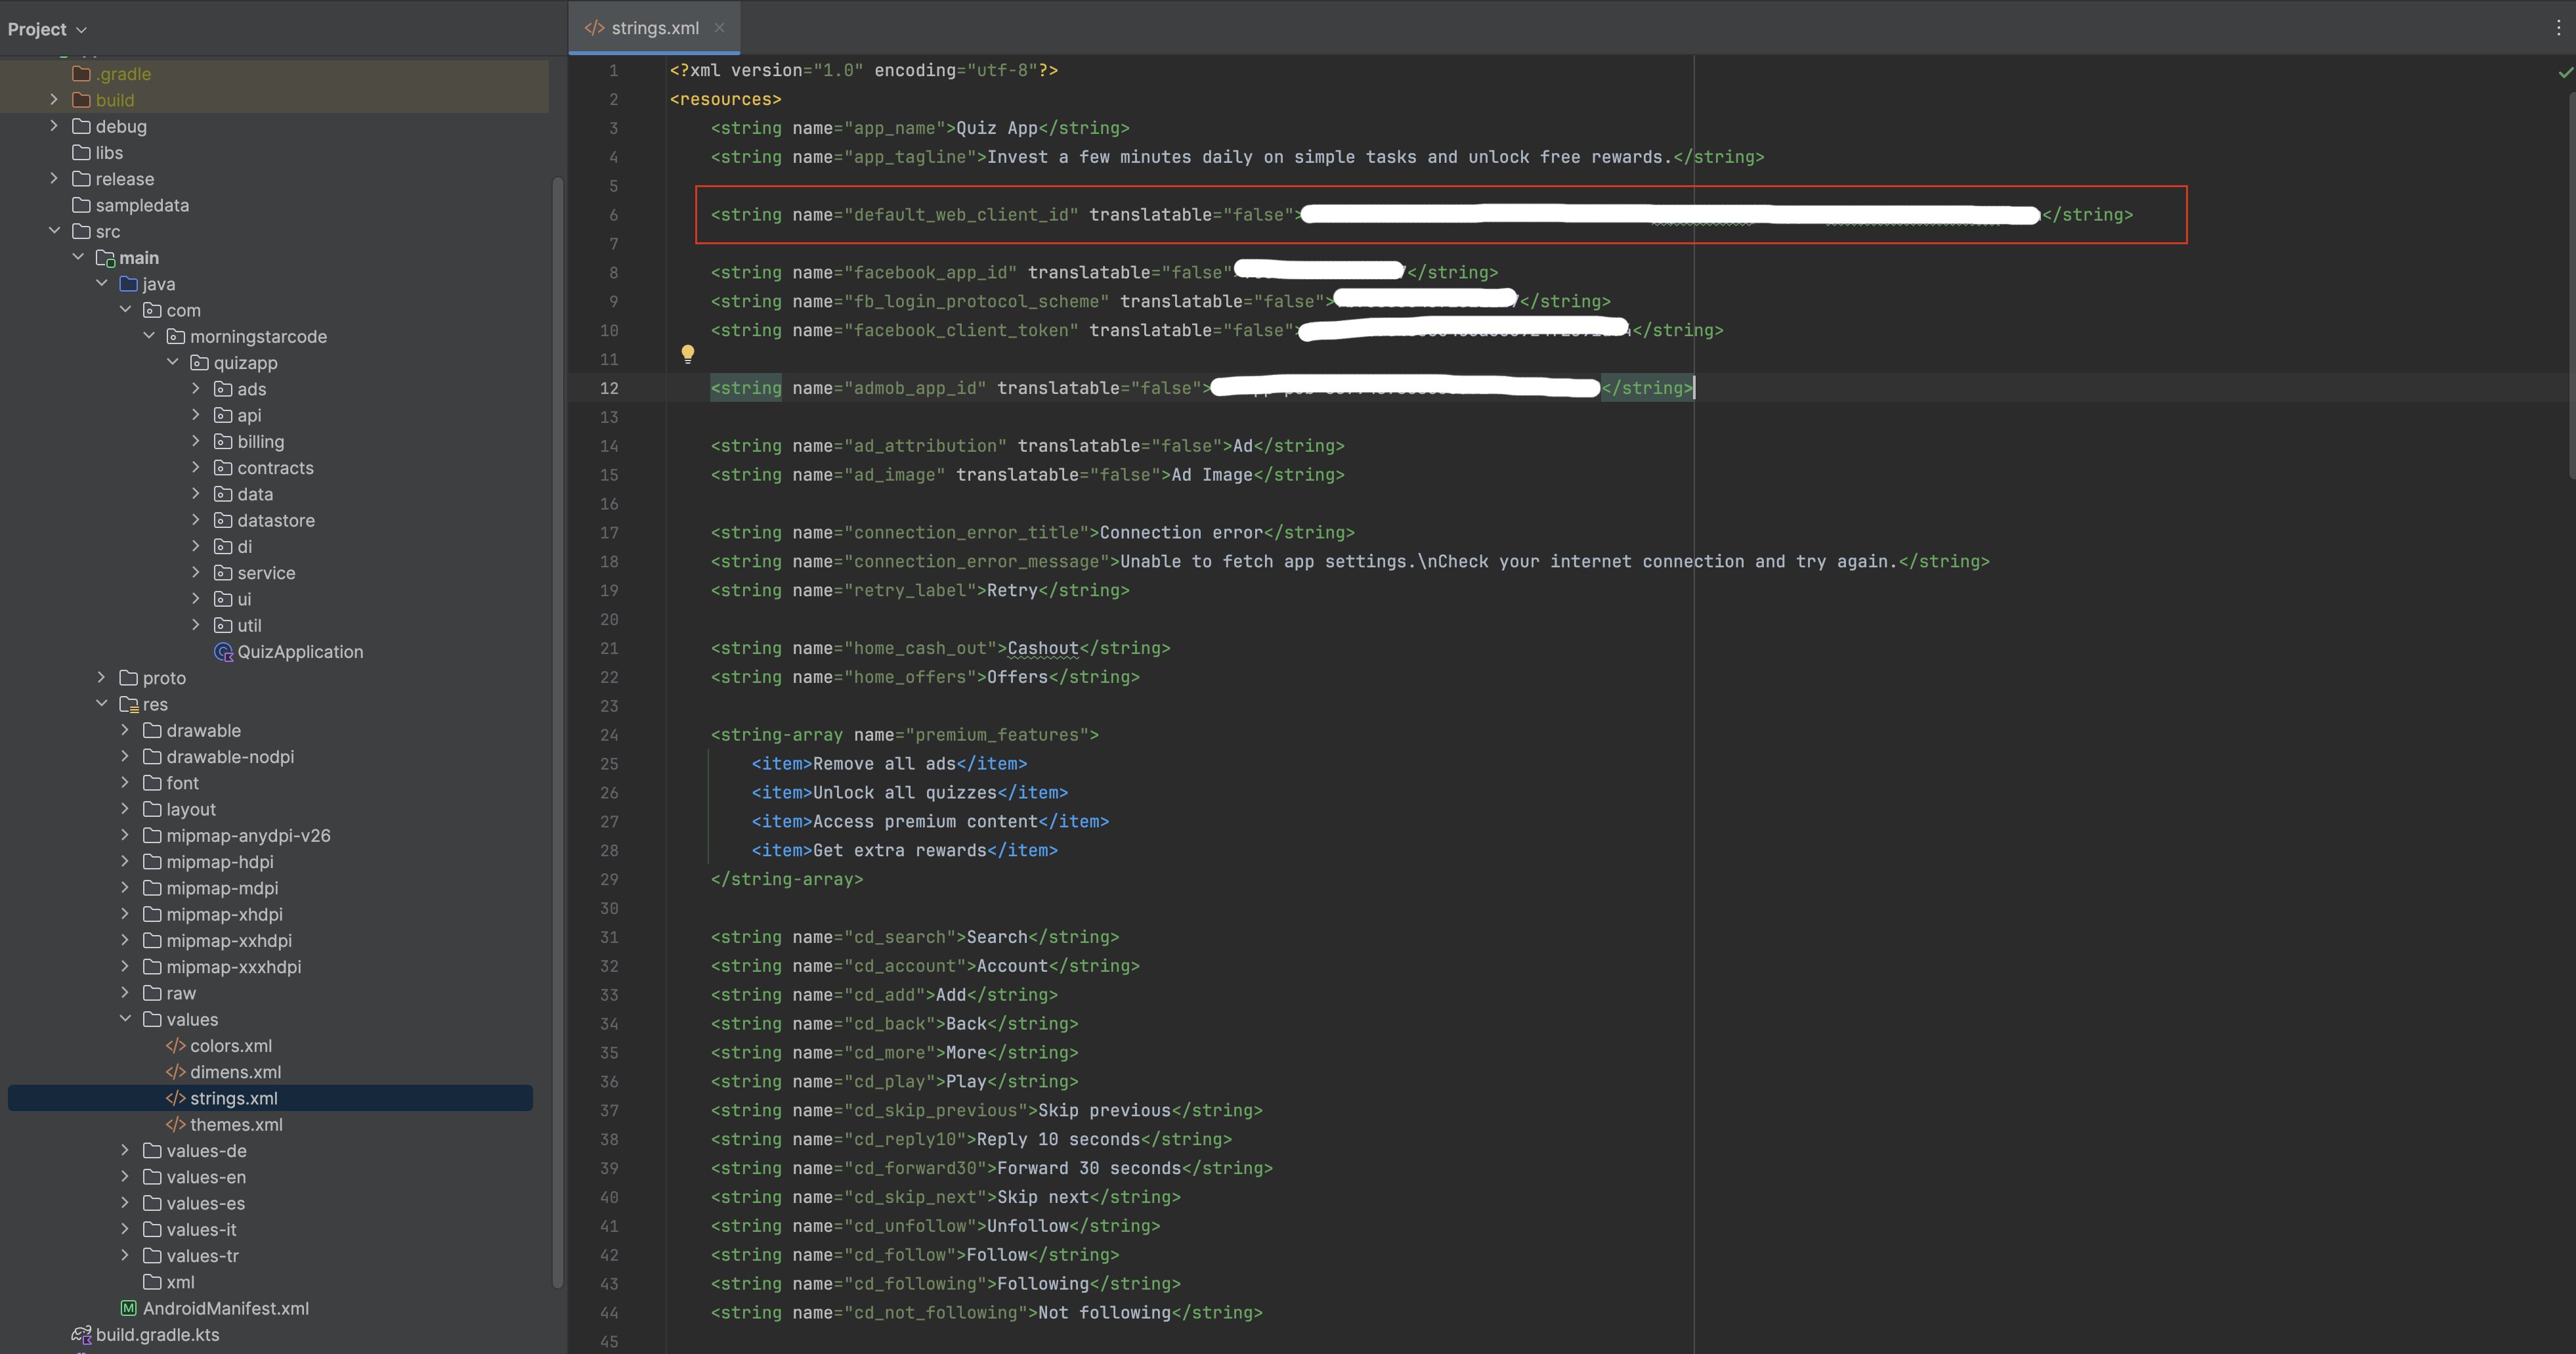
After creating OAuth client ID, copy Client ID and paste it string.xml file.
Change default_web_client_id from gpt-app-android/app/src/main/res/values/strings.xml
Facebook Login Setup
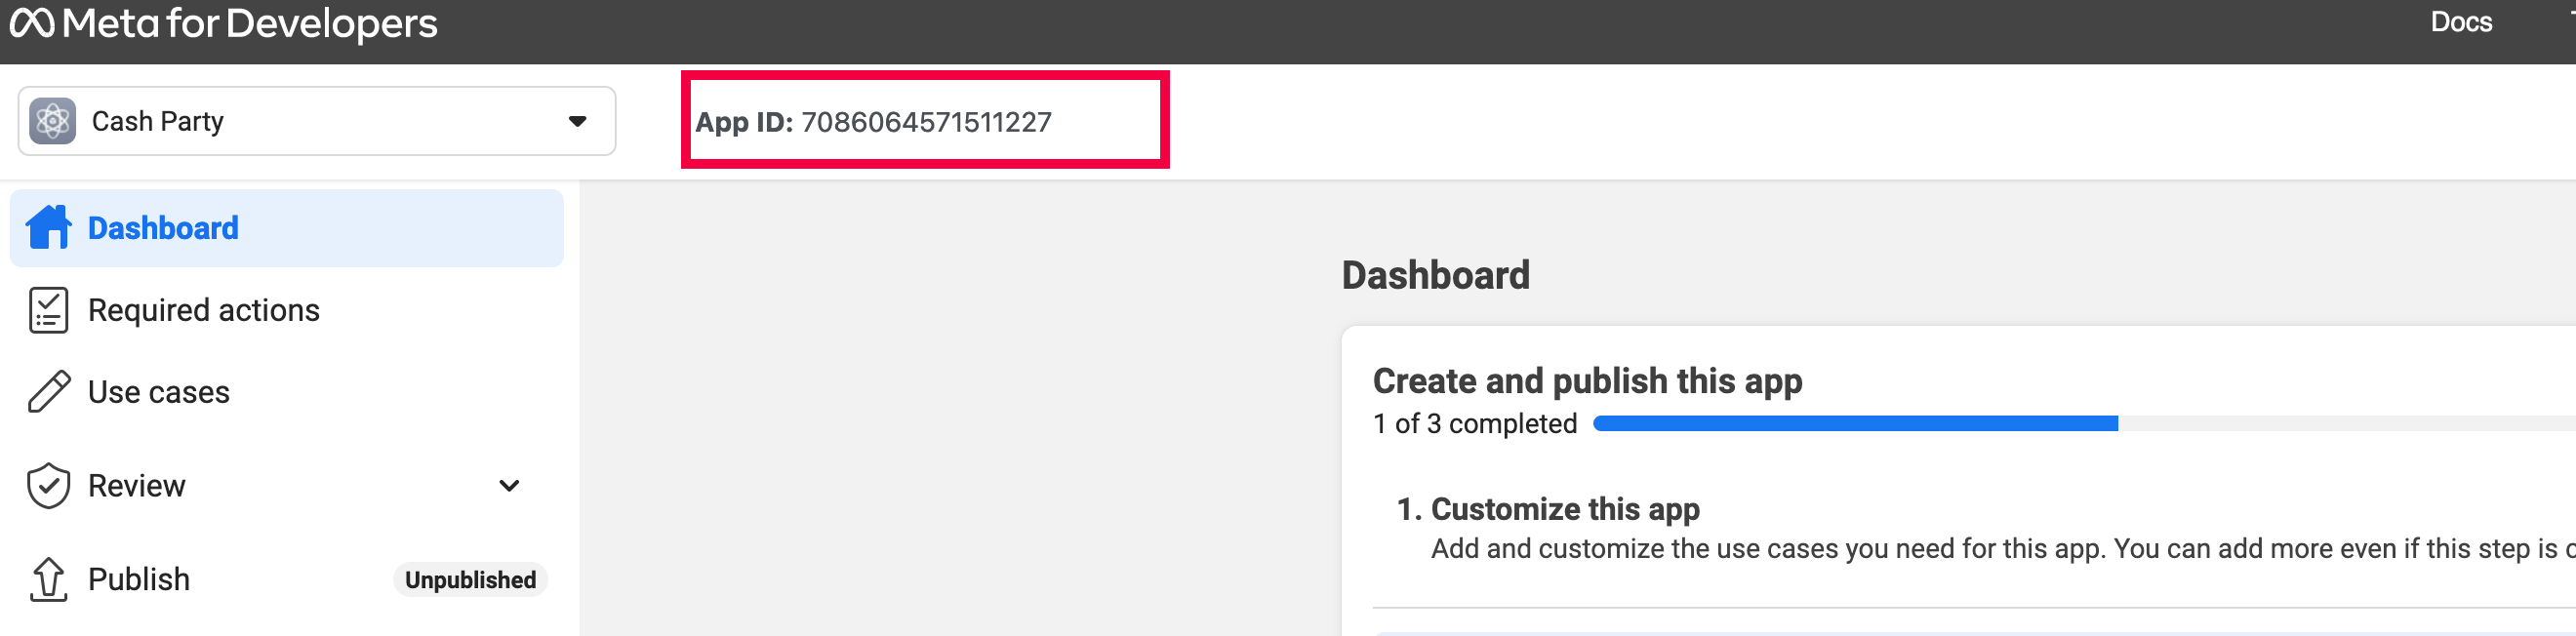
Open https://developers.facebook.com/docs/facebook-login/android/ and follow the instructions to set up Facebook login.
Get your App ID and App Secret Facebook Developer Console.
Protocol Scheme: fb{app_id}
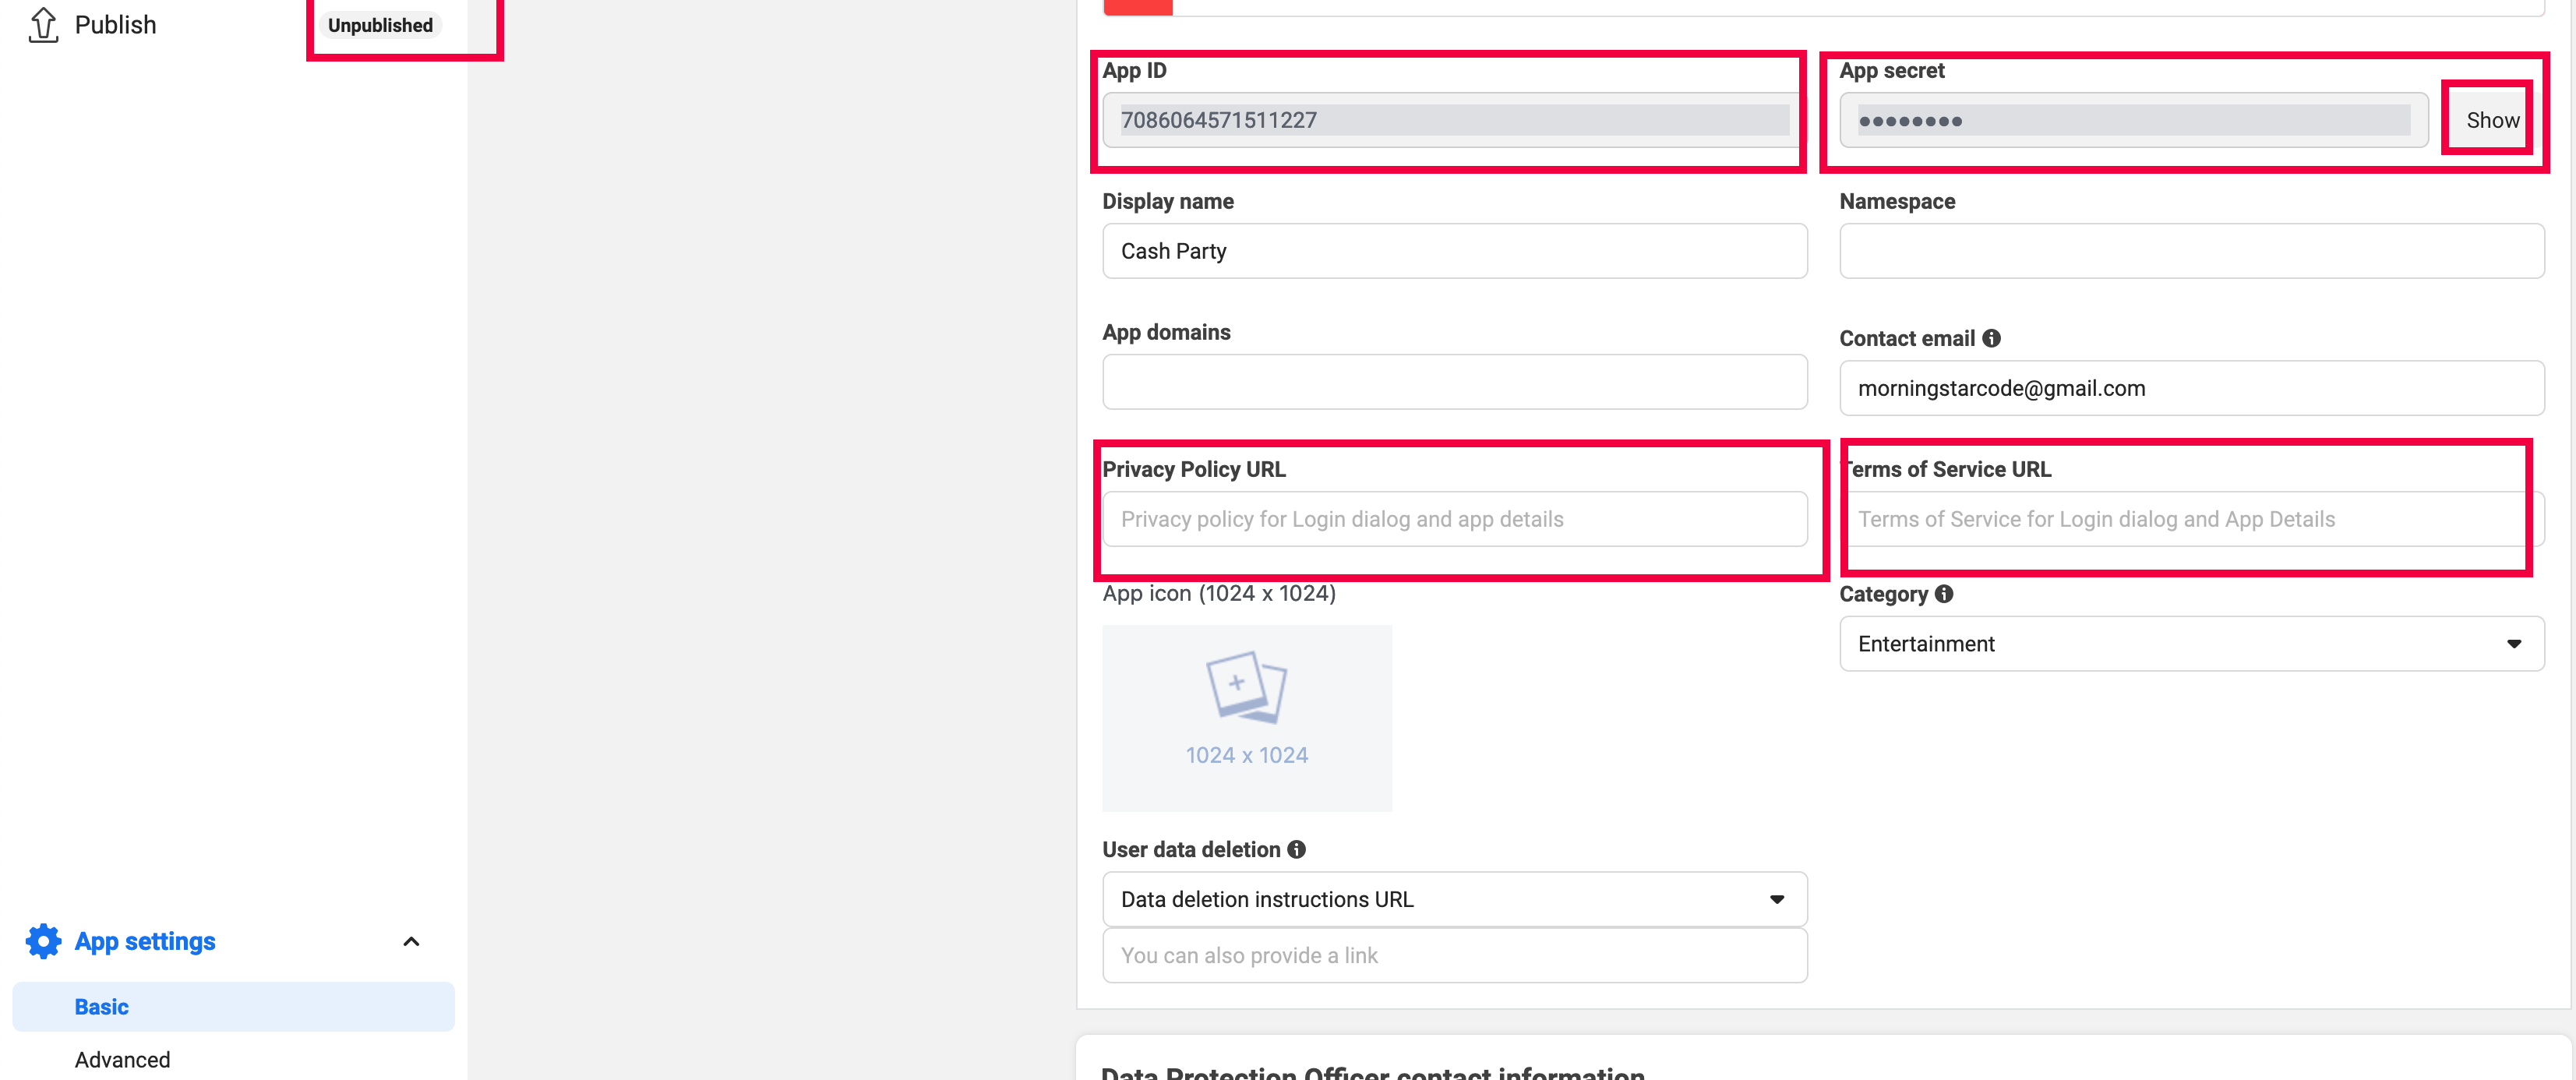
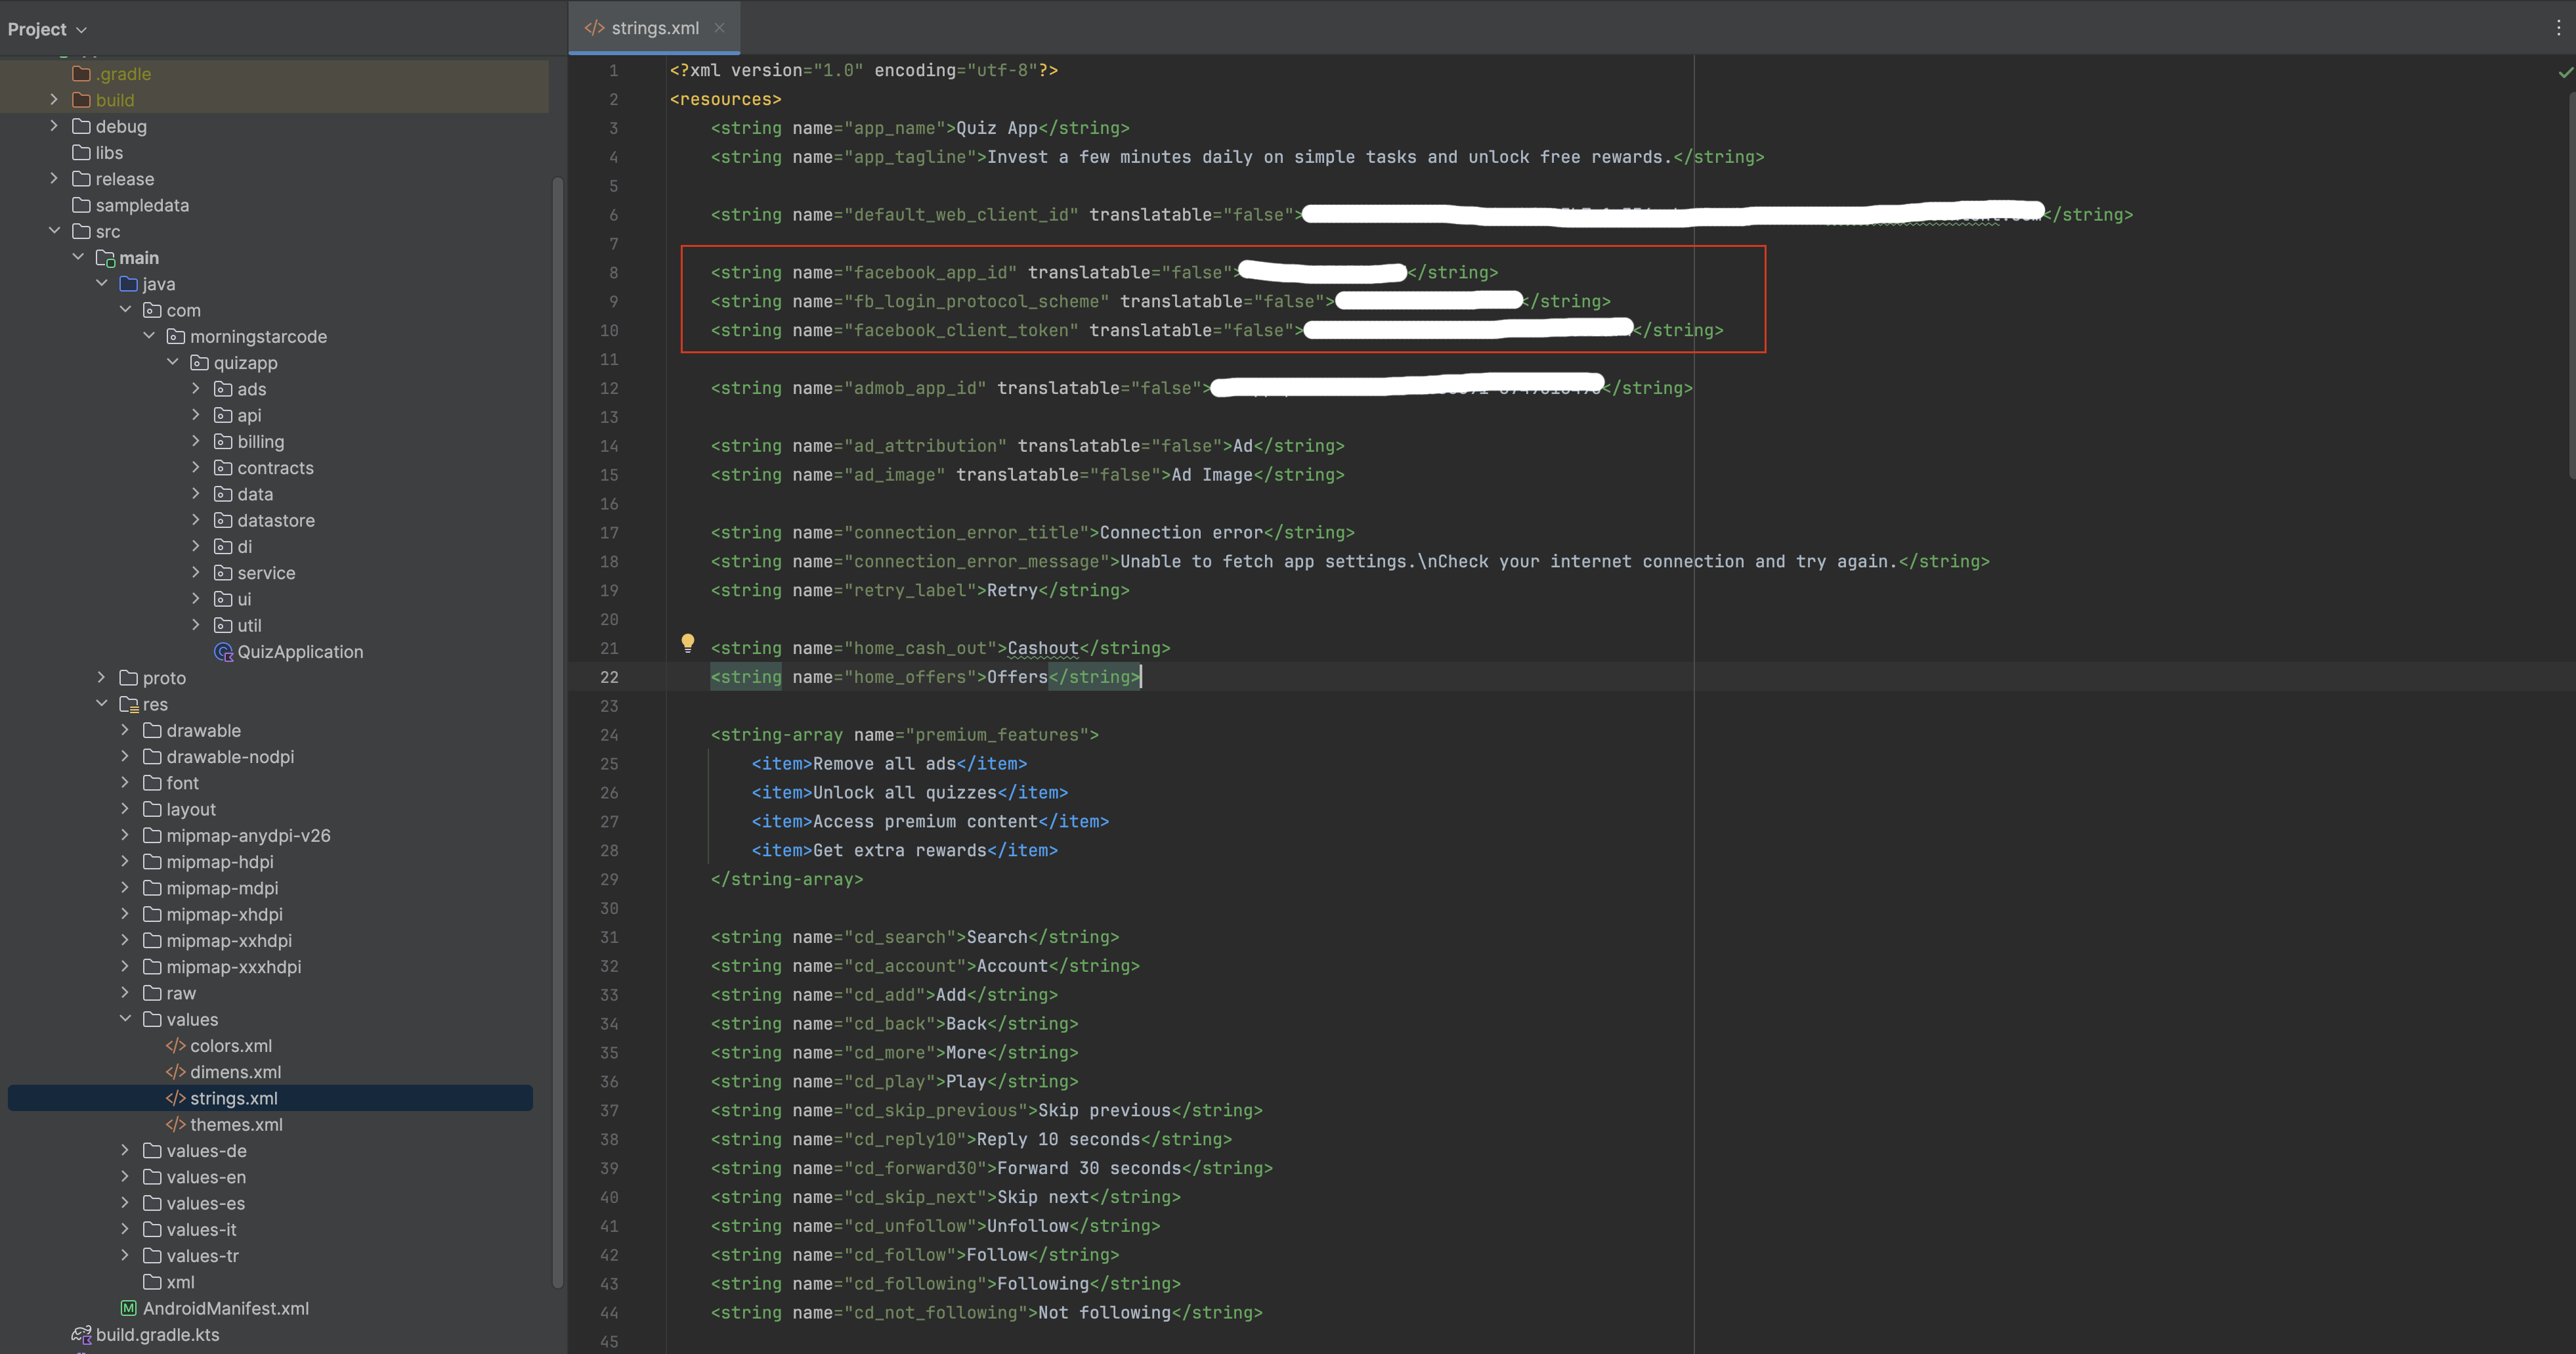
After getting the App ID and App Secret, update facebook_app_id and fb_login_protocol_scheme in gpt-app-android/app/src/main/res/values/strings.xml file.
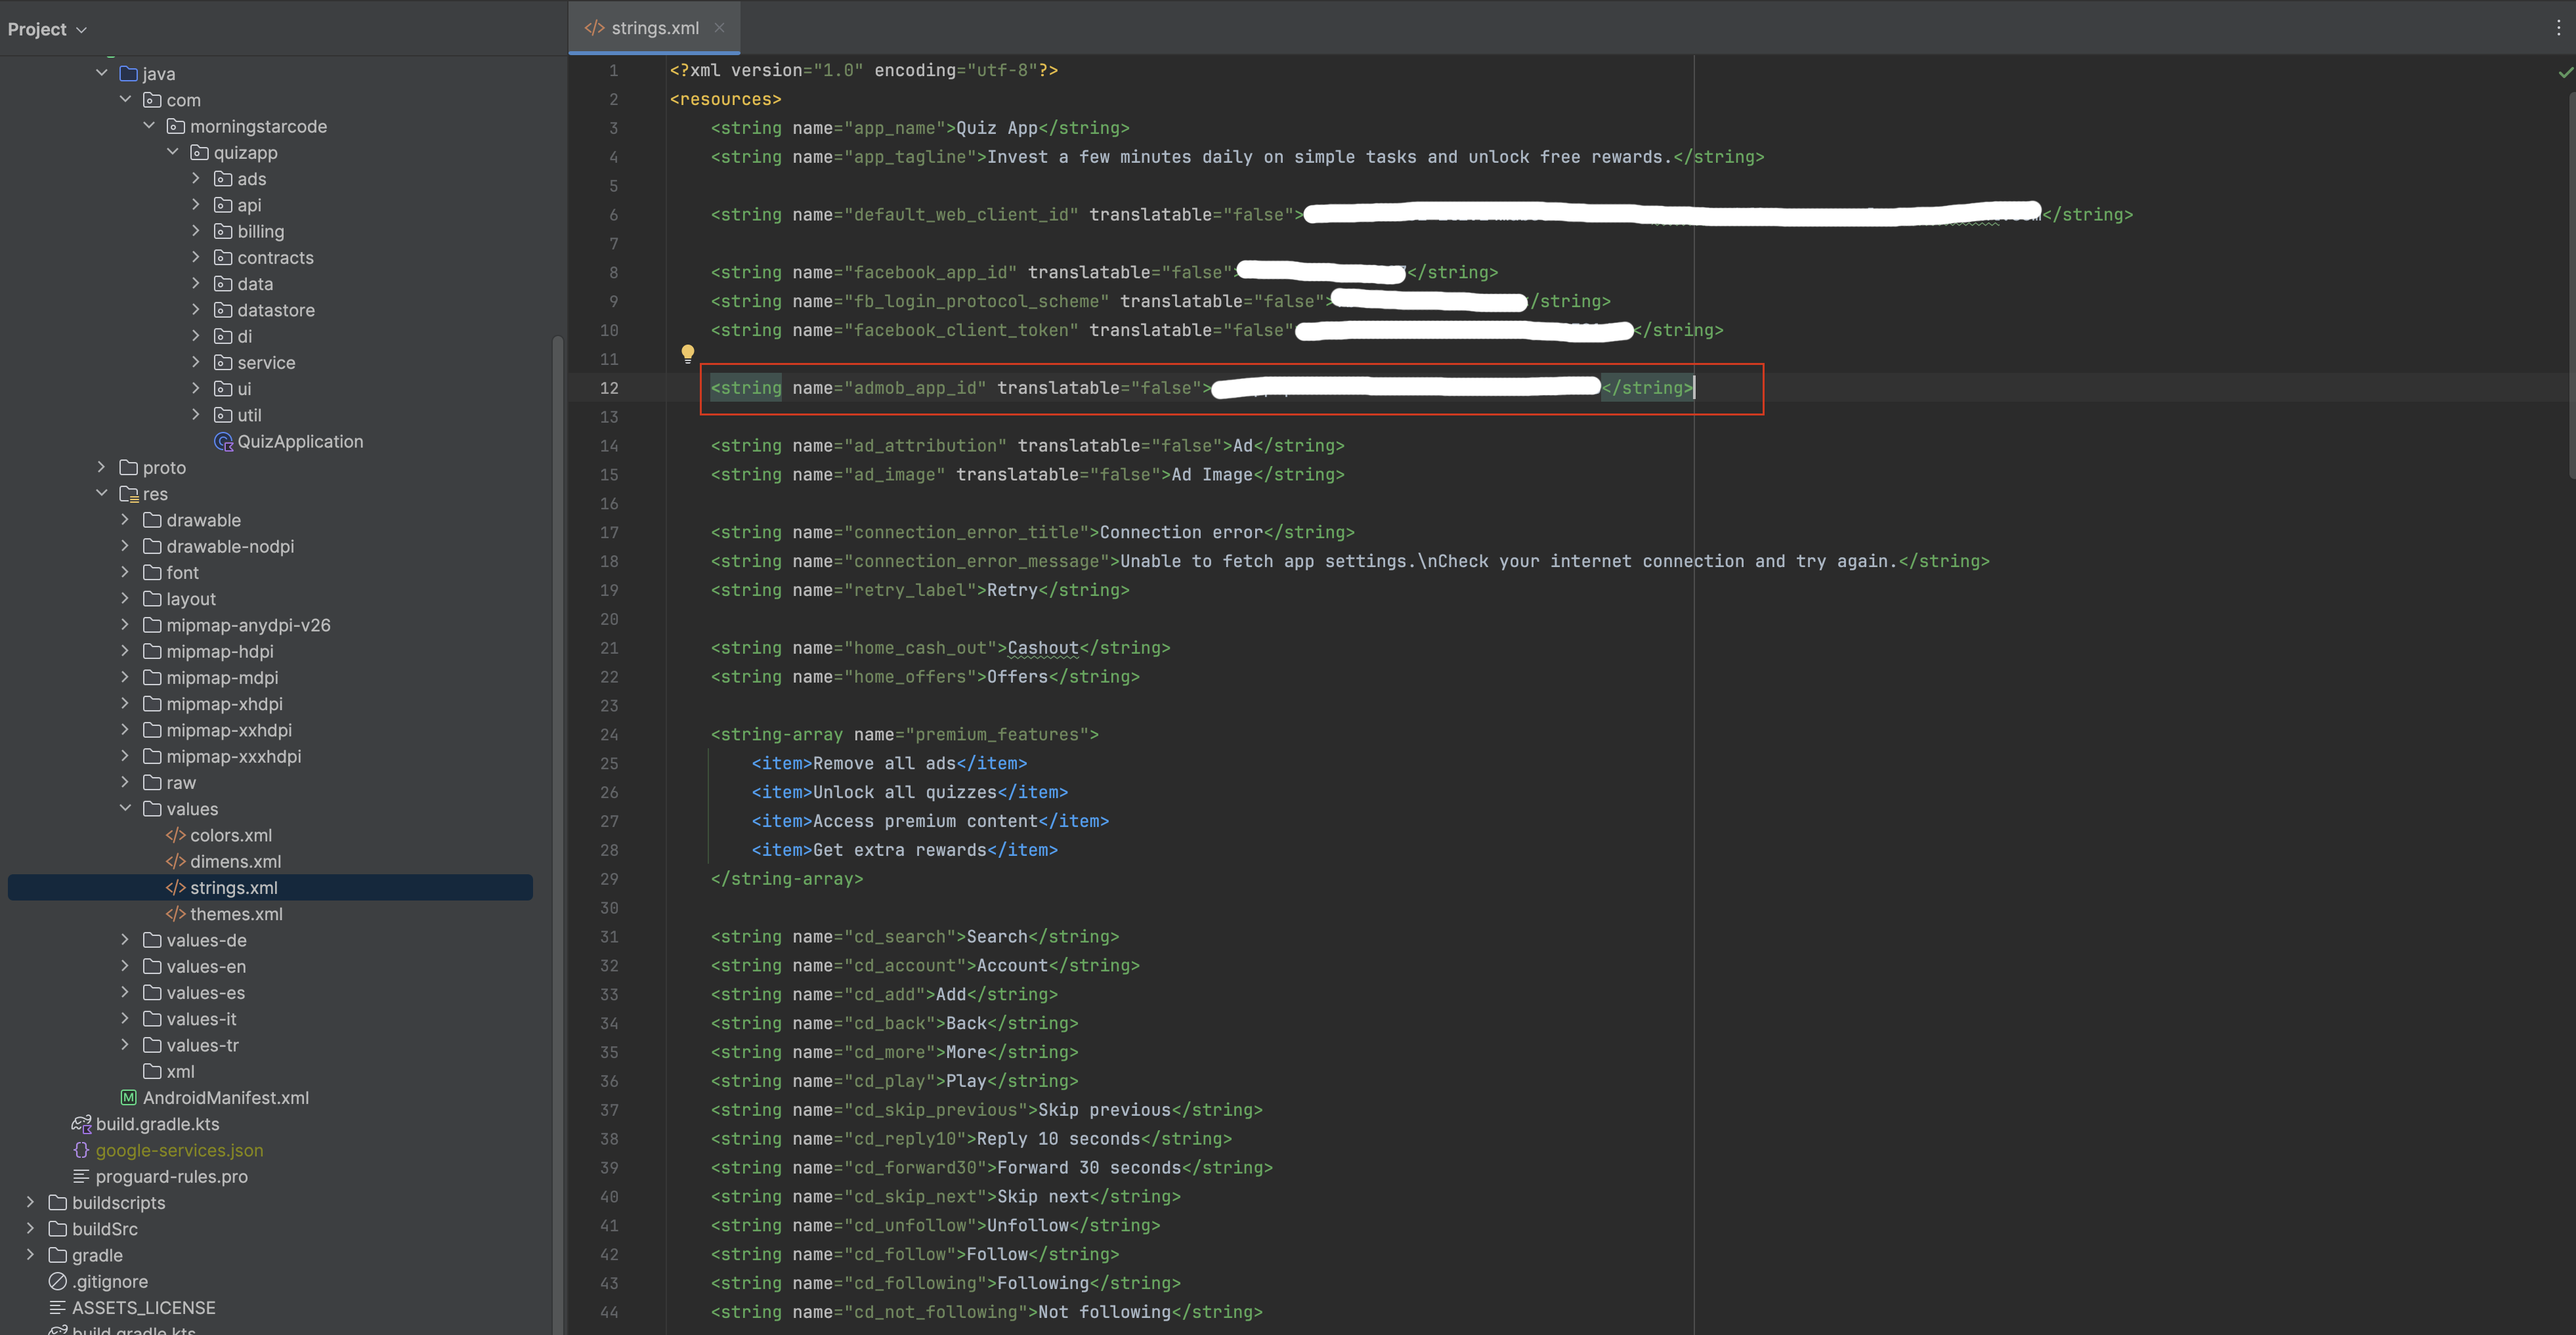
Admob APP ID
To update the AdMob App ID in your Android app, follow these steps:
Navigate to the res folder of your Android project: gpt-app-android/app/src/main/res/
Open the strings.xml file located in the values directory: res/values/strings.xml
Replace it with your actual AdMob App ID.
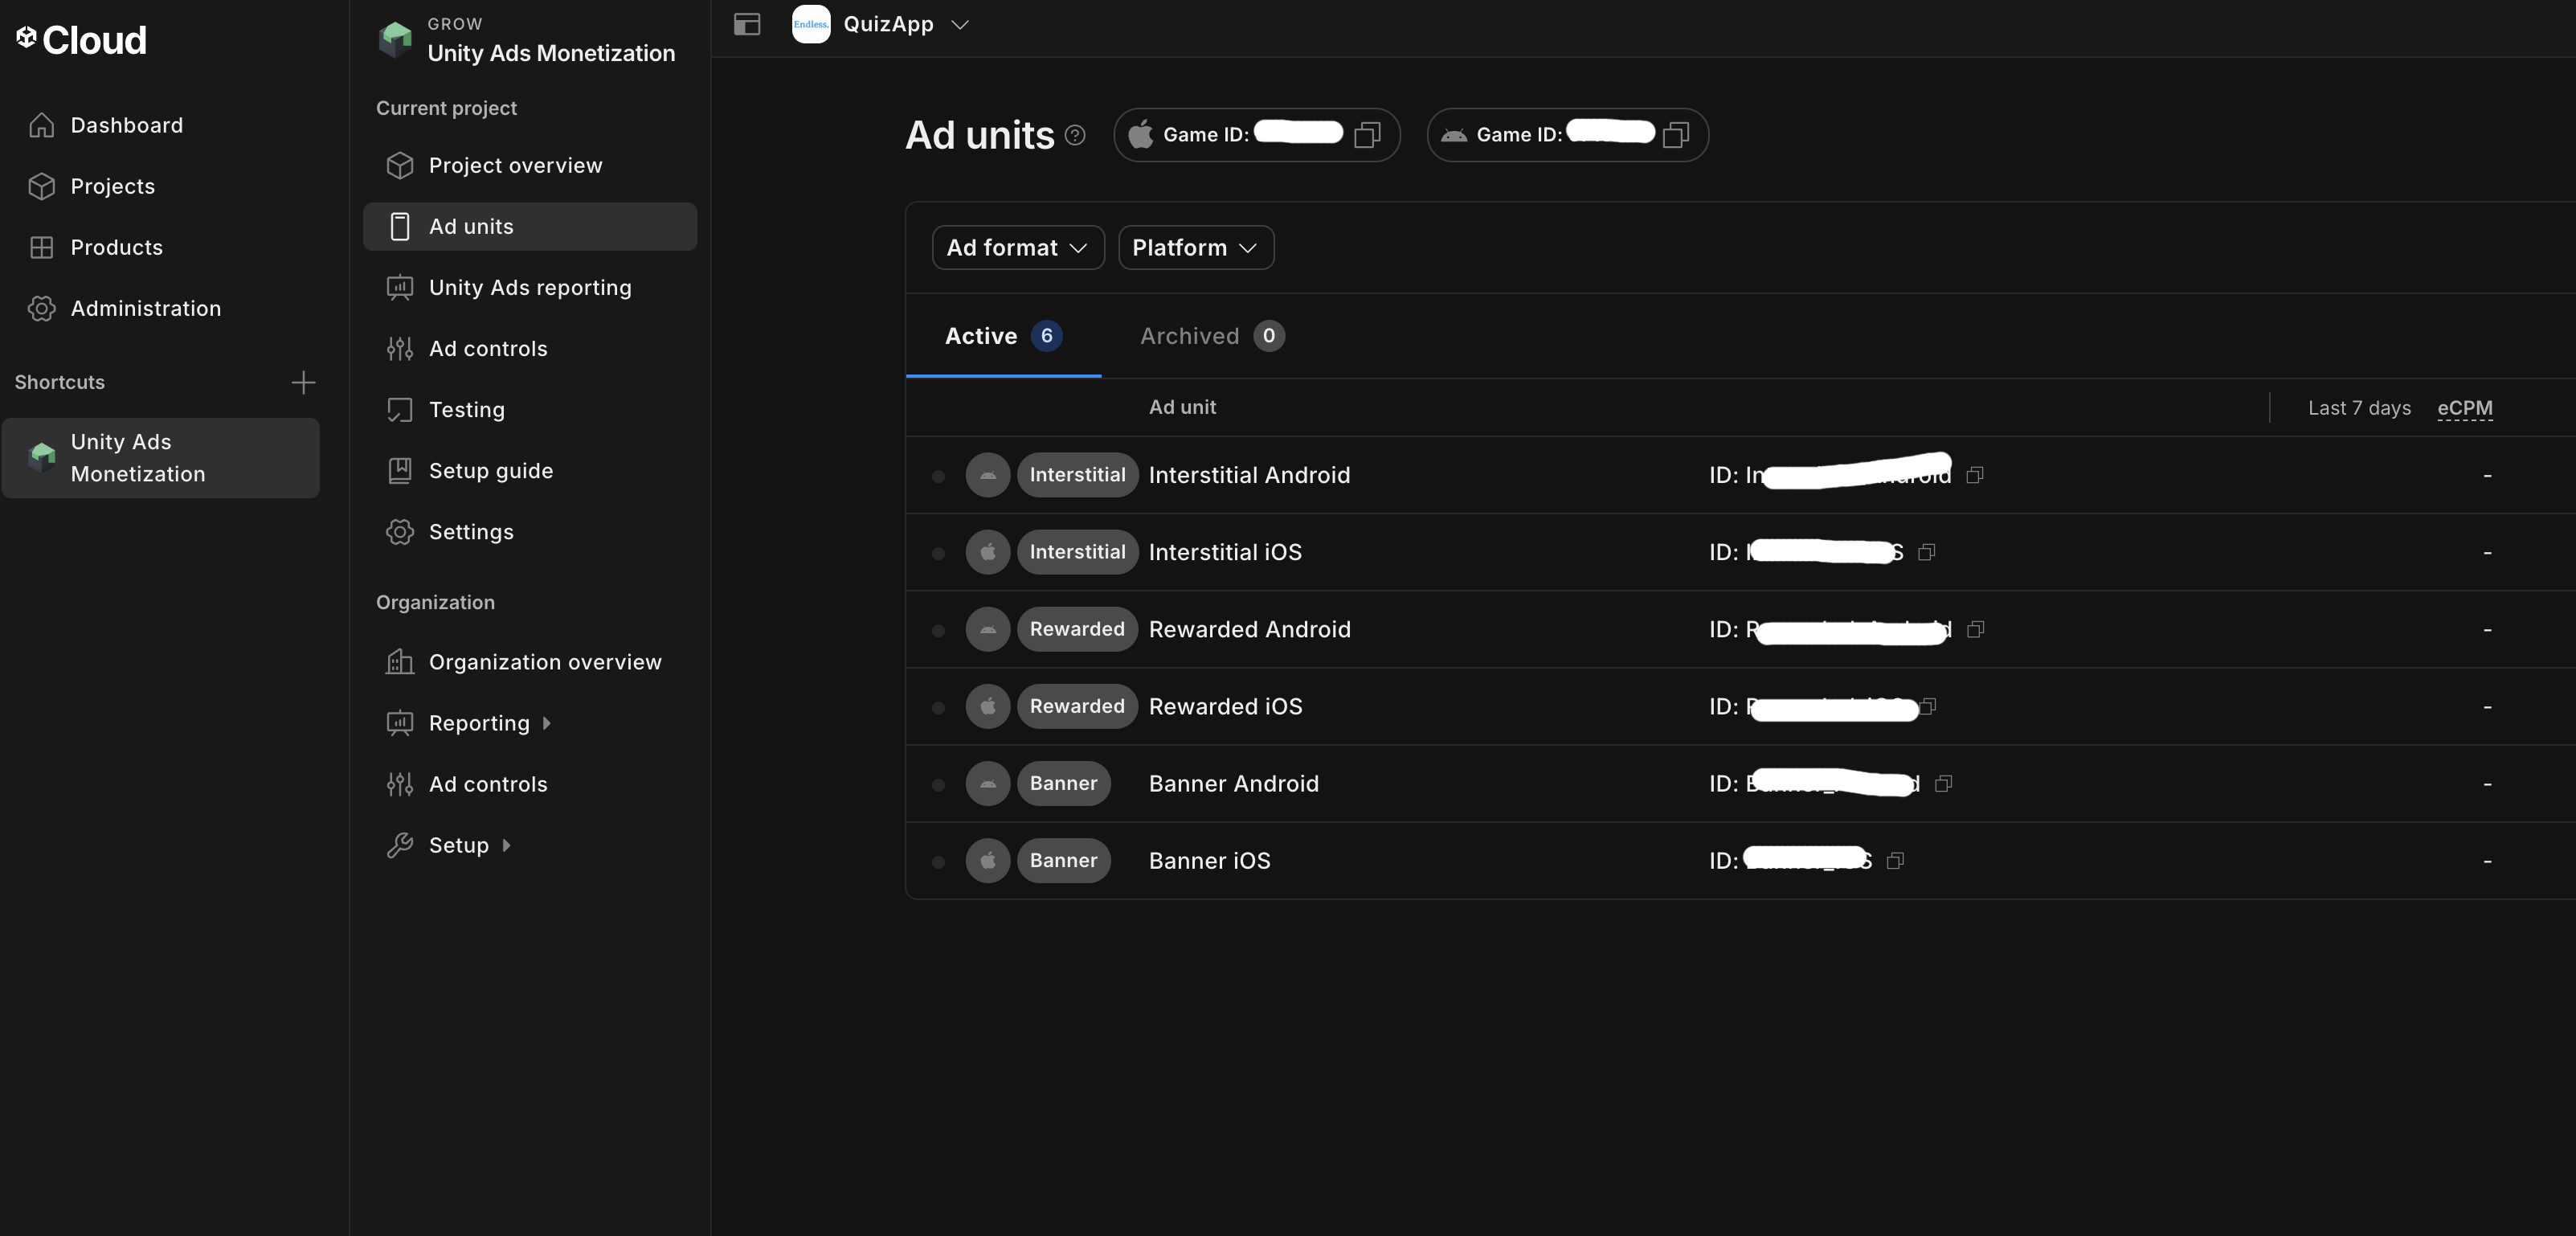
Unity Ads Integration
Sign up for a Unity Ads account at https://unity.com
Create a new Unity project in the Unity Ads dashboard:
- Navigate to the Unity Dashboard and select Operate > Monetization.
- Click Create a New Project and enter the required details (Project name, platform, etc.).
- Select Android as the platform.
Get your Game ID:
- Once your project is created, Unity will provide a Game ID for Android.
- You will need this Game ID to integrate Unity Ads into your Android app.
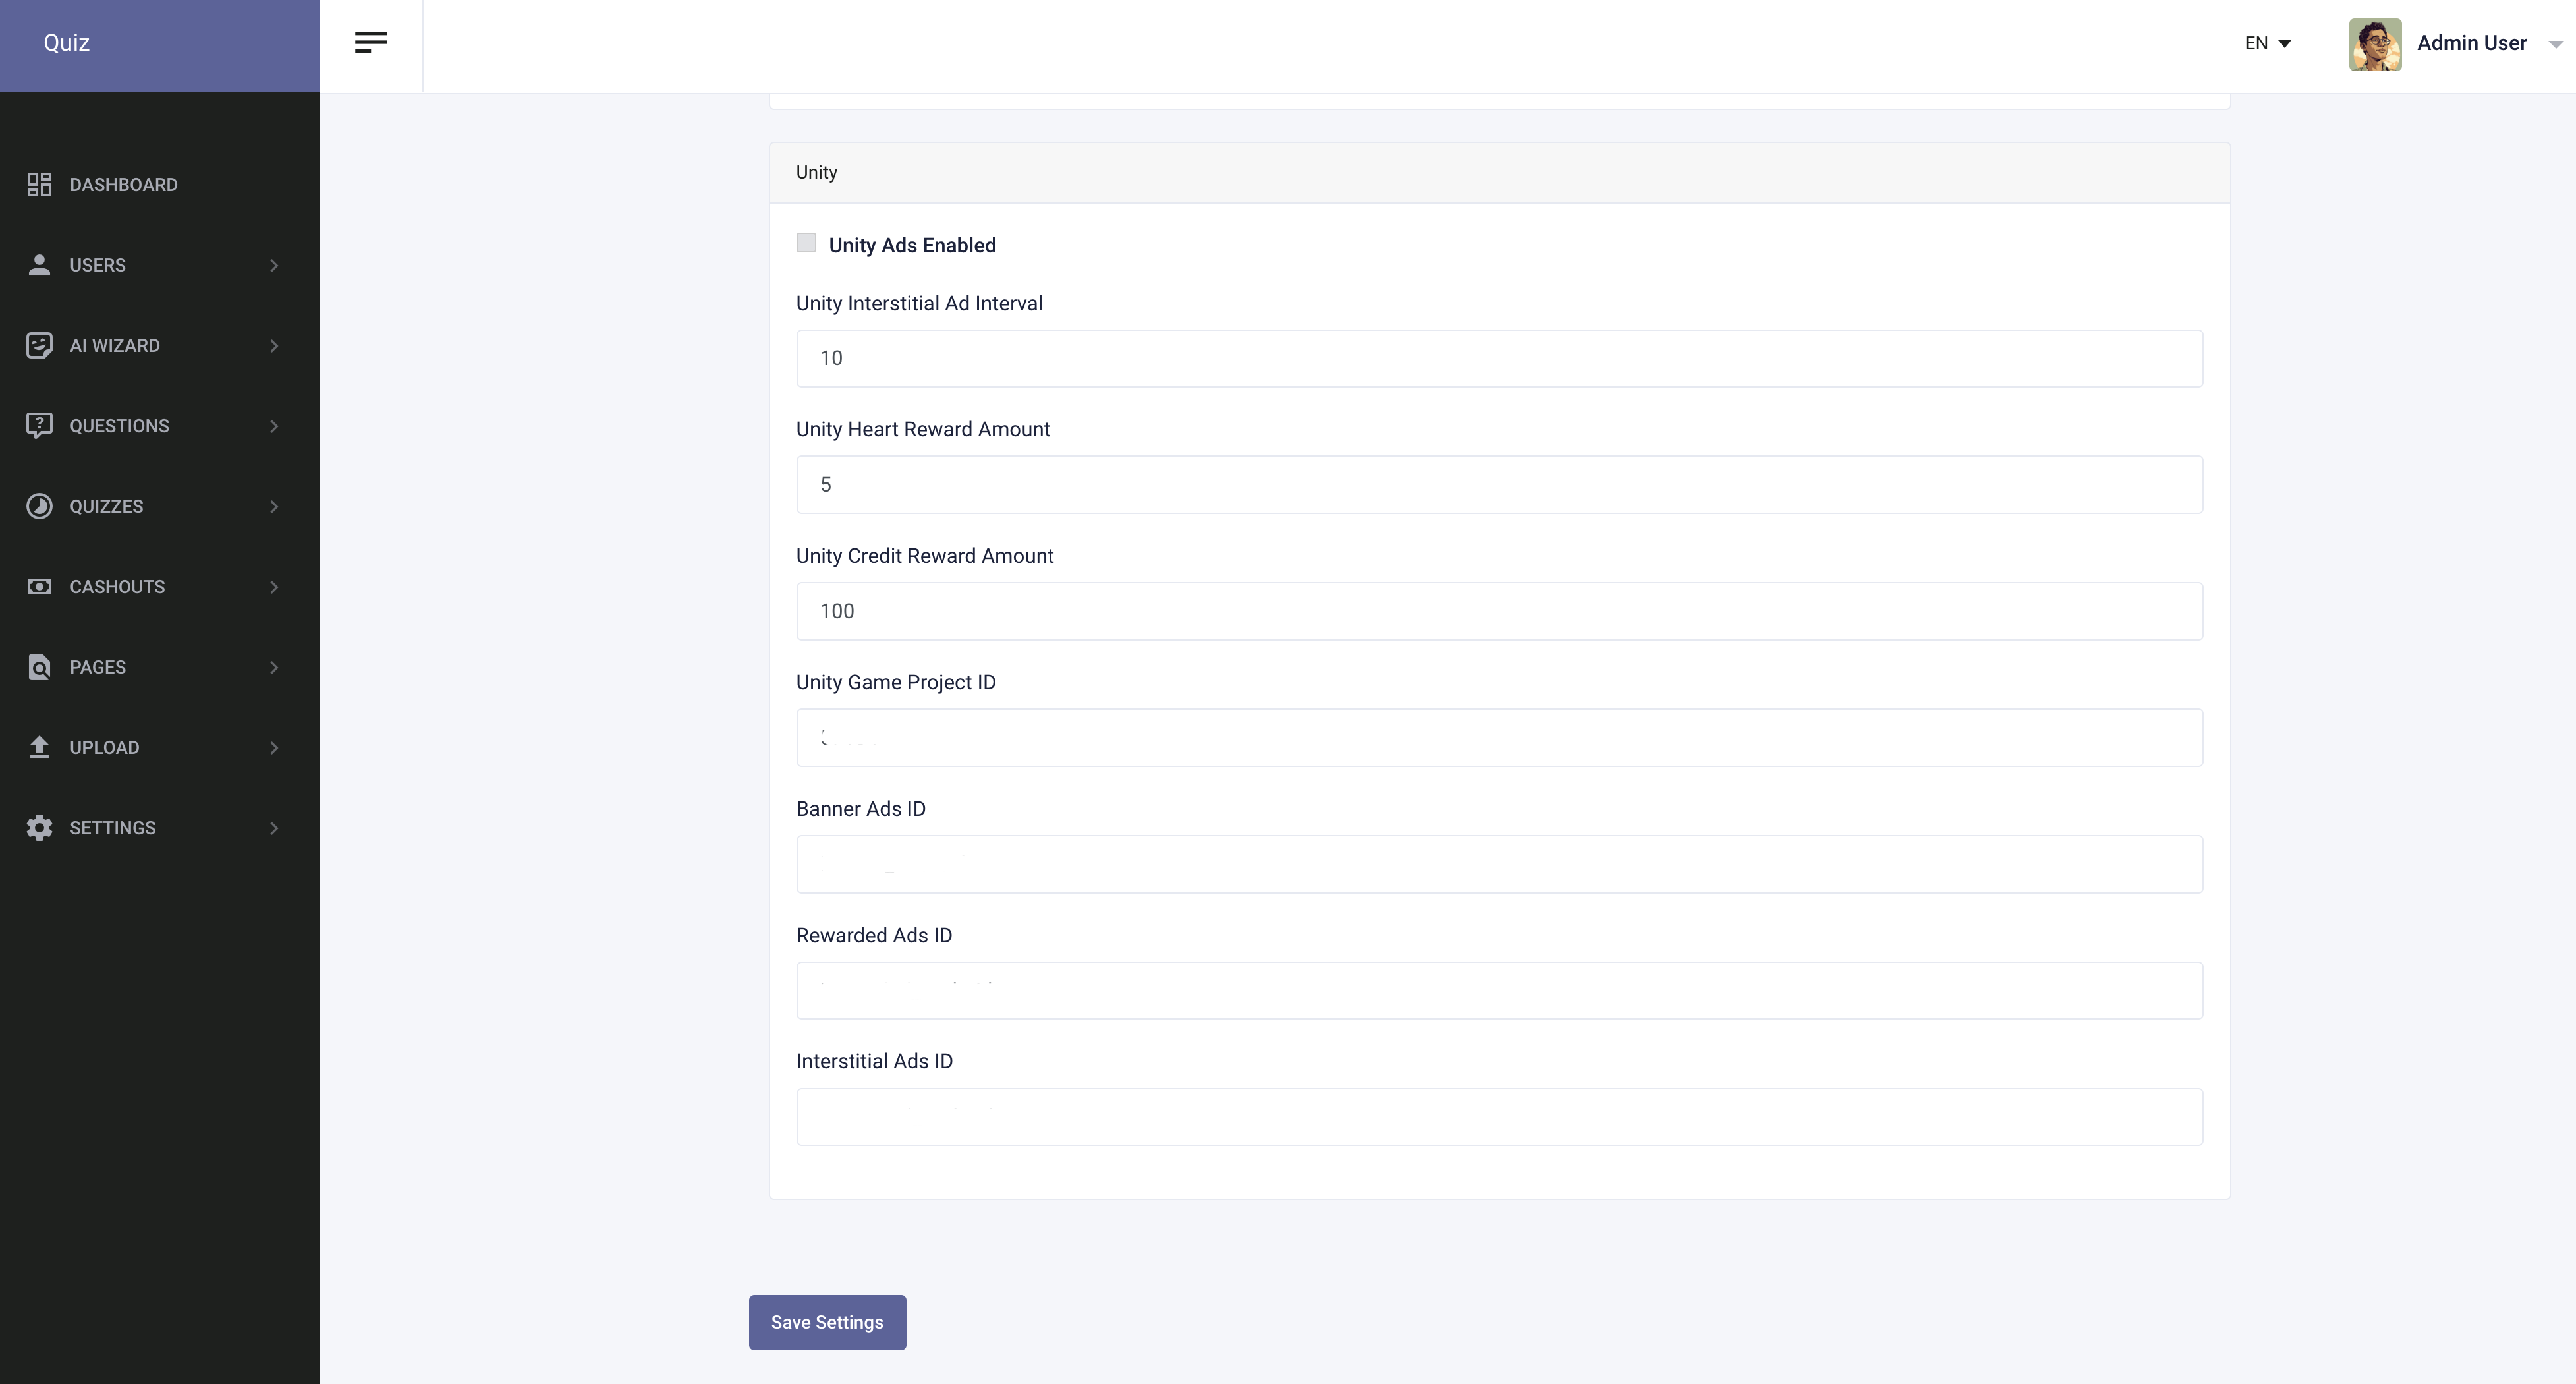
- Update Unity game id in app settings from admin panel.
- Get your ad unit ids and update in app settings from admin panel.
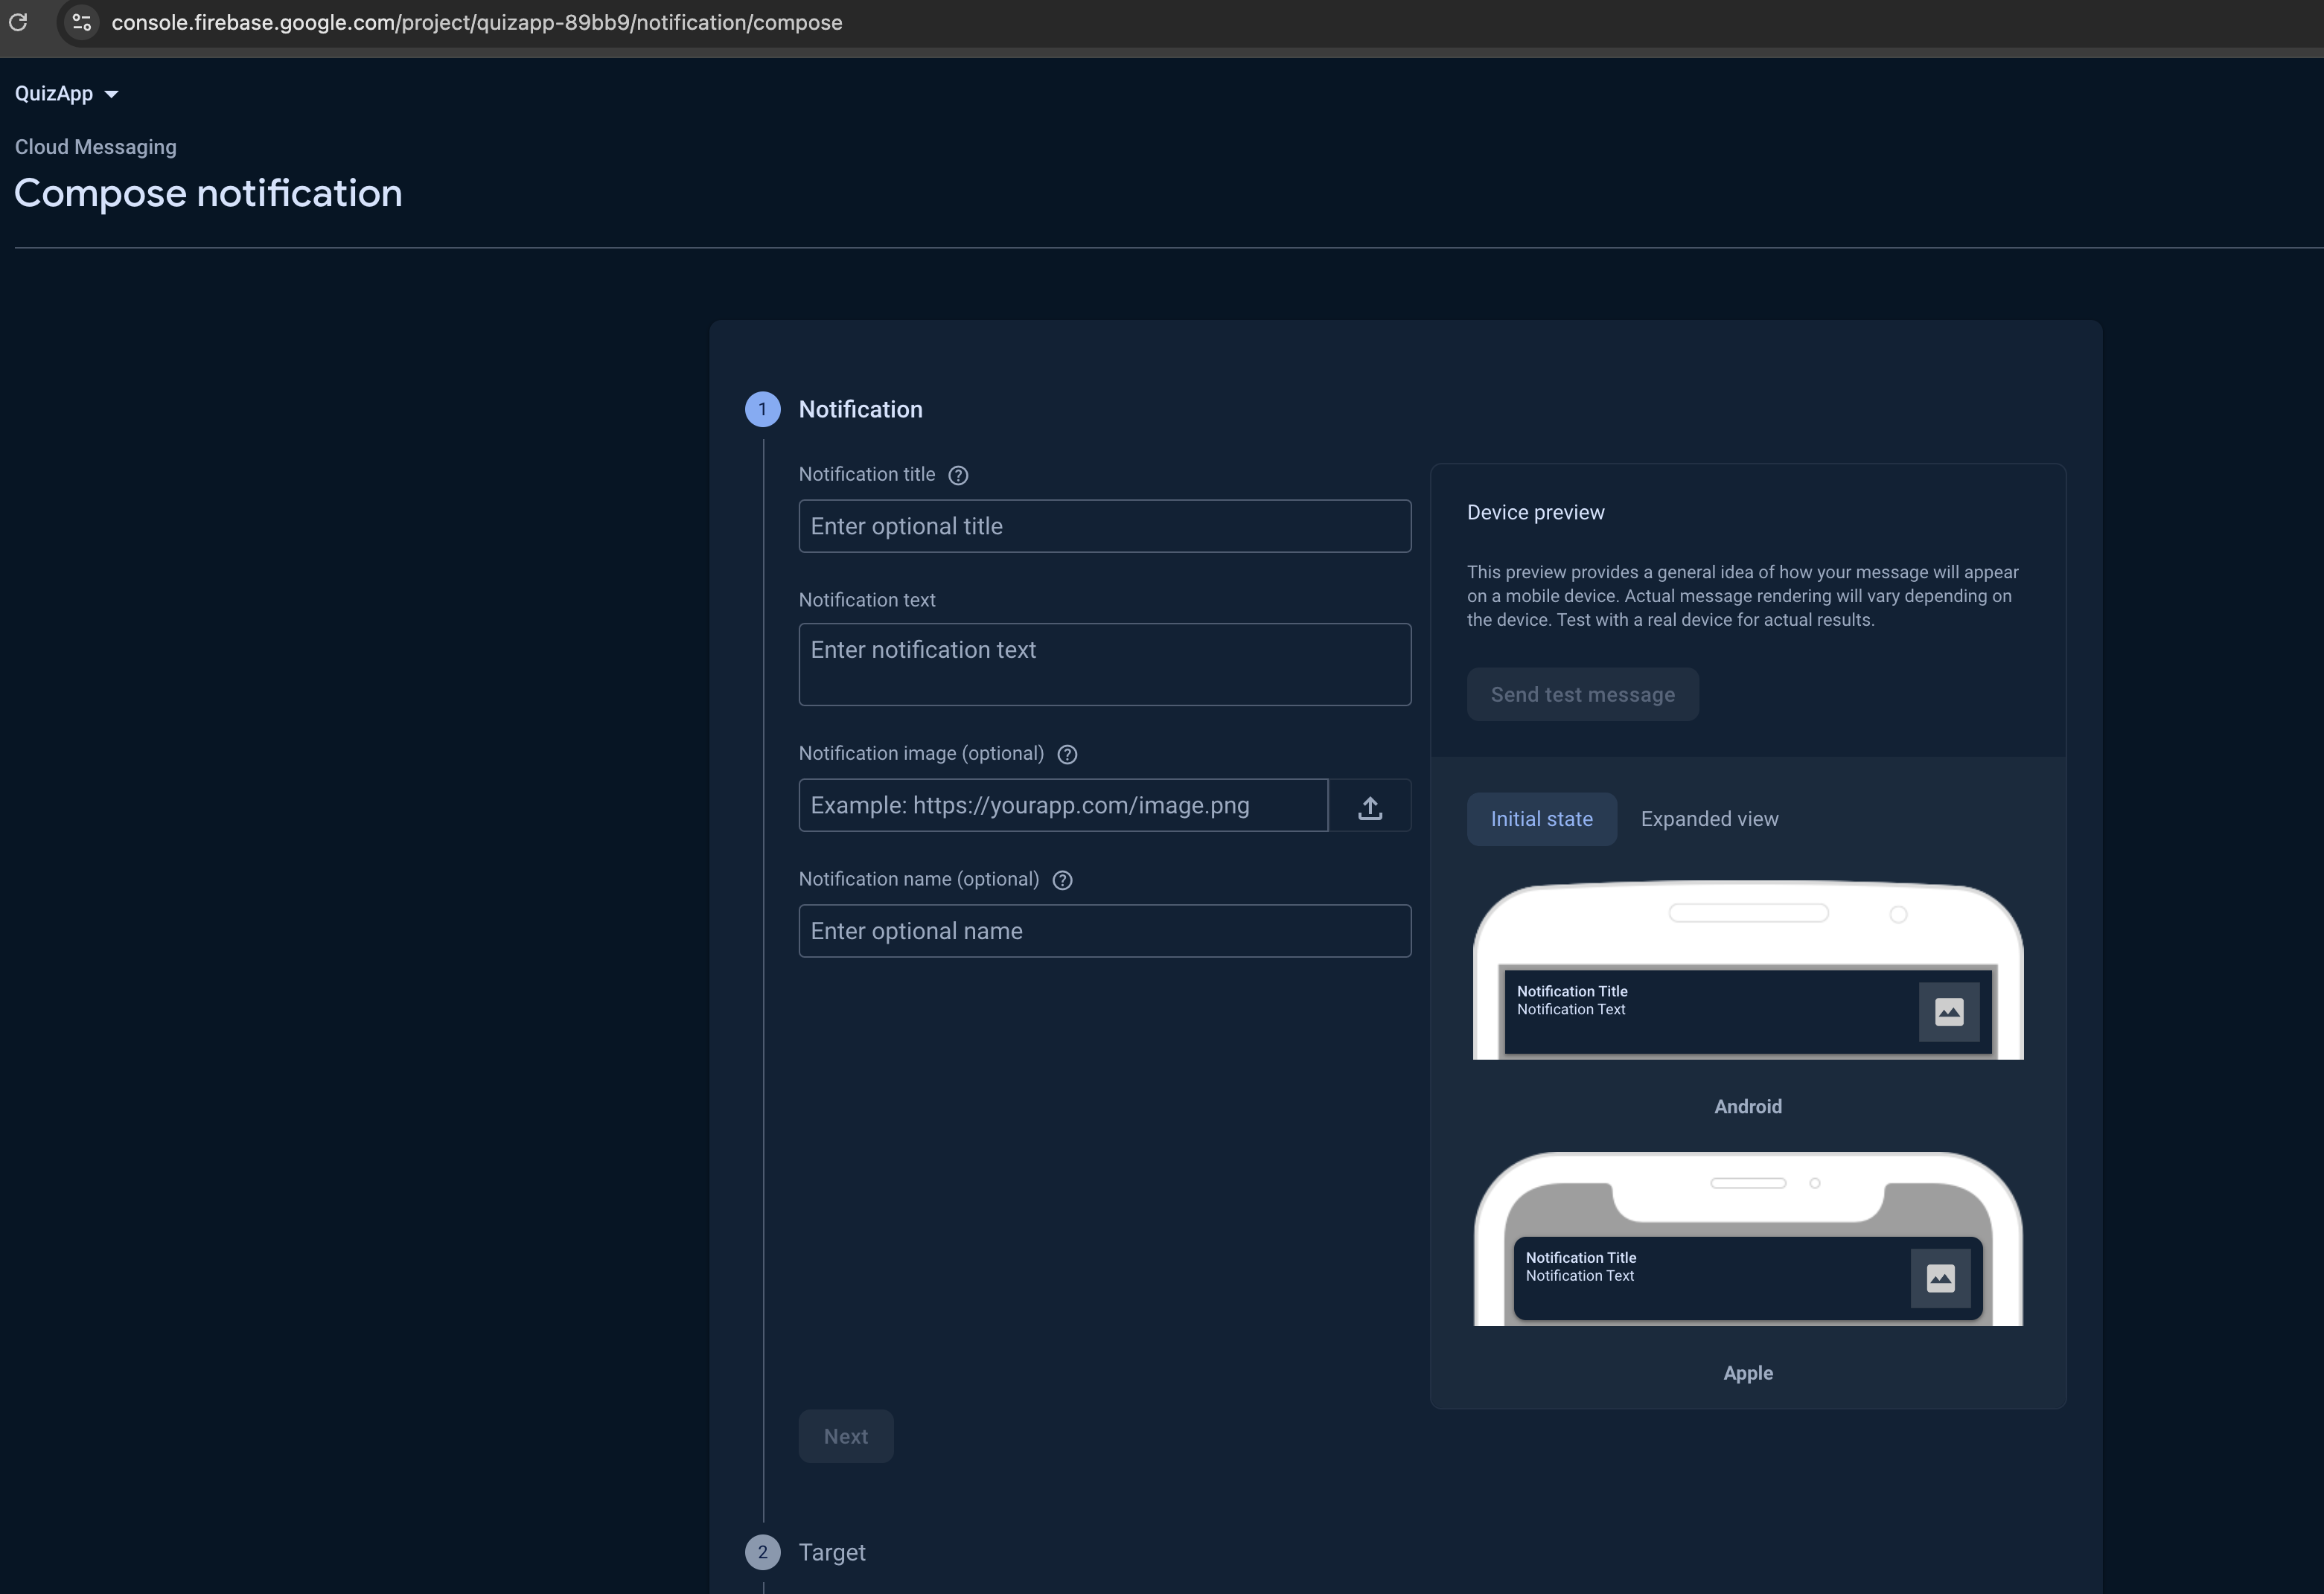
Firebase Integration for Notifications
Go to the Firebase Console and create a new project.
https://console.firebase.google.comAdd your Android app by registering the app with your package name.

Download the google-services.json file and place it in your app's app/ directory.


Send notifications from the Firebase Console to your Android app.
OneSignal Integration for Notifications
Sign up for a OneSignal account at https://onesignal.com
Create a new app in the OneSignal dashboard:
- Click on "Add a New App".
- Enter a name for your app (e.g., "Quiz App").
- Click "Next".
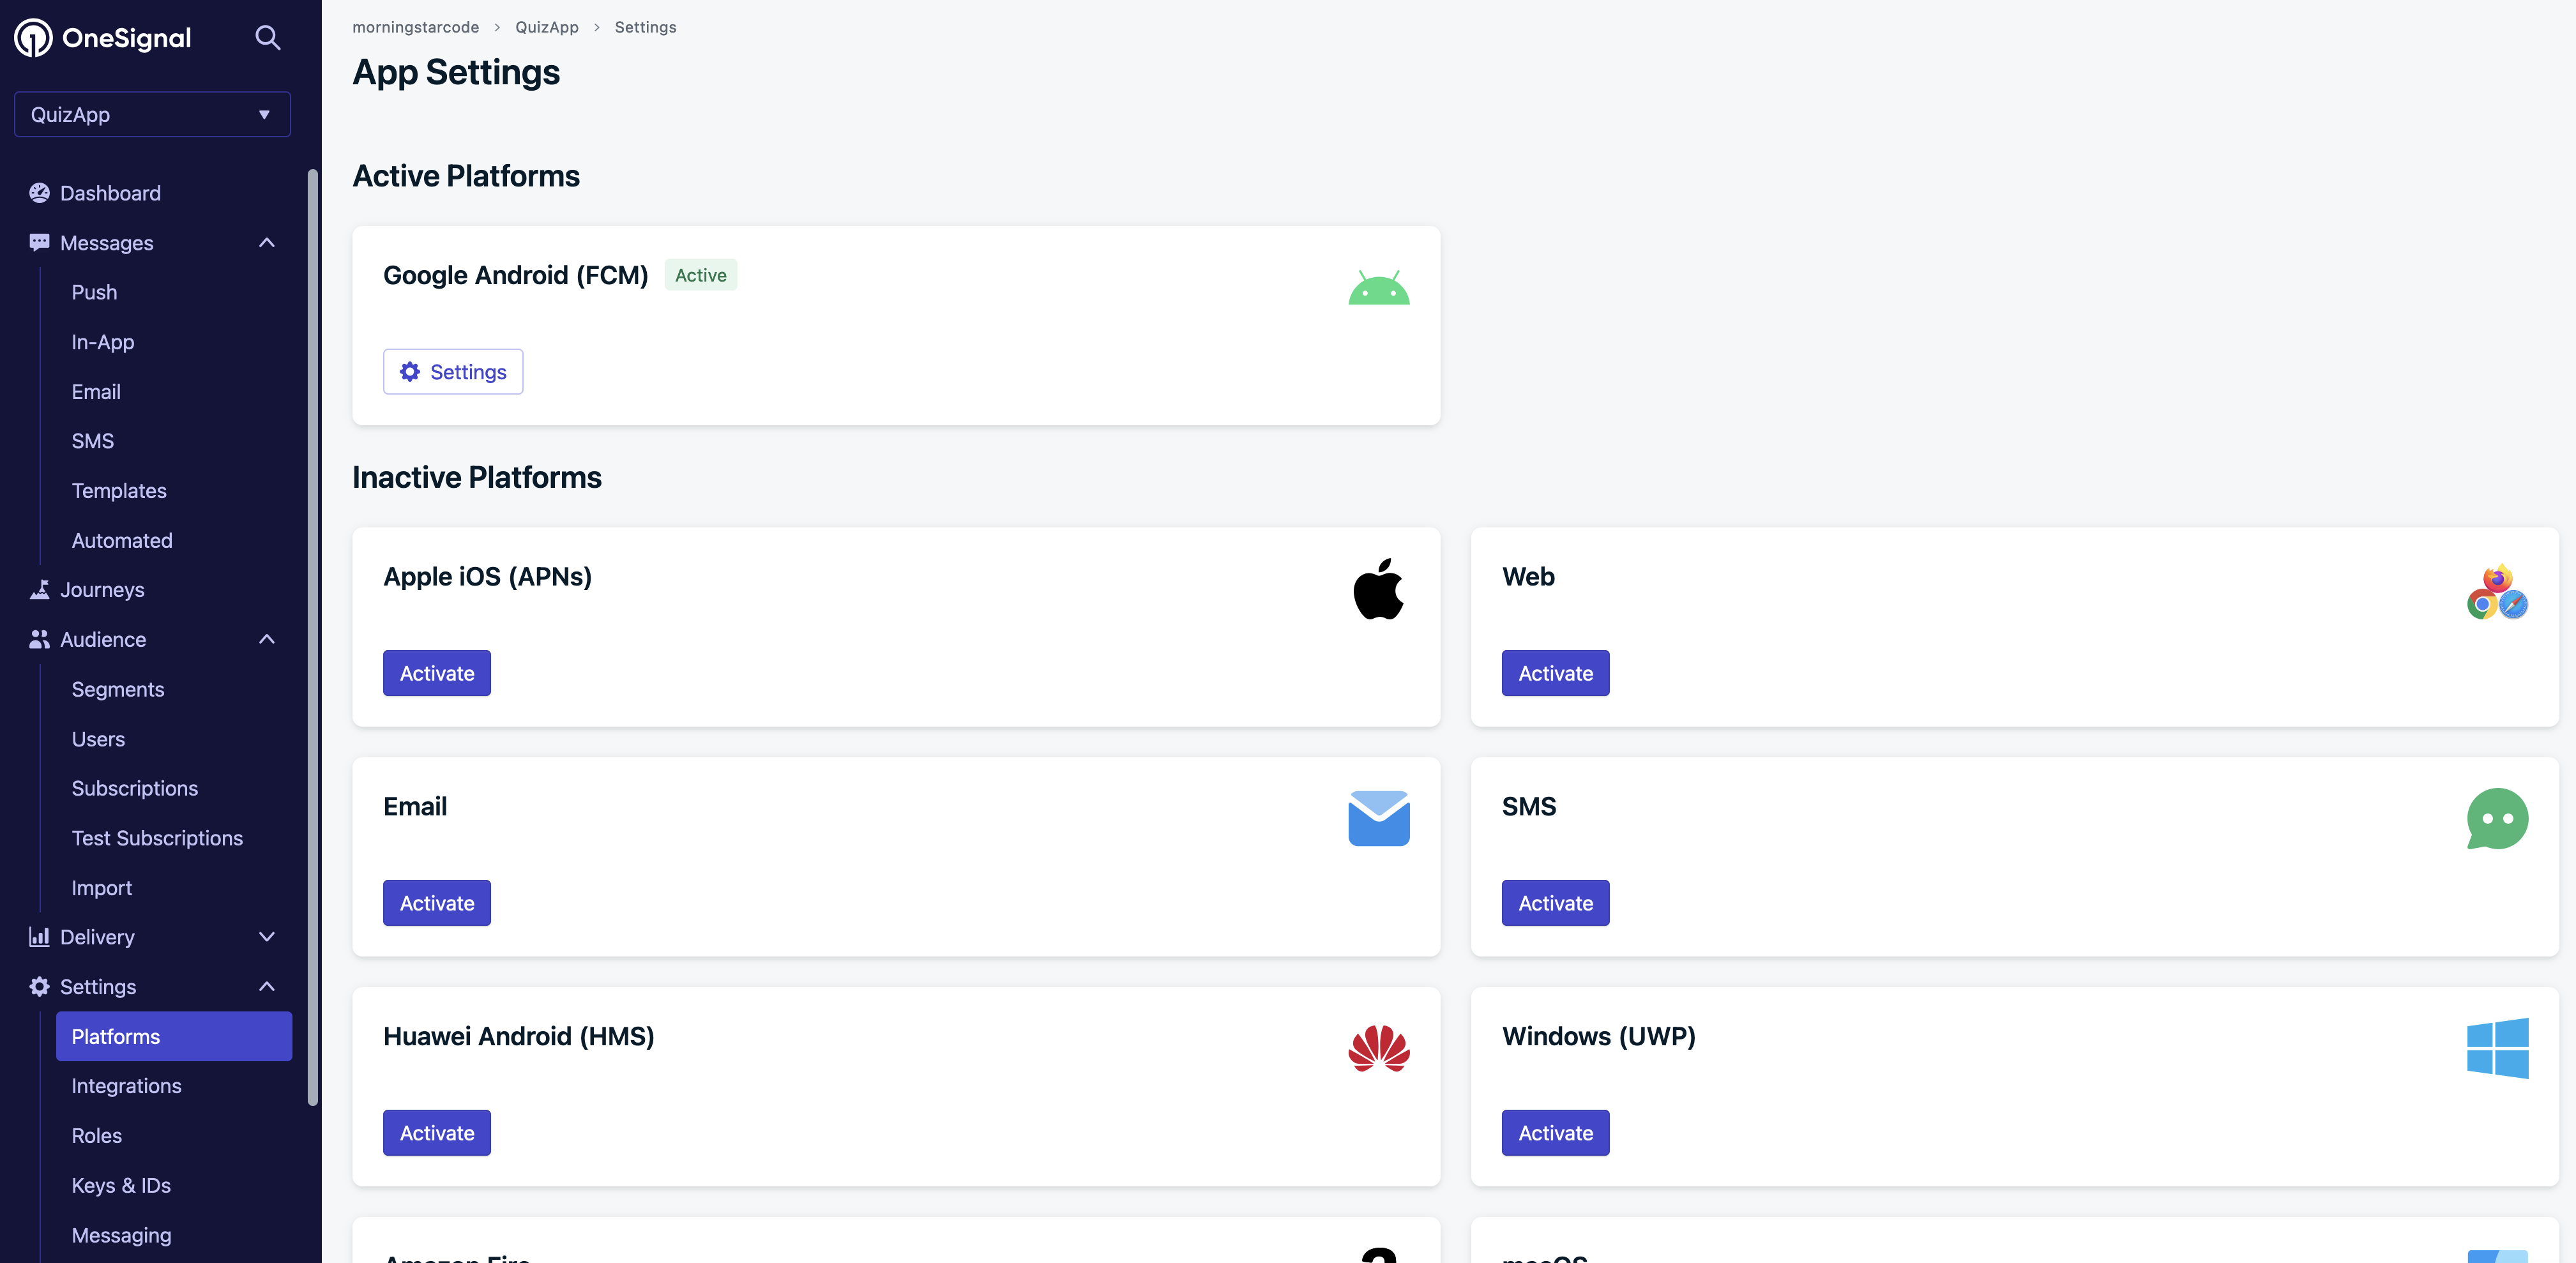
Select Google Android as the platform when prompted, as this guide focuses on Android integration.
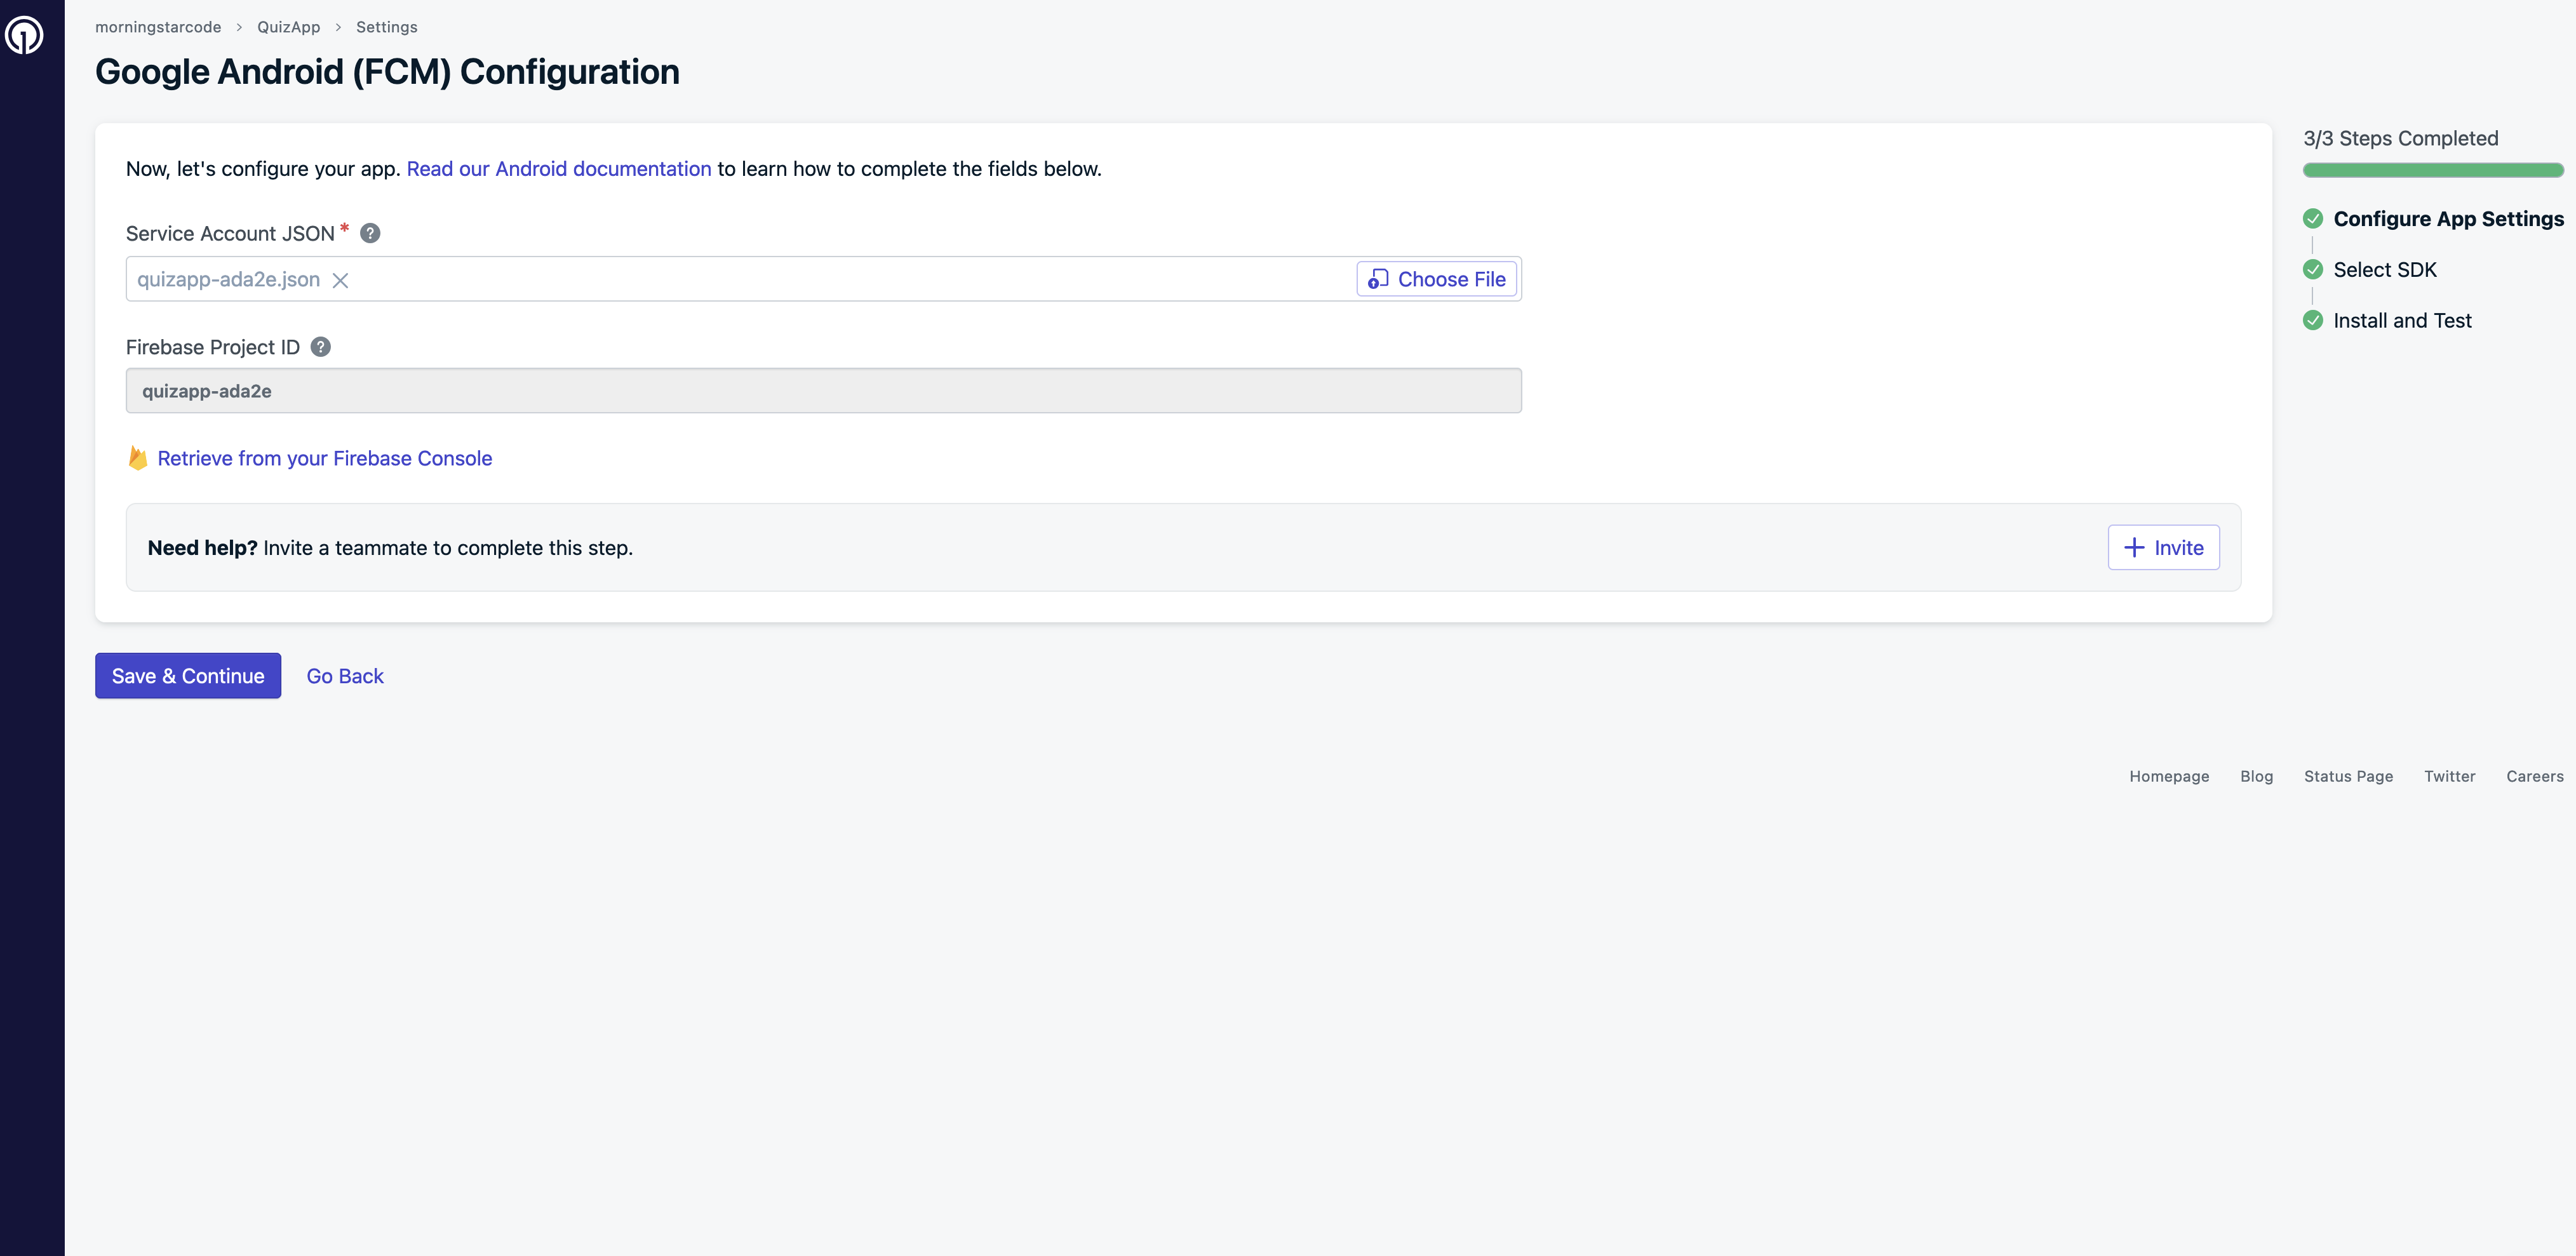
Enable Google Android (FCM) from active platforms. And click "Settings" to configure the app.
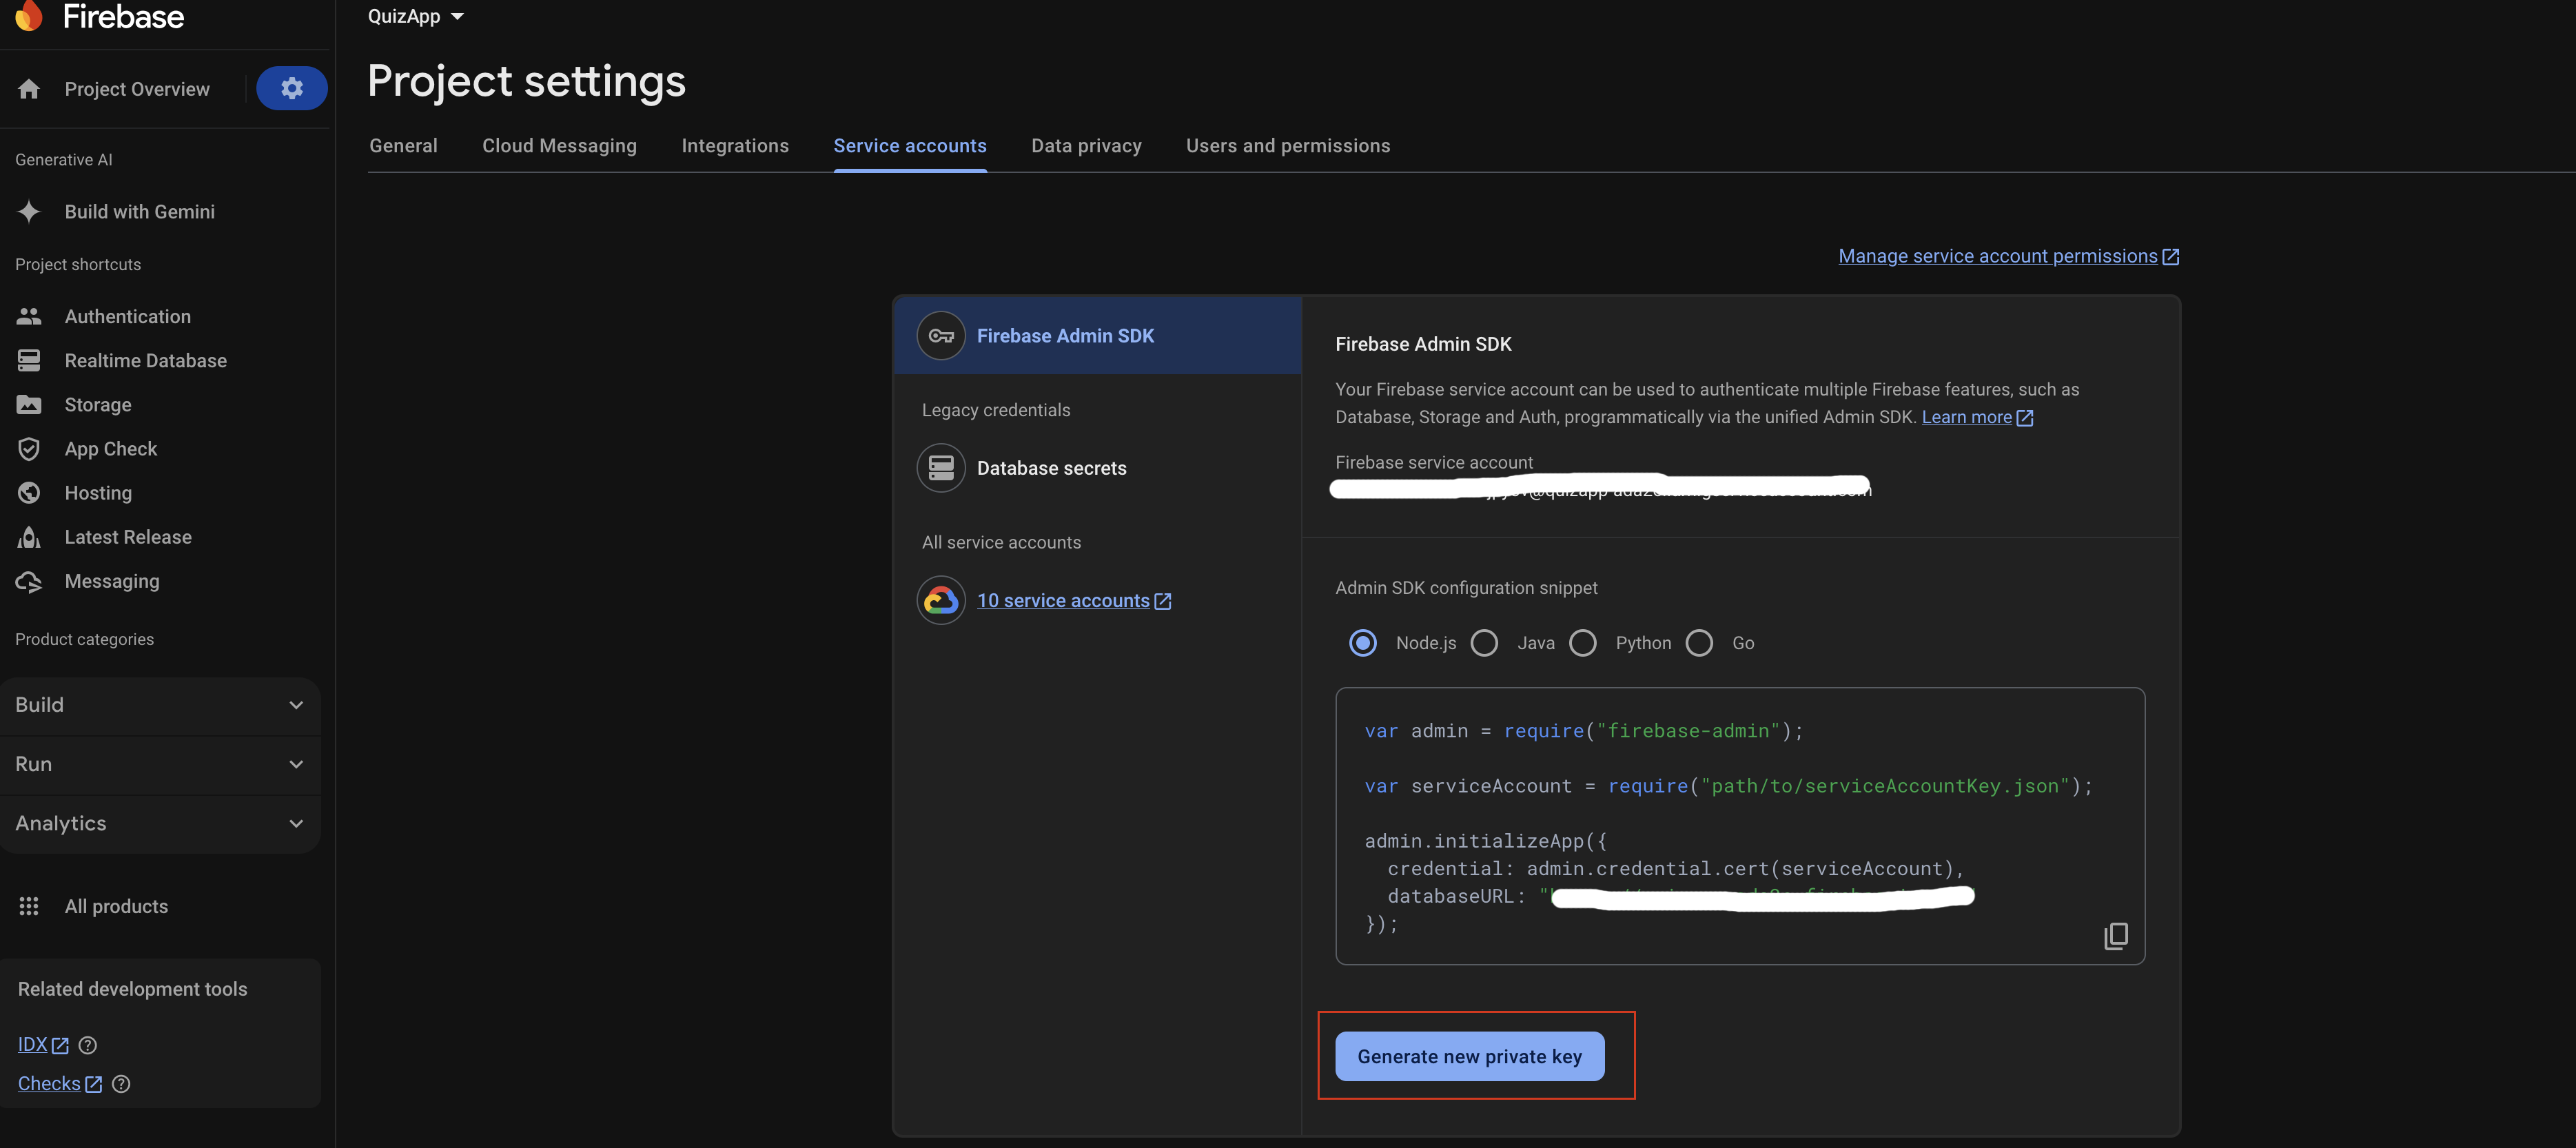
Go to your project in firebase console https://console.firebase.google.com to get service account json file.
Go to Project settings > Service accounts > Generate new private key.
Upload the service account json file in OneSignal.
Important
Please also add this service account json file in laravel project in gpt-app-admin-panel/storage/firebase/
directory.
And update the FIREBASE_CREDENTIALS path in gpt-app-admin-panel/.env file.
This is important to ensure the ability to send notifications from the admin panel.
Important
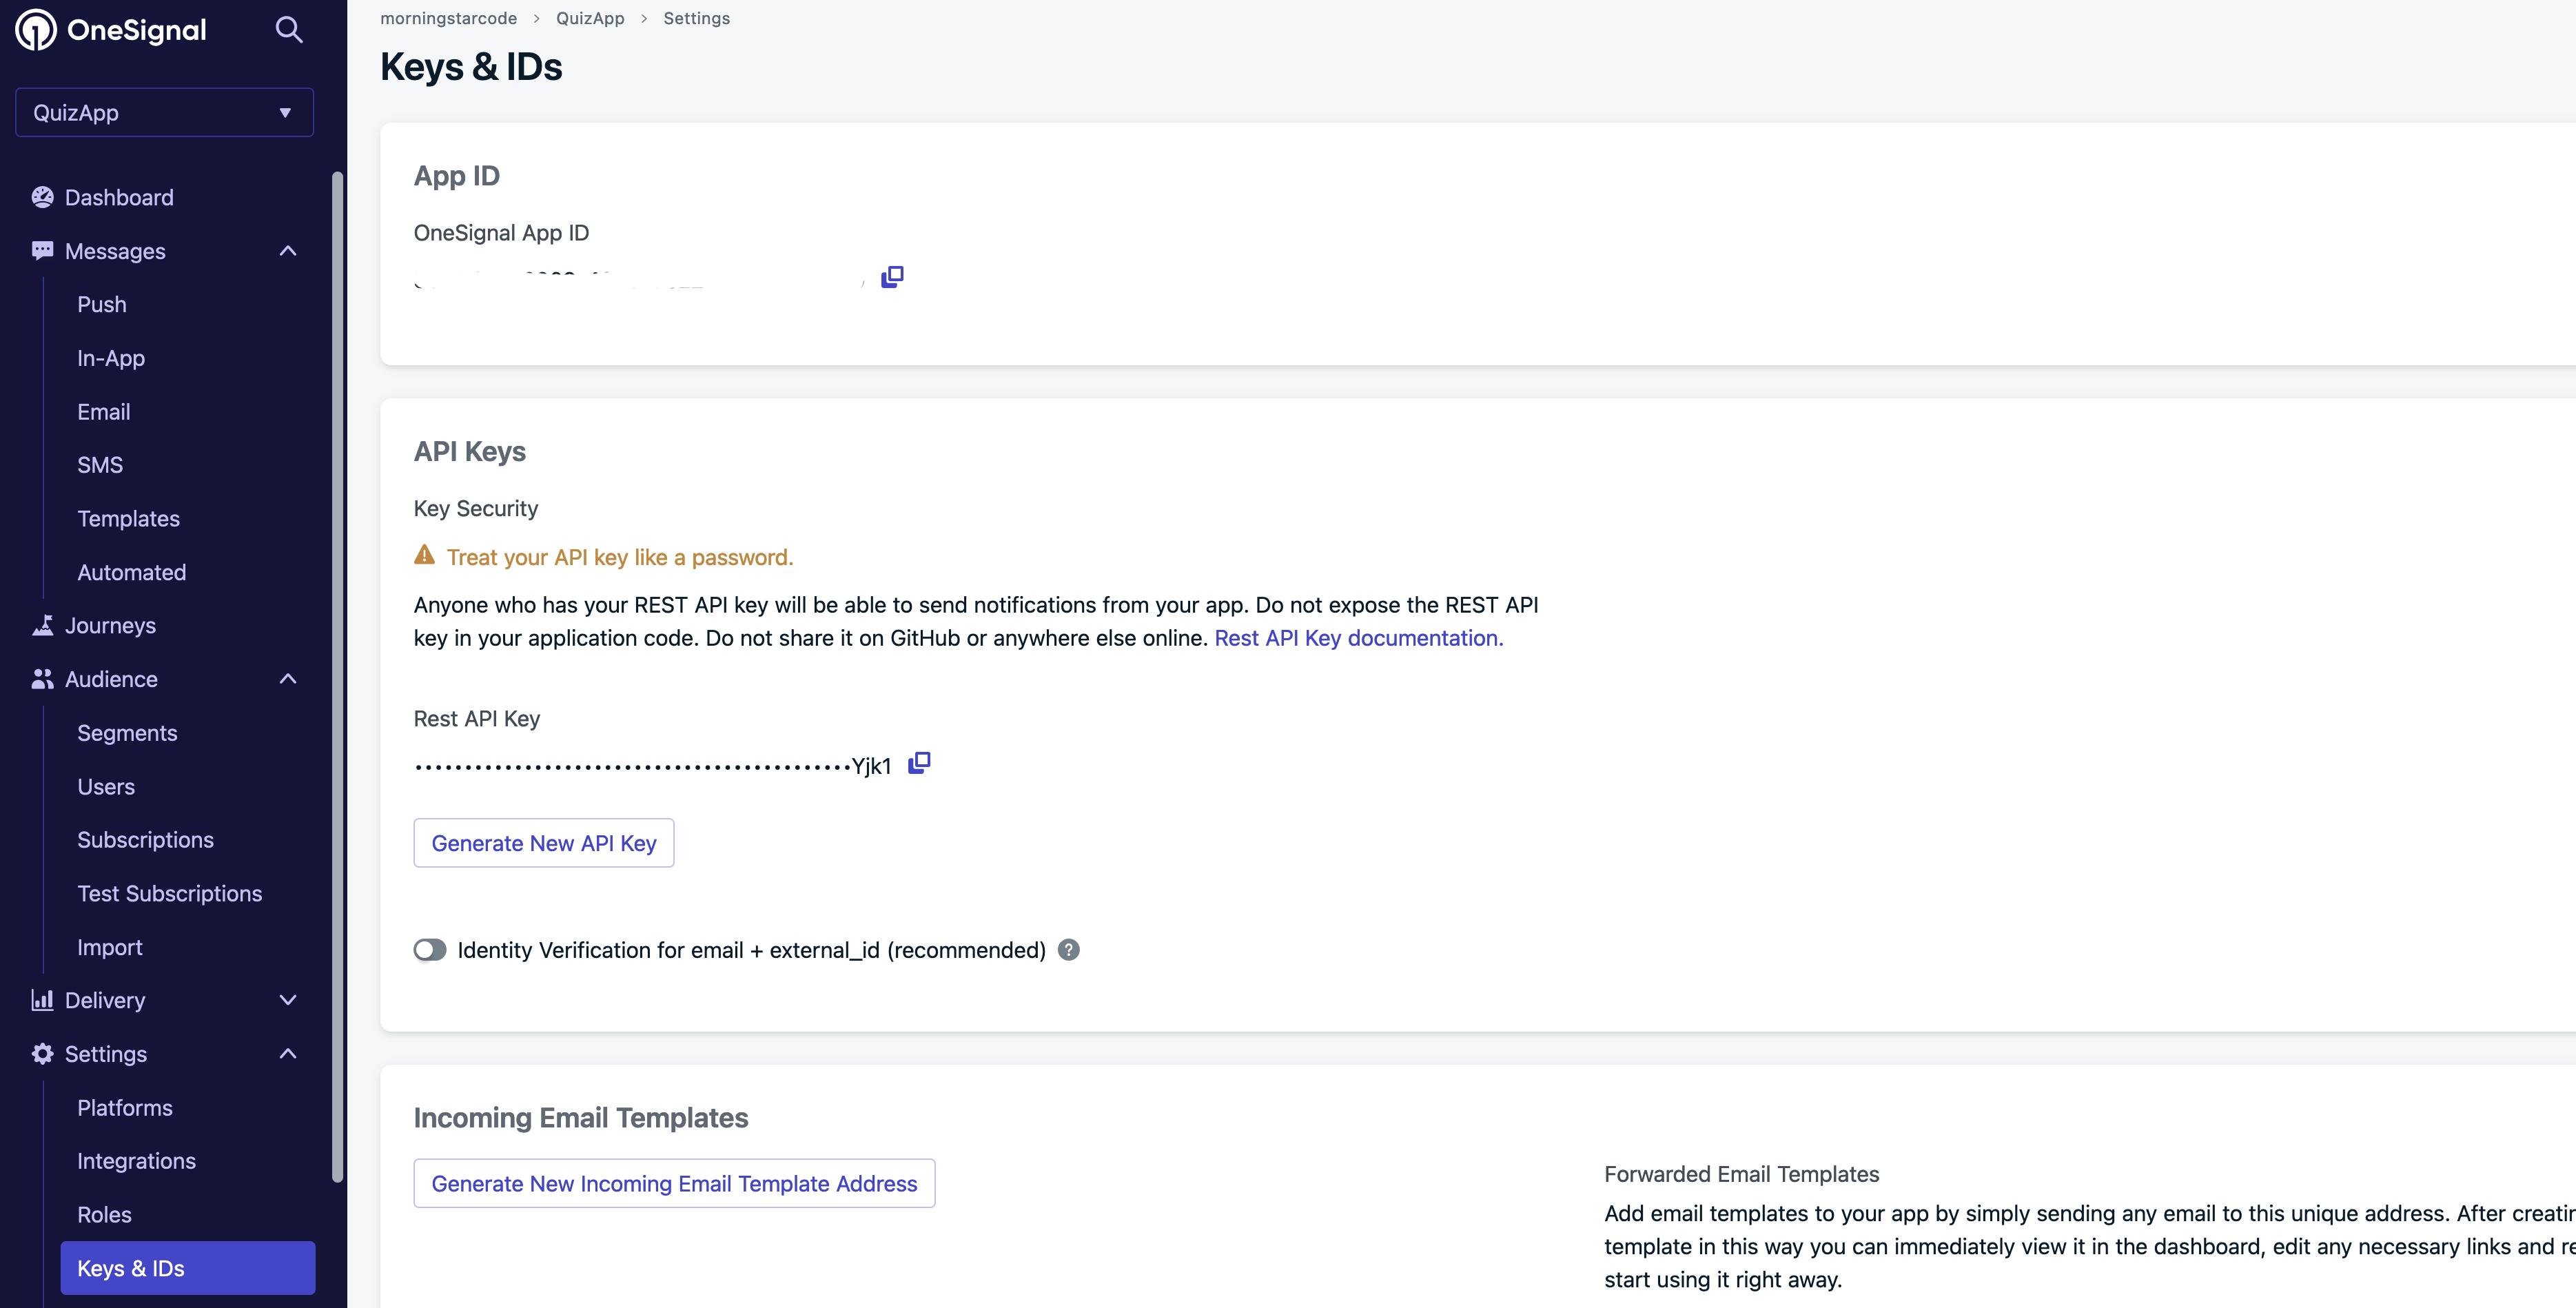
Please also update ONESIGNAL_APP_ID and ONESIGNAL_REST_API_KEY in the gpt-app-admin-panel/.env file. This is important to ensure the ability to send notifications from the admin panel.
Languages
To update the language string values in your Android app, follow these steps:
Navigate to the res folder of your Android project: gpt-app-android/app/src/main/res/
Open the strings.xml file located in the values directory for the default language: res/values/strings.xml
To support additional languages, create new directories following this pattern:
res/values-[language_code]/strings.xml
Example: For Turkish, use res/values-tr/strings.xml.
In each strings.xml, update the necessary string values based on the locale
You can also add more languages by creating new directories for each language and updating the strings.xml file with the appropriate translations.
Important: After updating the locale strings in the Android project, make sure to add the corresponding locale in the Admin Panel to ensure it works properly in the app.

In-App Products
Go to the Google Play Console and sign in with your Google developer account.
https://play.google.com/console
From the dashboard, select the app for which you want to add In-App Products.
If your app is not yet published, you’ll need to create it and submit at least one build before adding IAPs.
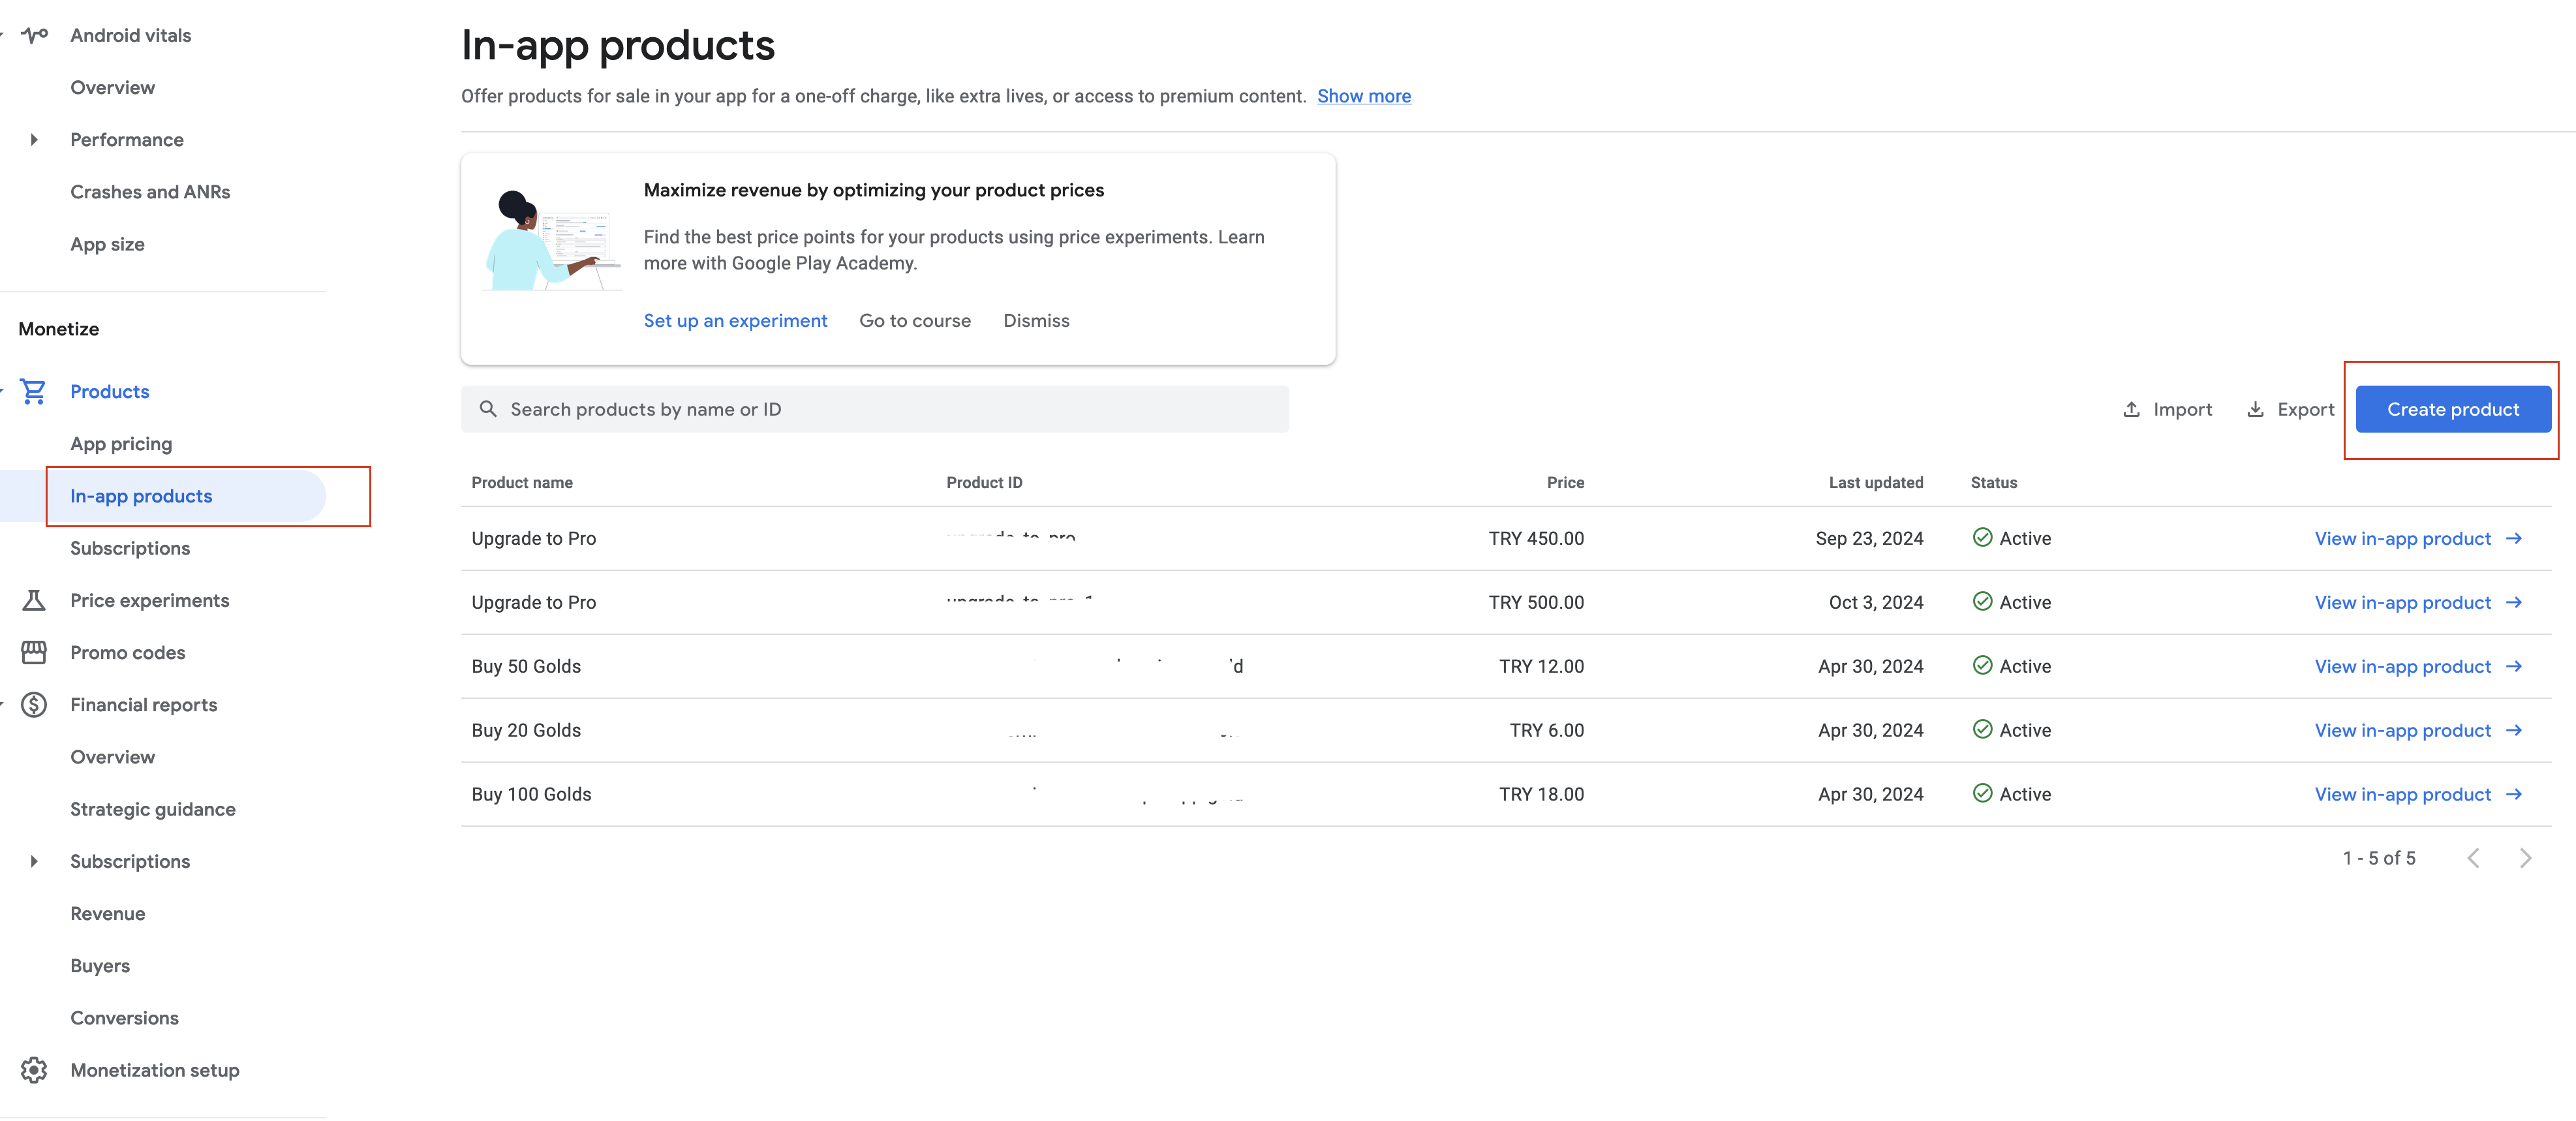
In the left-hand menu, expand the Monetize section and select Products > In-App Products.
Click on Create Product to add a new In-App Product.
Managed Products: One-time purchases, such as consumables or non-consumable digital items (e.g., coins, skins).
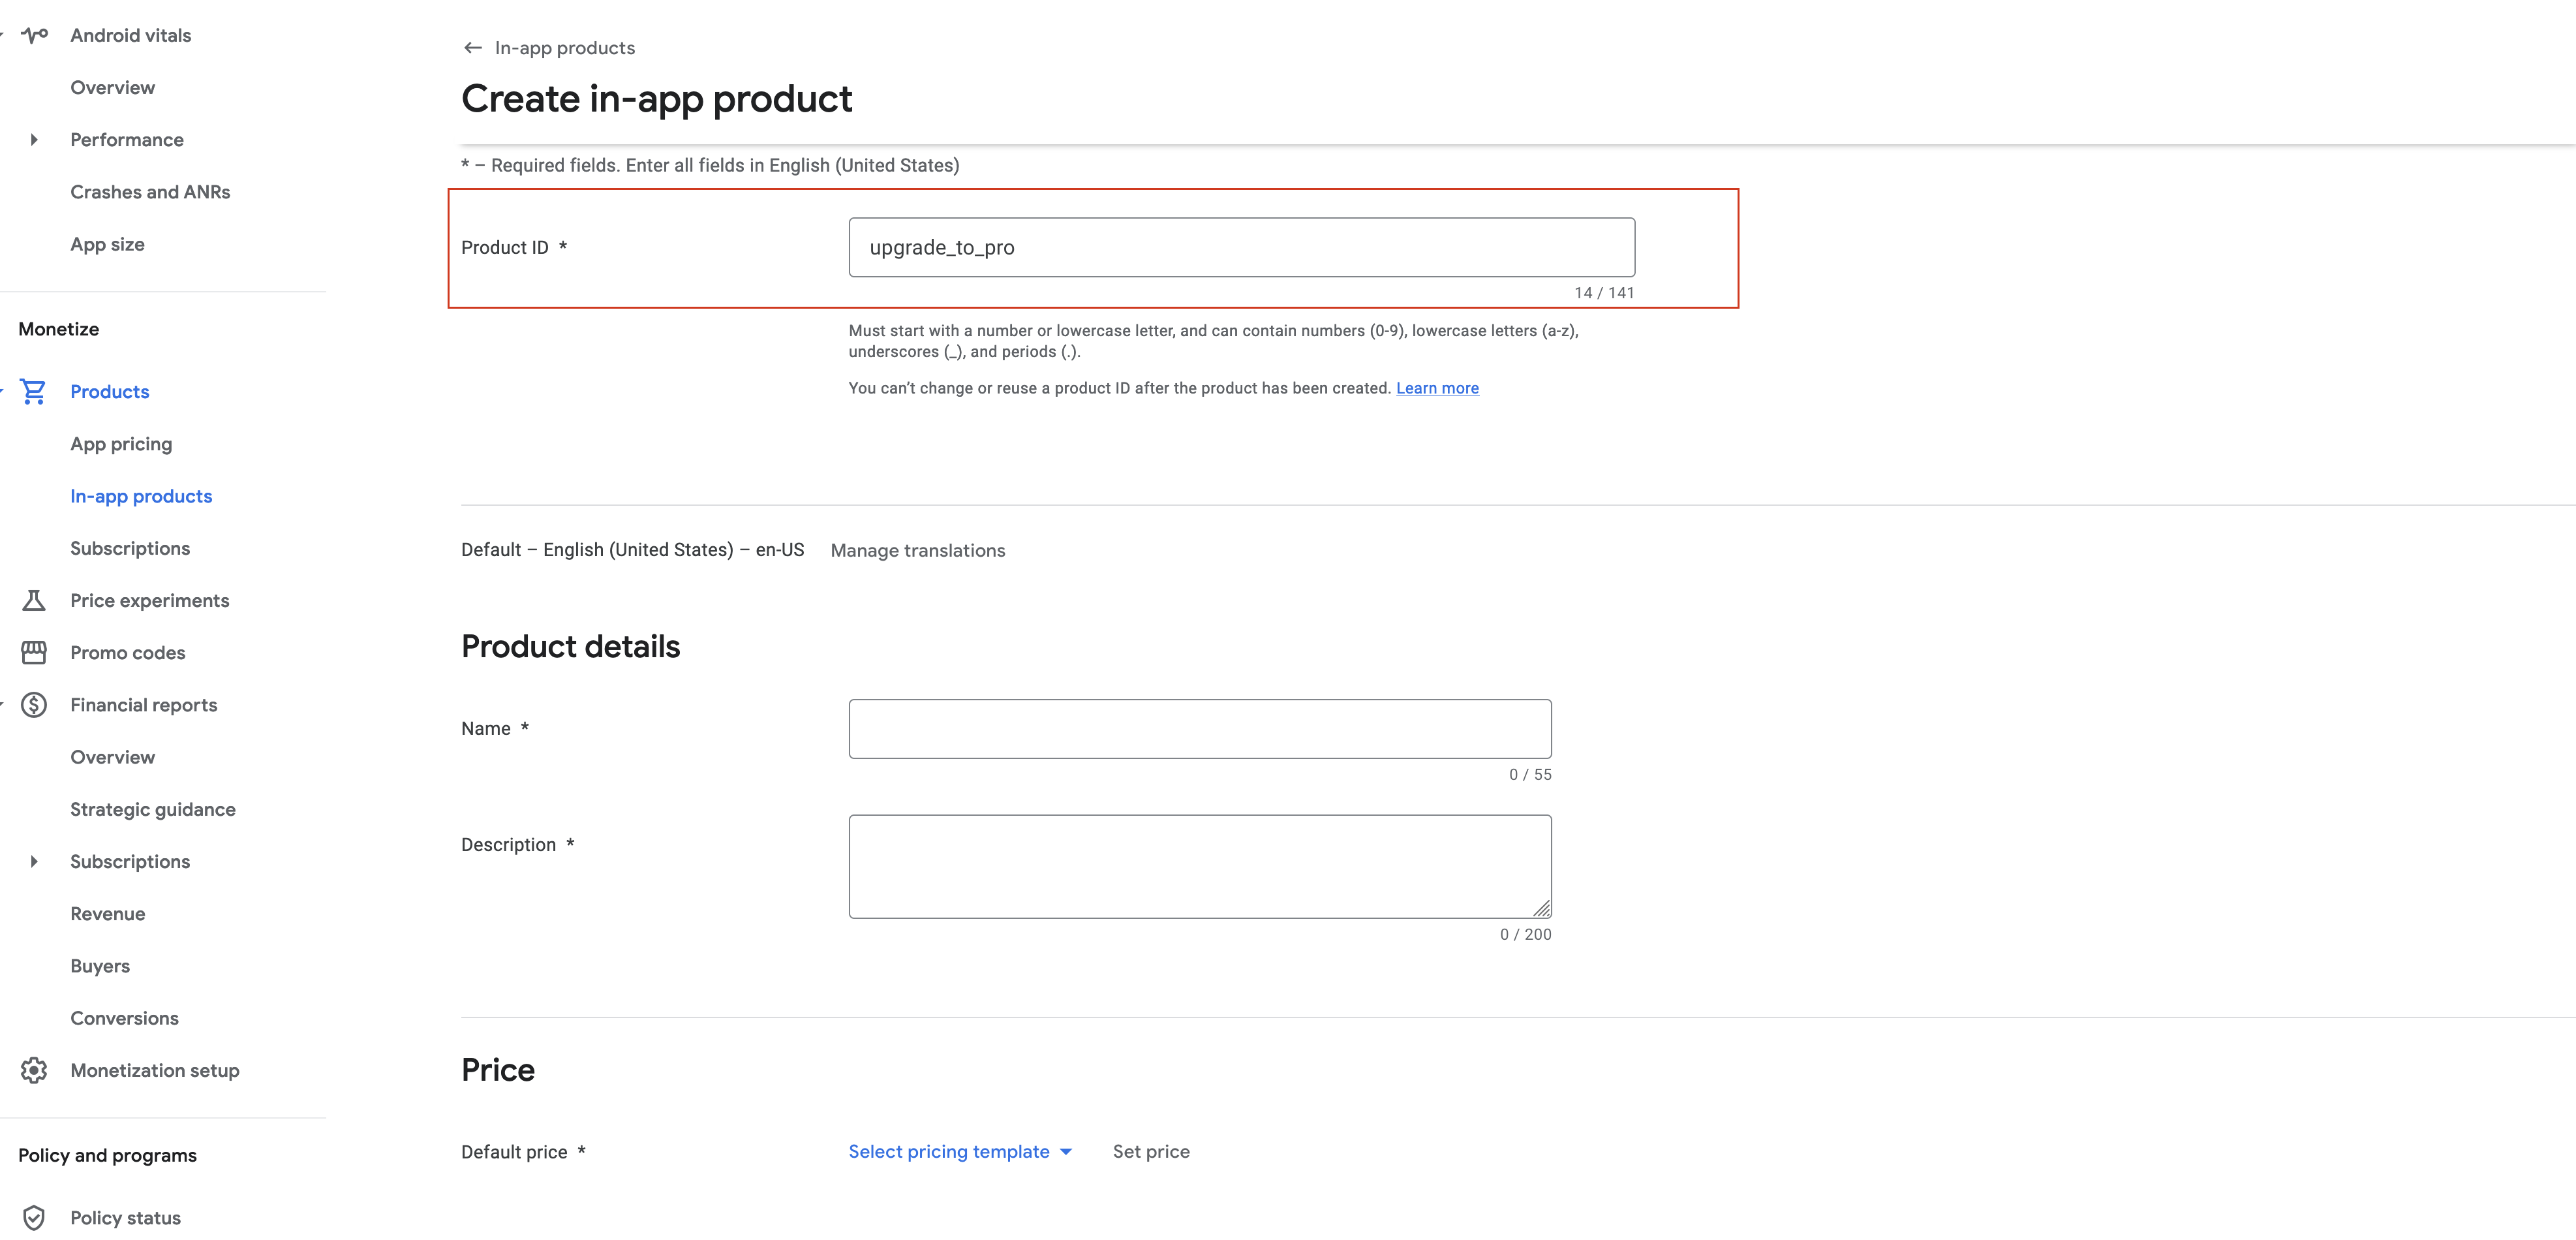
Product ID: Enter a unique ID for your product. This ID will be used in your app's code to refer to this item (e.g., premium_upgrade or coin_pack_1000).
Product Name: Provide a descriptive name for the in-app product. This is for internal use only and won’t be visible to users.
Description: Add a short description of the product that will be visible to users when they view the purchase.
Pricing: Set the price for your in-app product. You can choose a base price, and Google Play will automatically convert it to other currencies for global users.
After configuring the in-app product details, set its status to Active.
Save the changes. Your in-app product will now be available in your app once it is live on the Google Play Store.
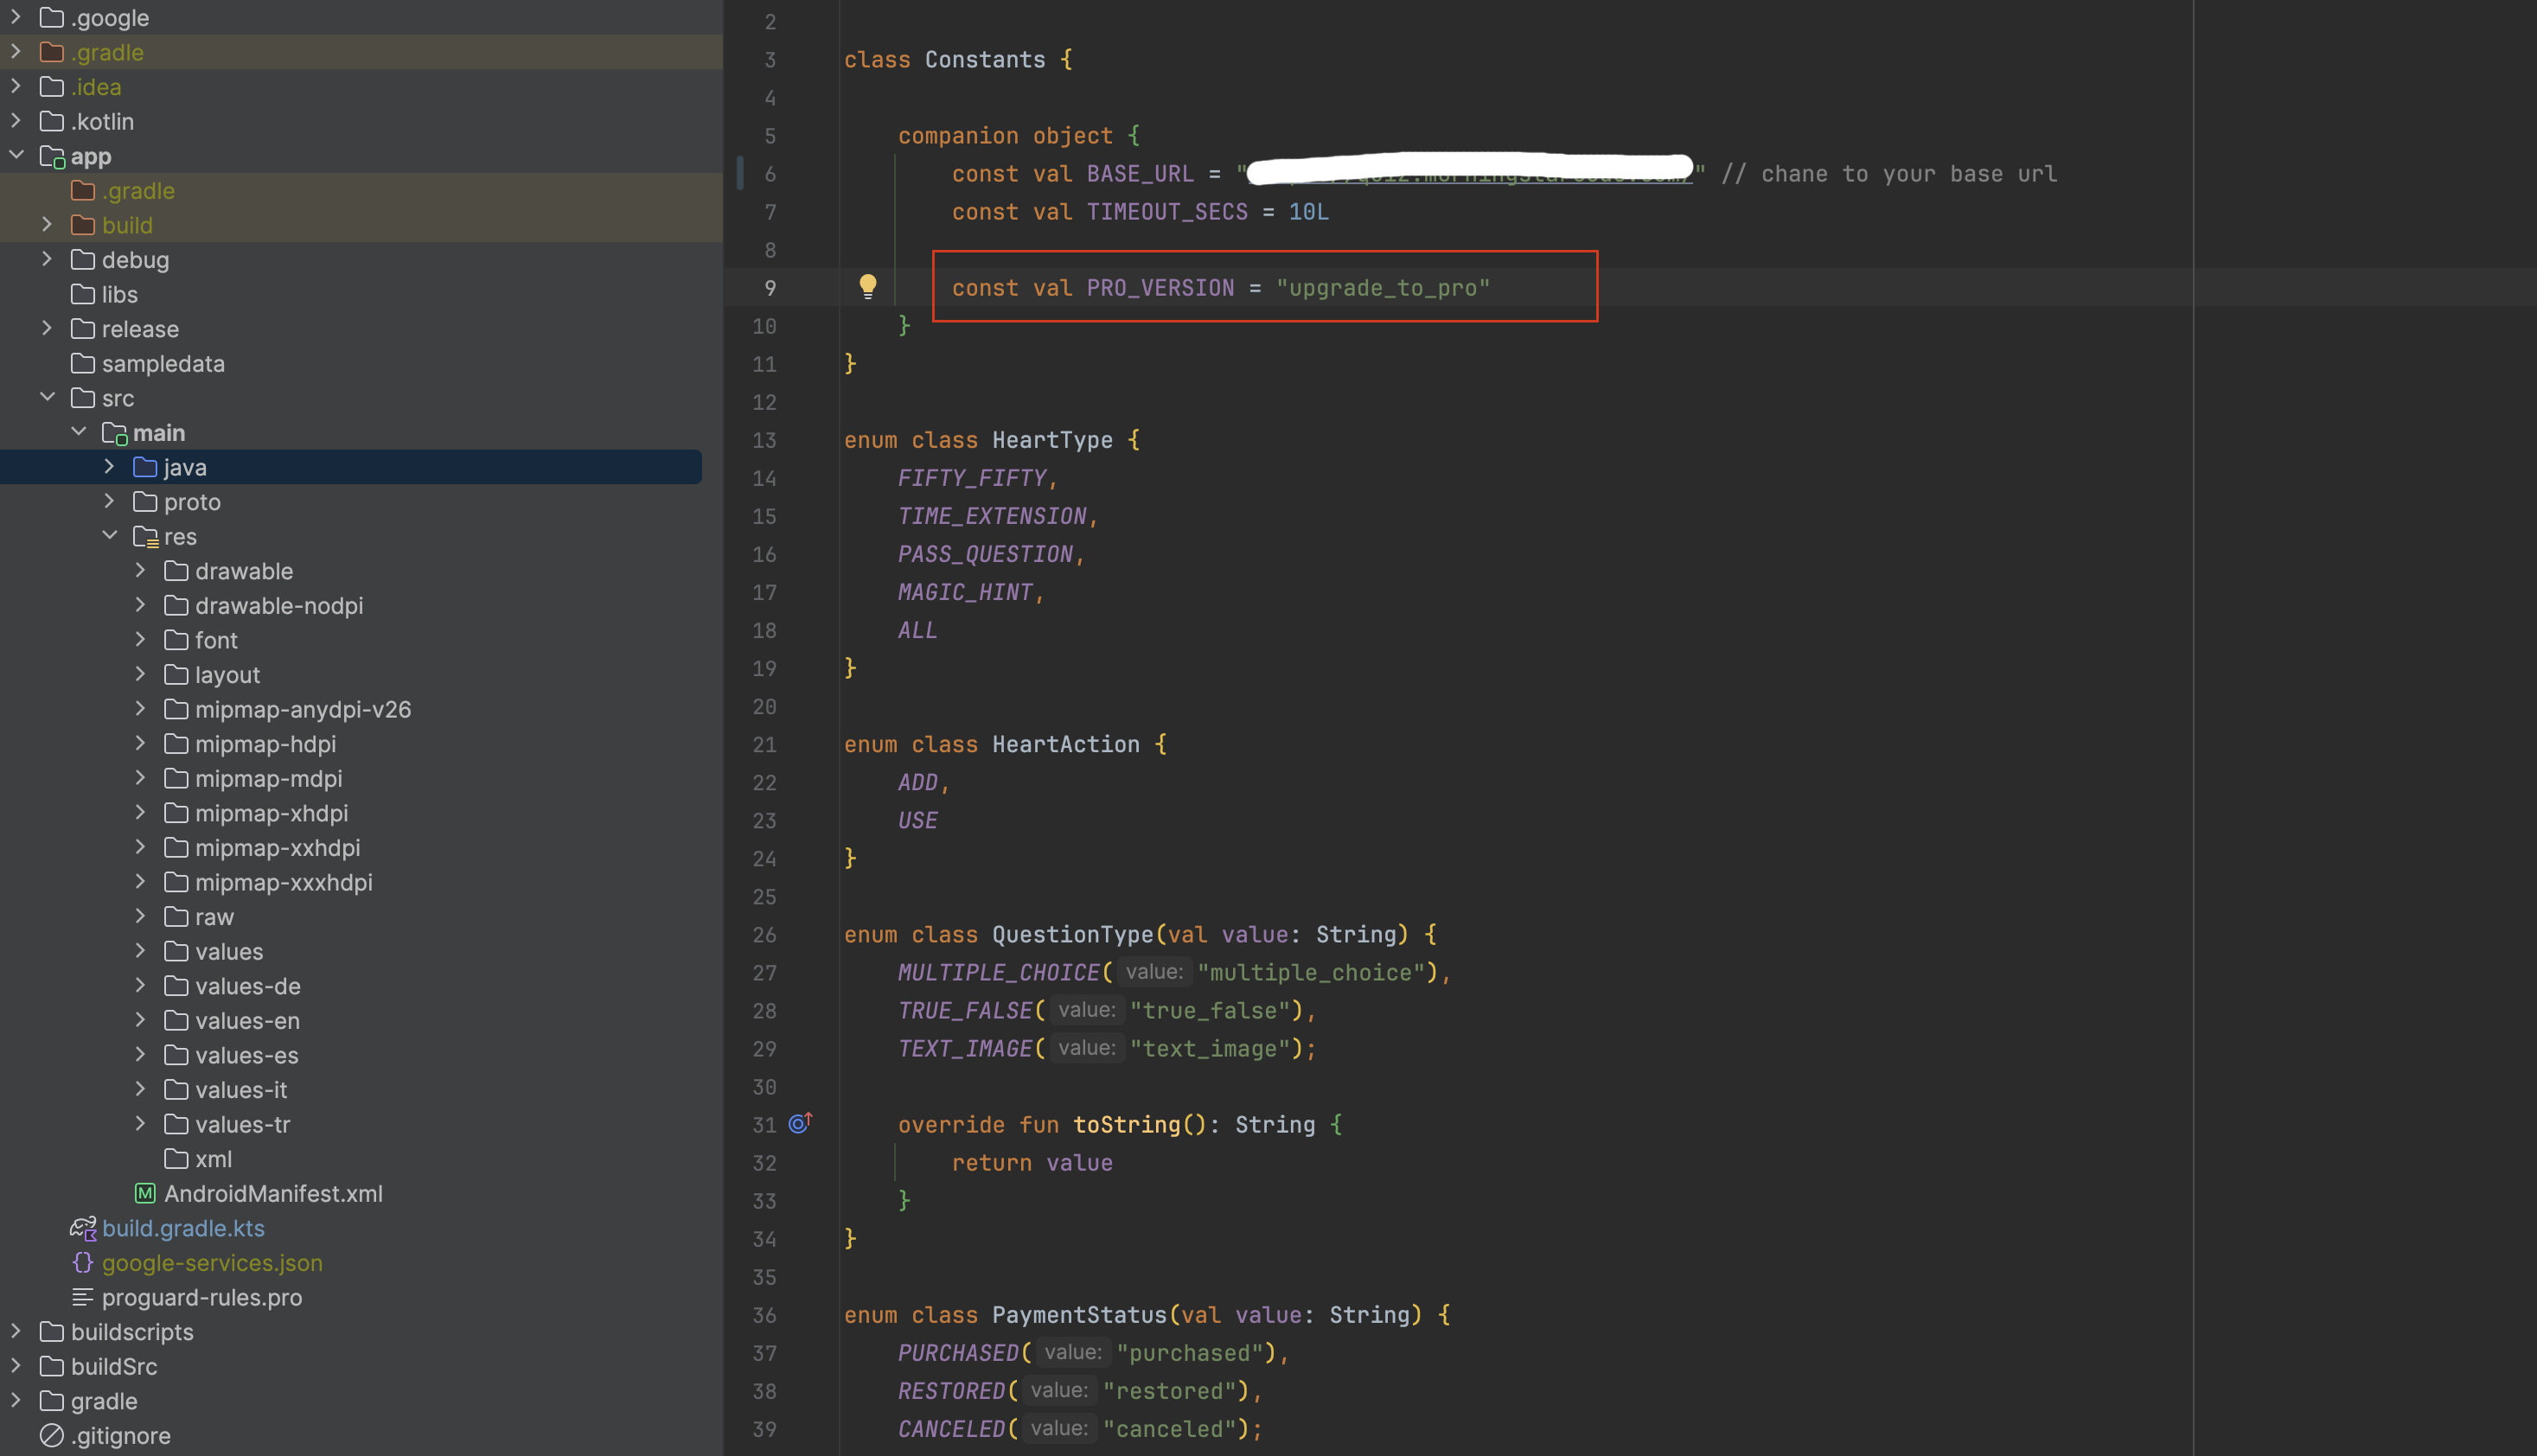
You'll need to refer to the Product ID you created in the Play Console when coding the purchase functionality.
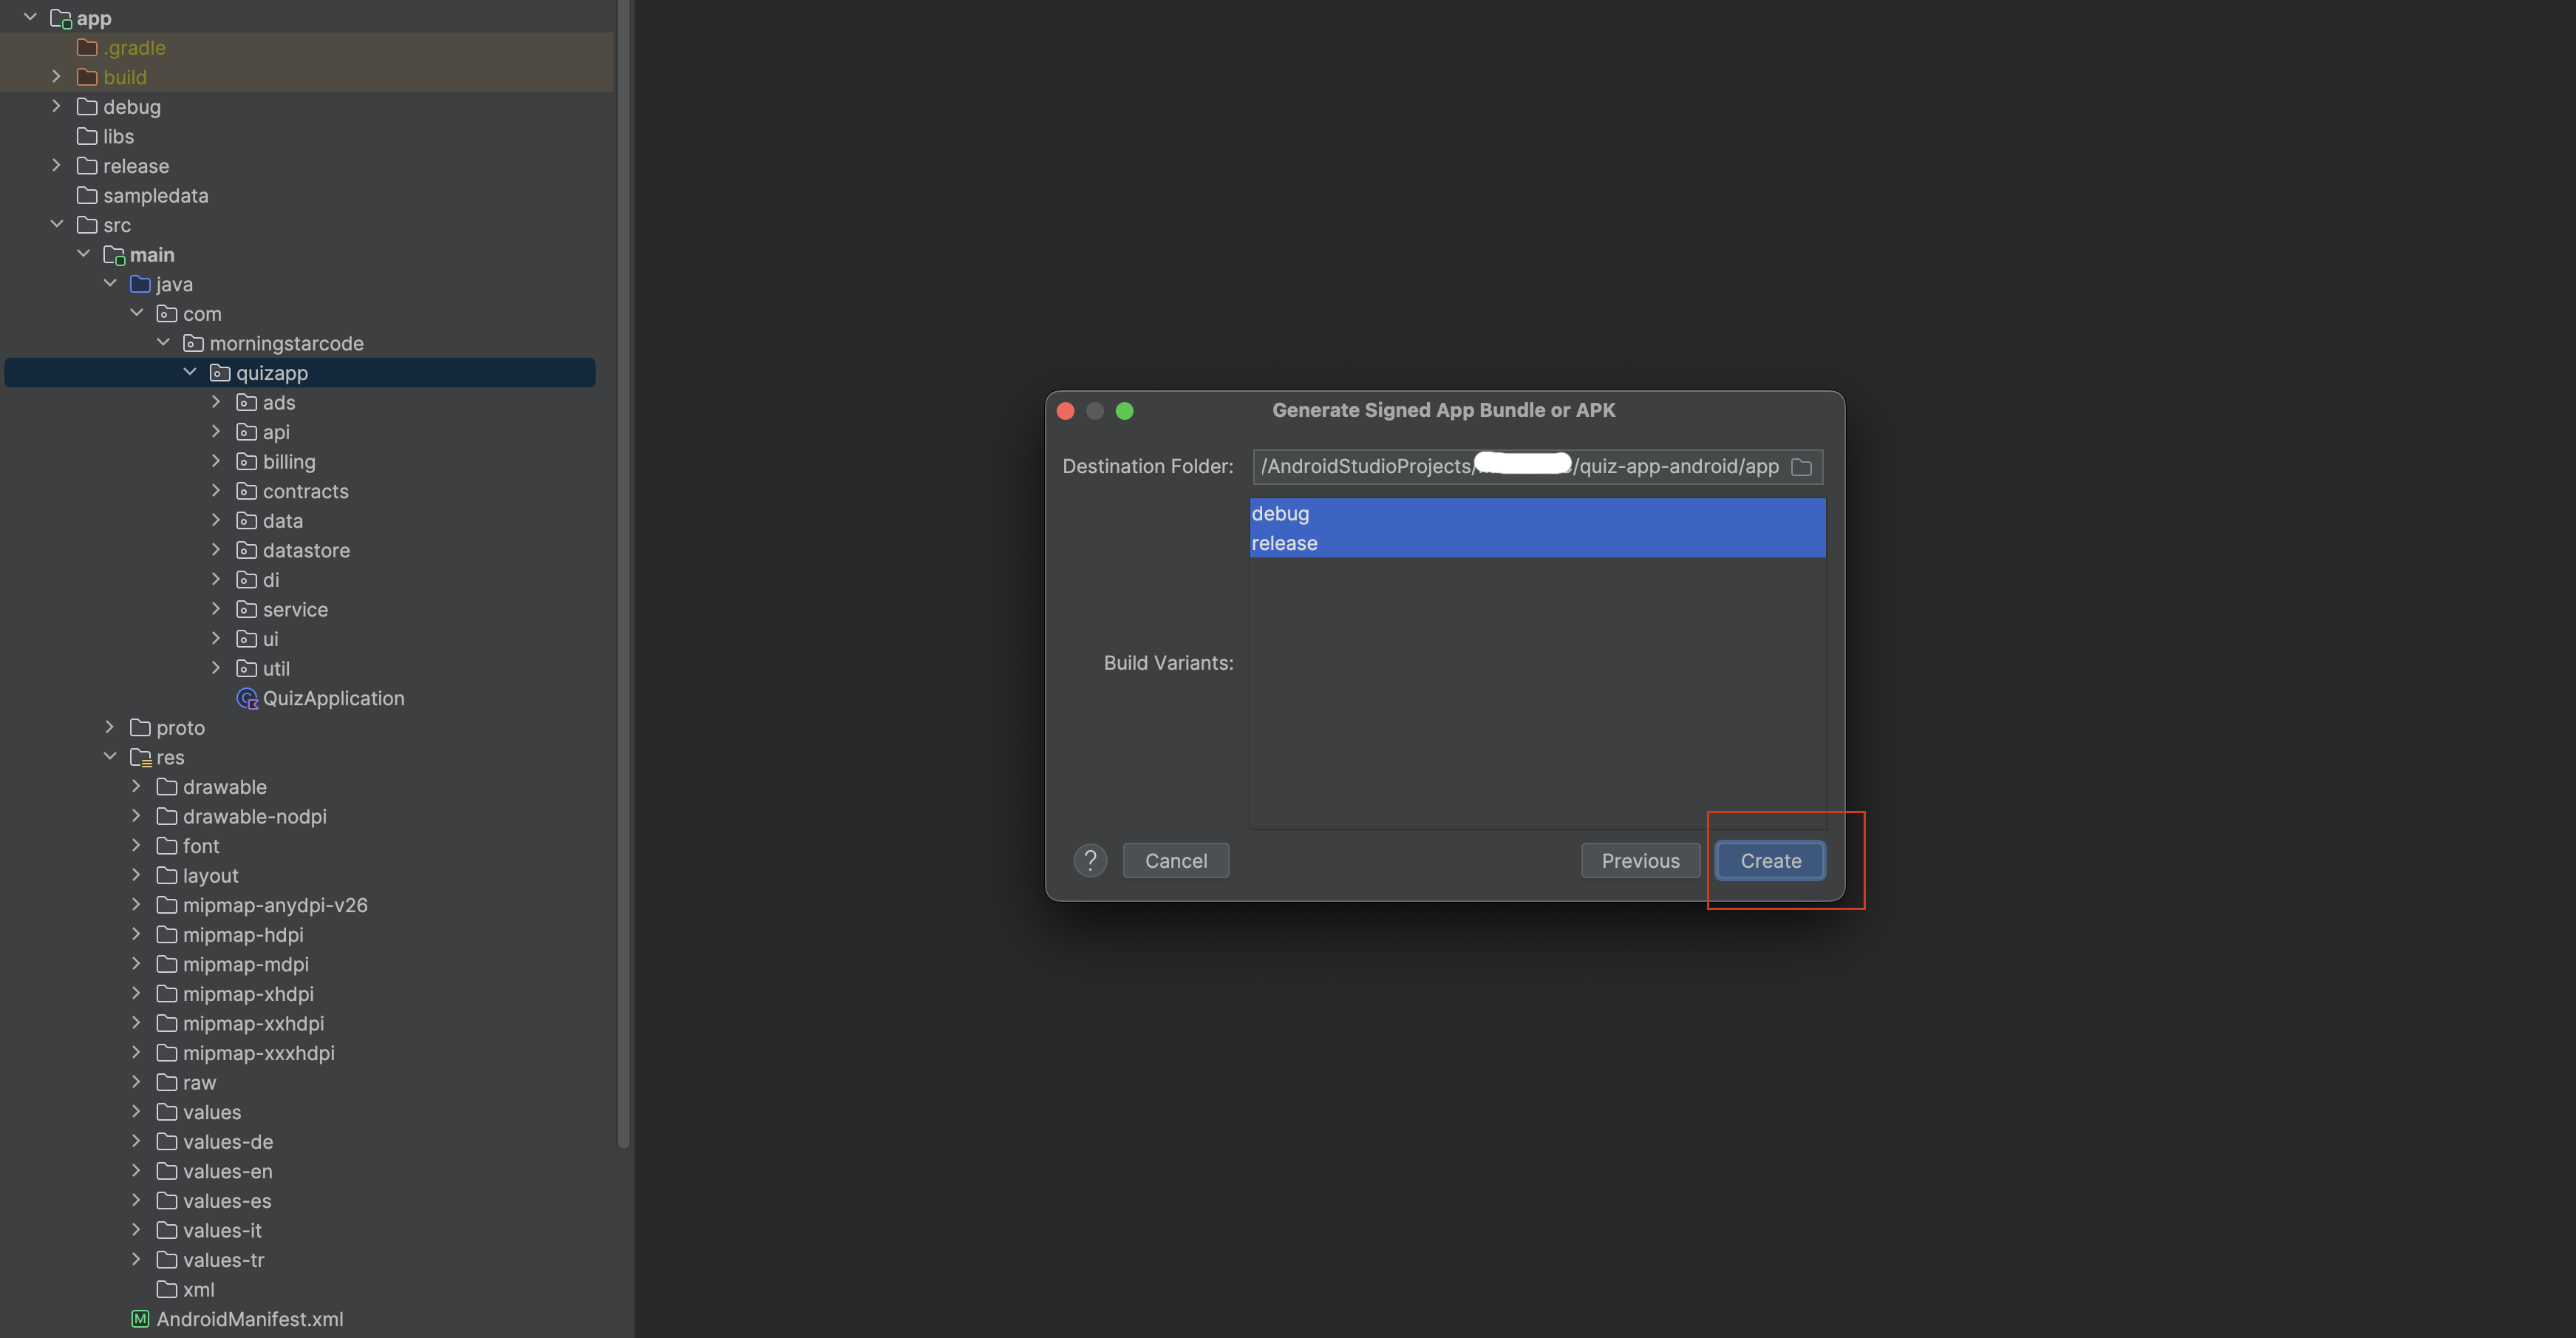
Generating APK or Bundle
To generate APK or Bundle, follow the steps below:
Open Android Studio and click on Build menu and select Build Bundle(s) / APK(s).
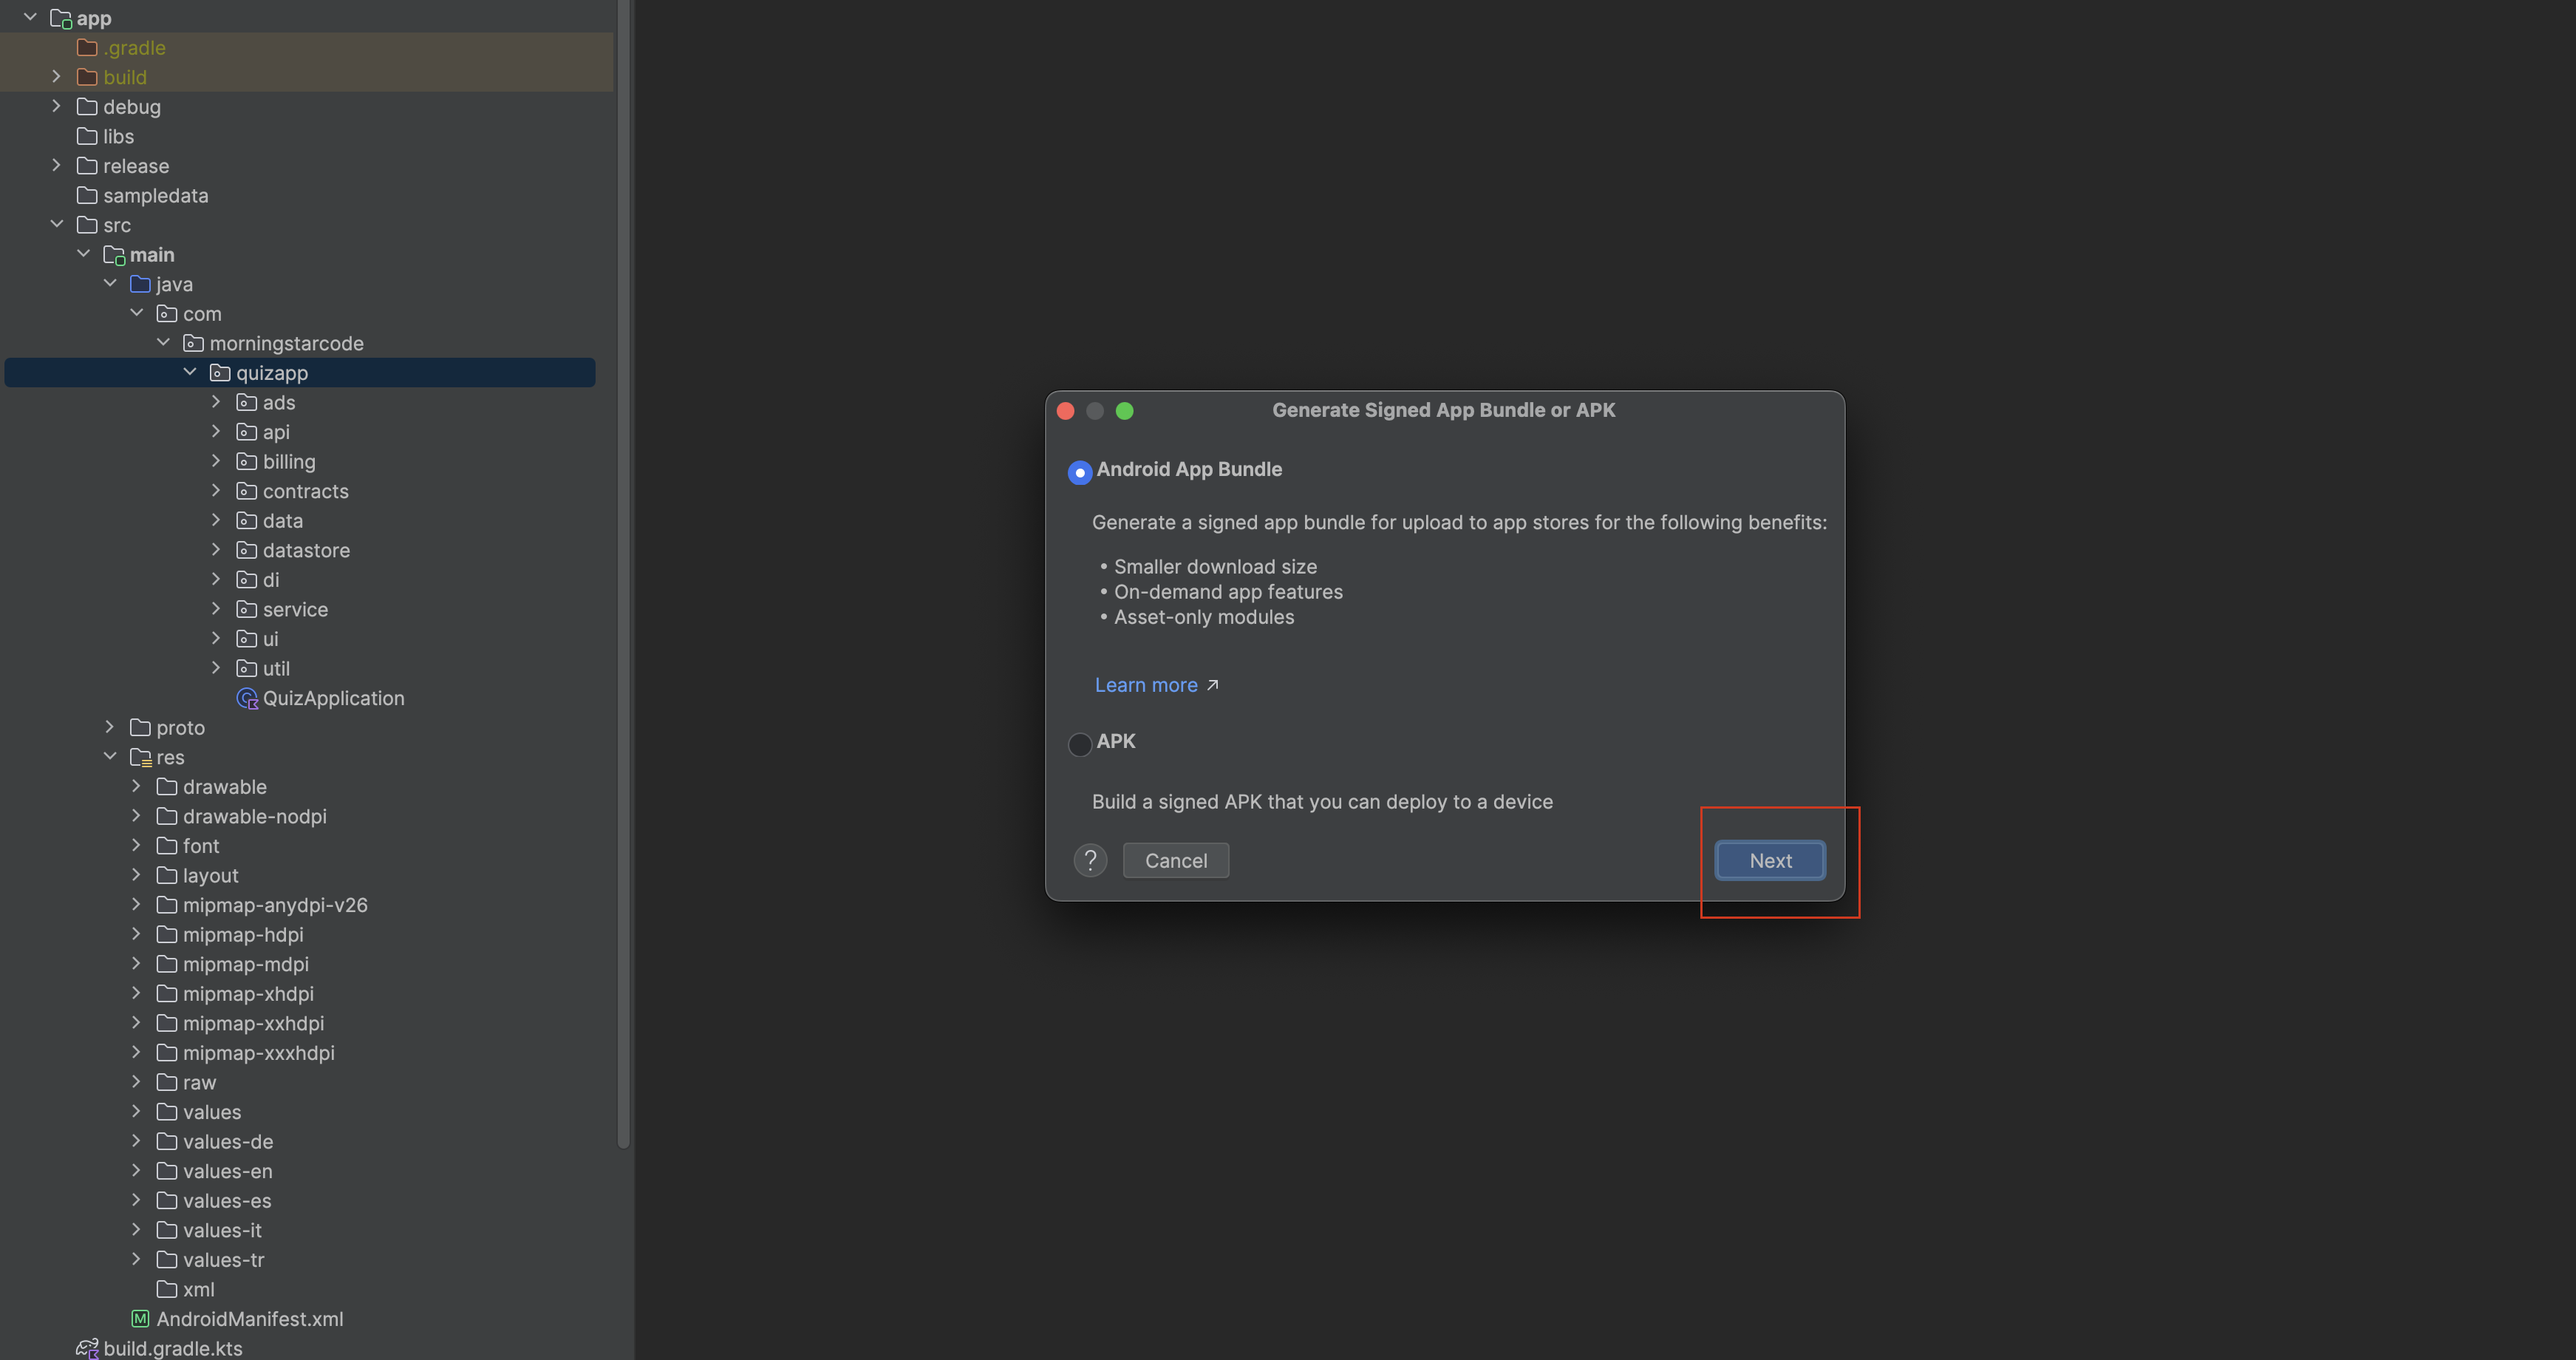
Create a JKS key store file for signing the APK or Bundle.

After creating JKS key store file, click on Next and select Release and click on Finish. It will generate APK or Bundle file. You can upload this file to Google Play Store.
Publishing Apps on Google Play
To publish your app on Google Play, follow the steps below:
Step 1: Create a Google Play Developer Account here.
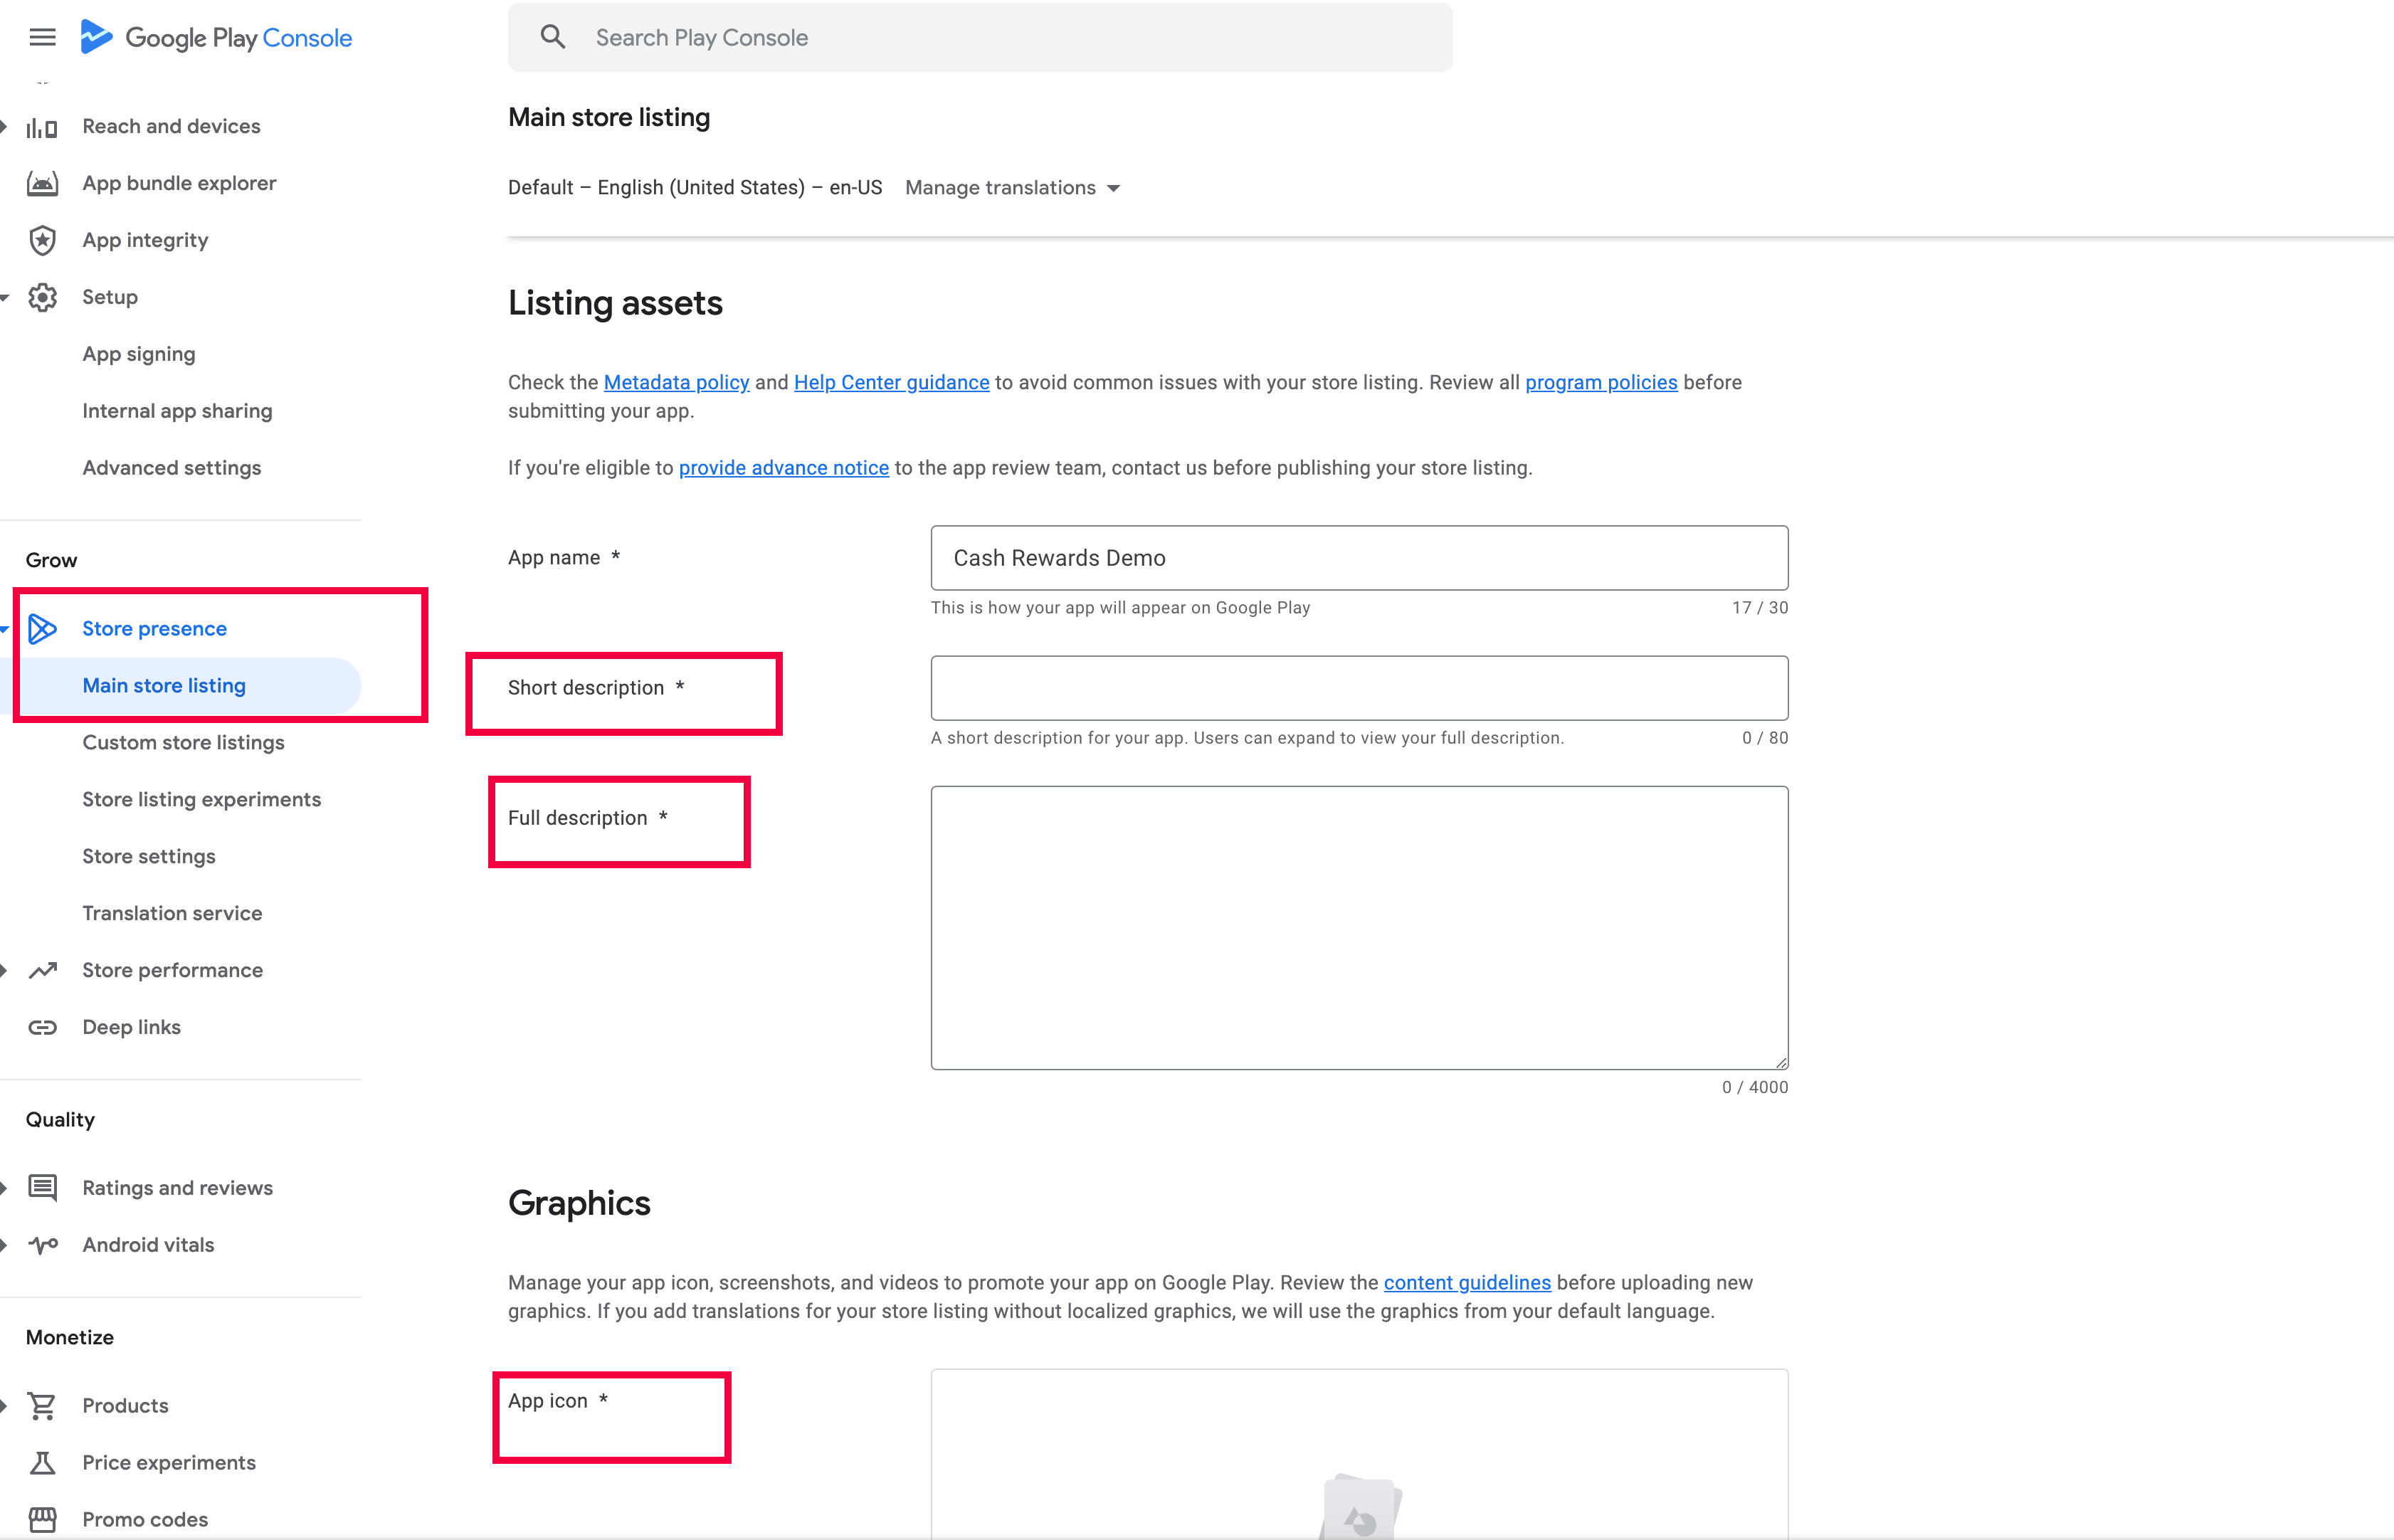
Step 2: Prepare Store Listing
Open Google Play Console and create a new app.
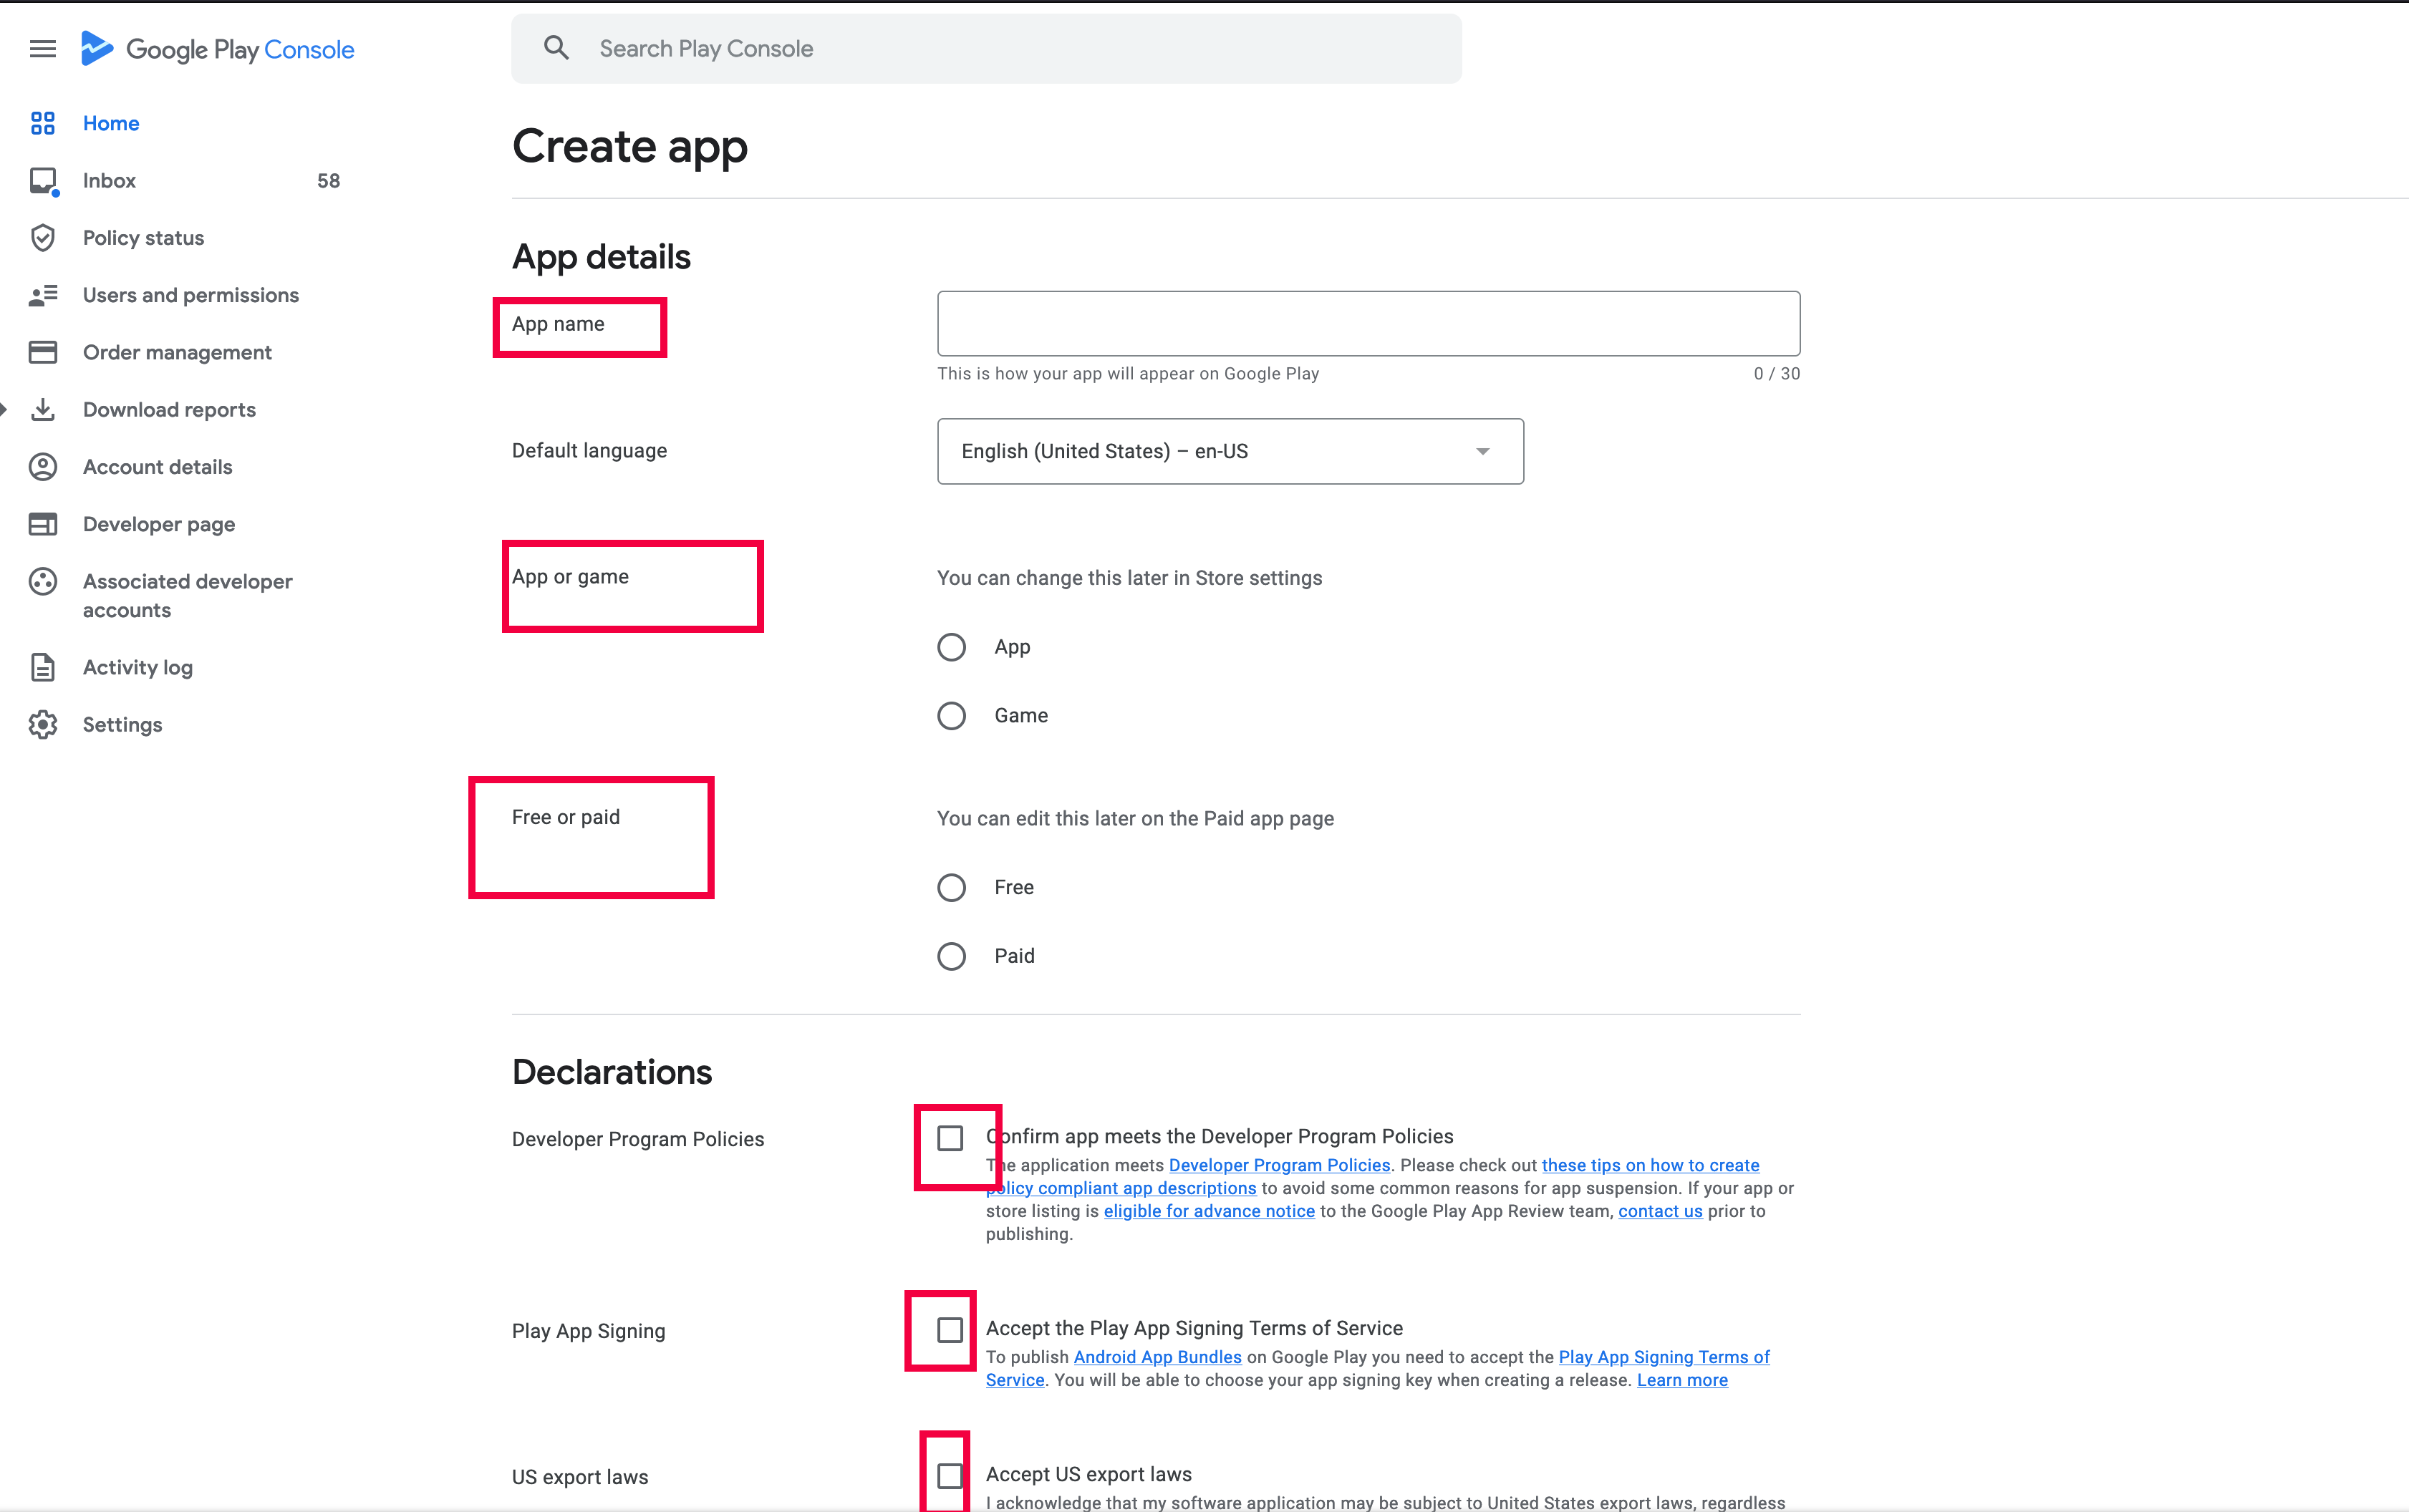
Fill in the required information, including app name, description, screenshots, and category.
Upload the APK or Bundle file generated from Android Studio.
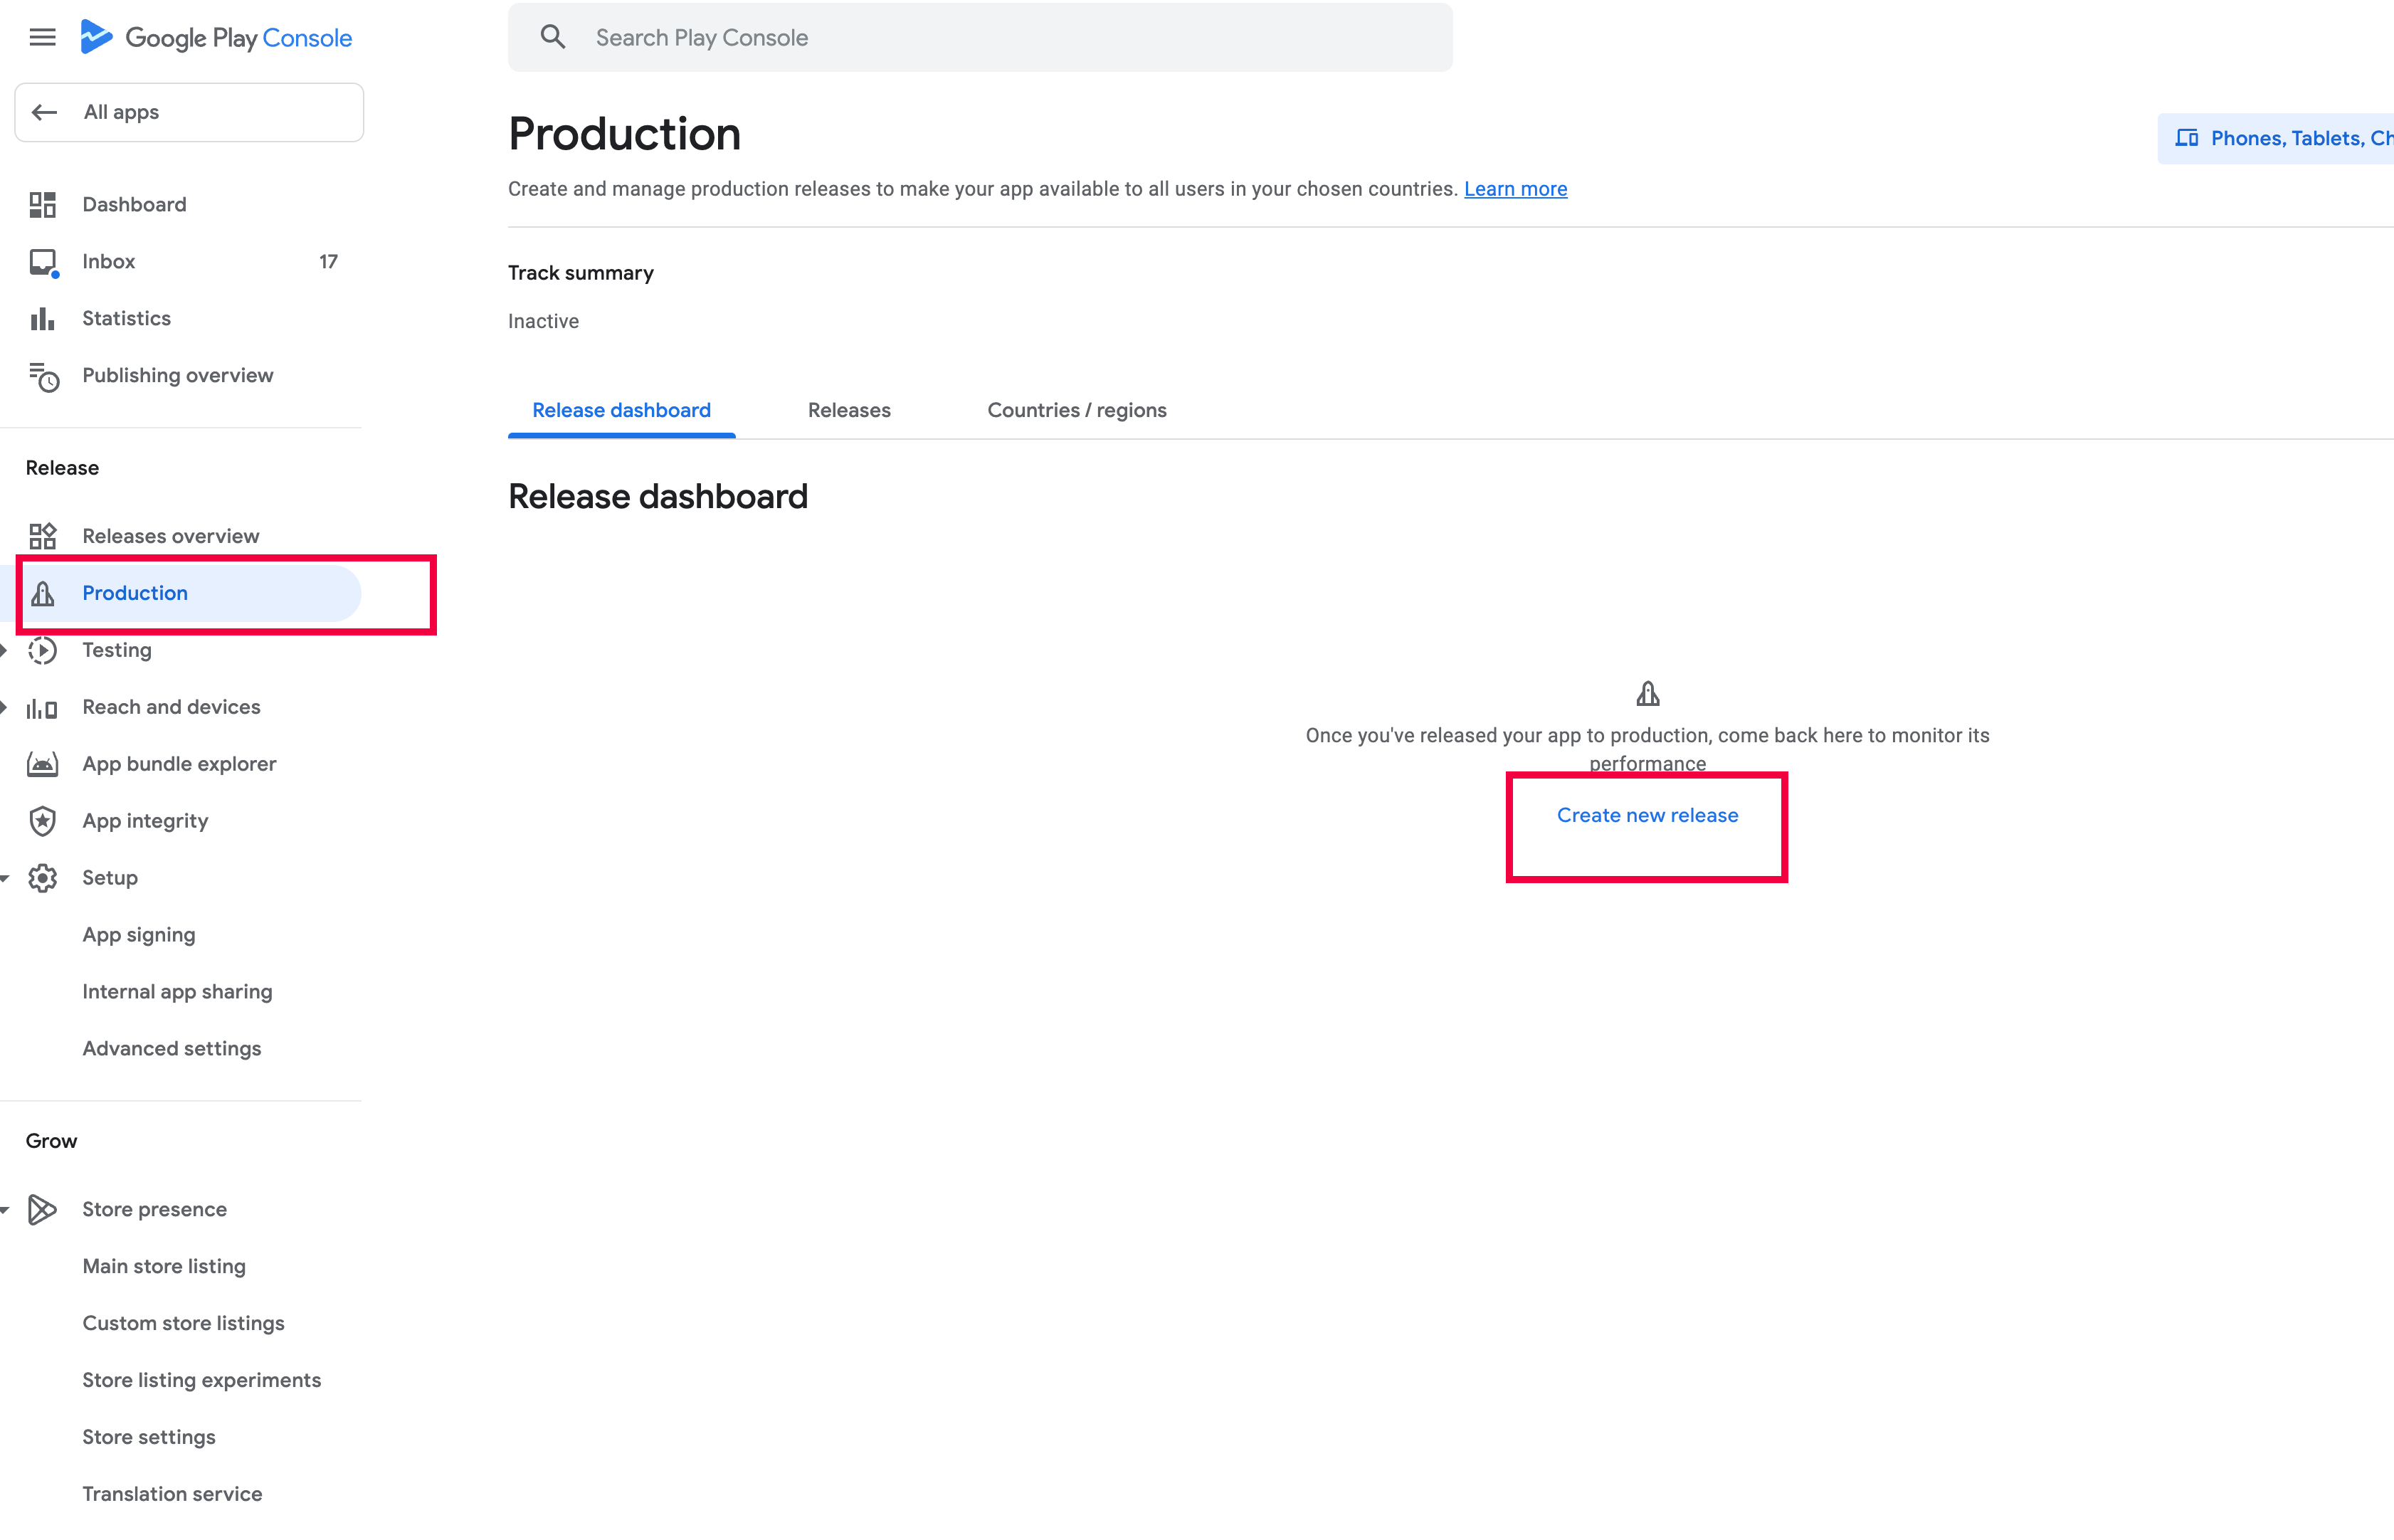
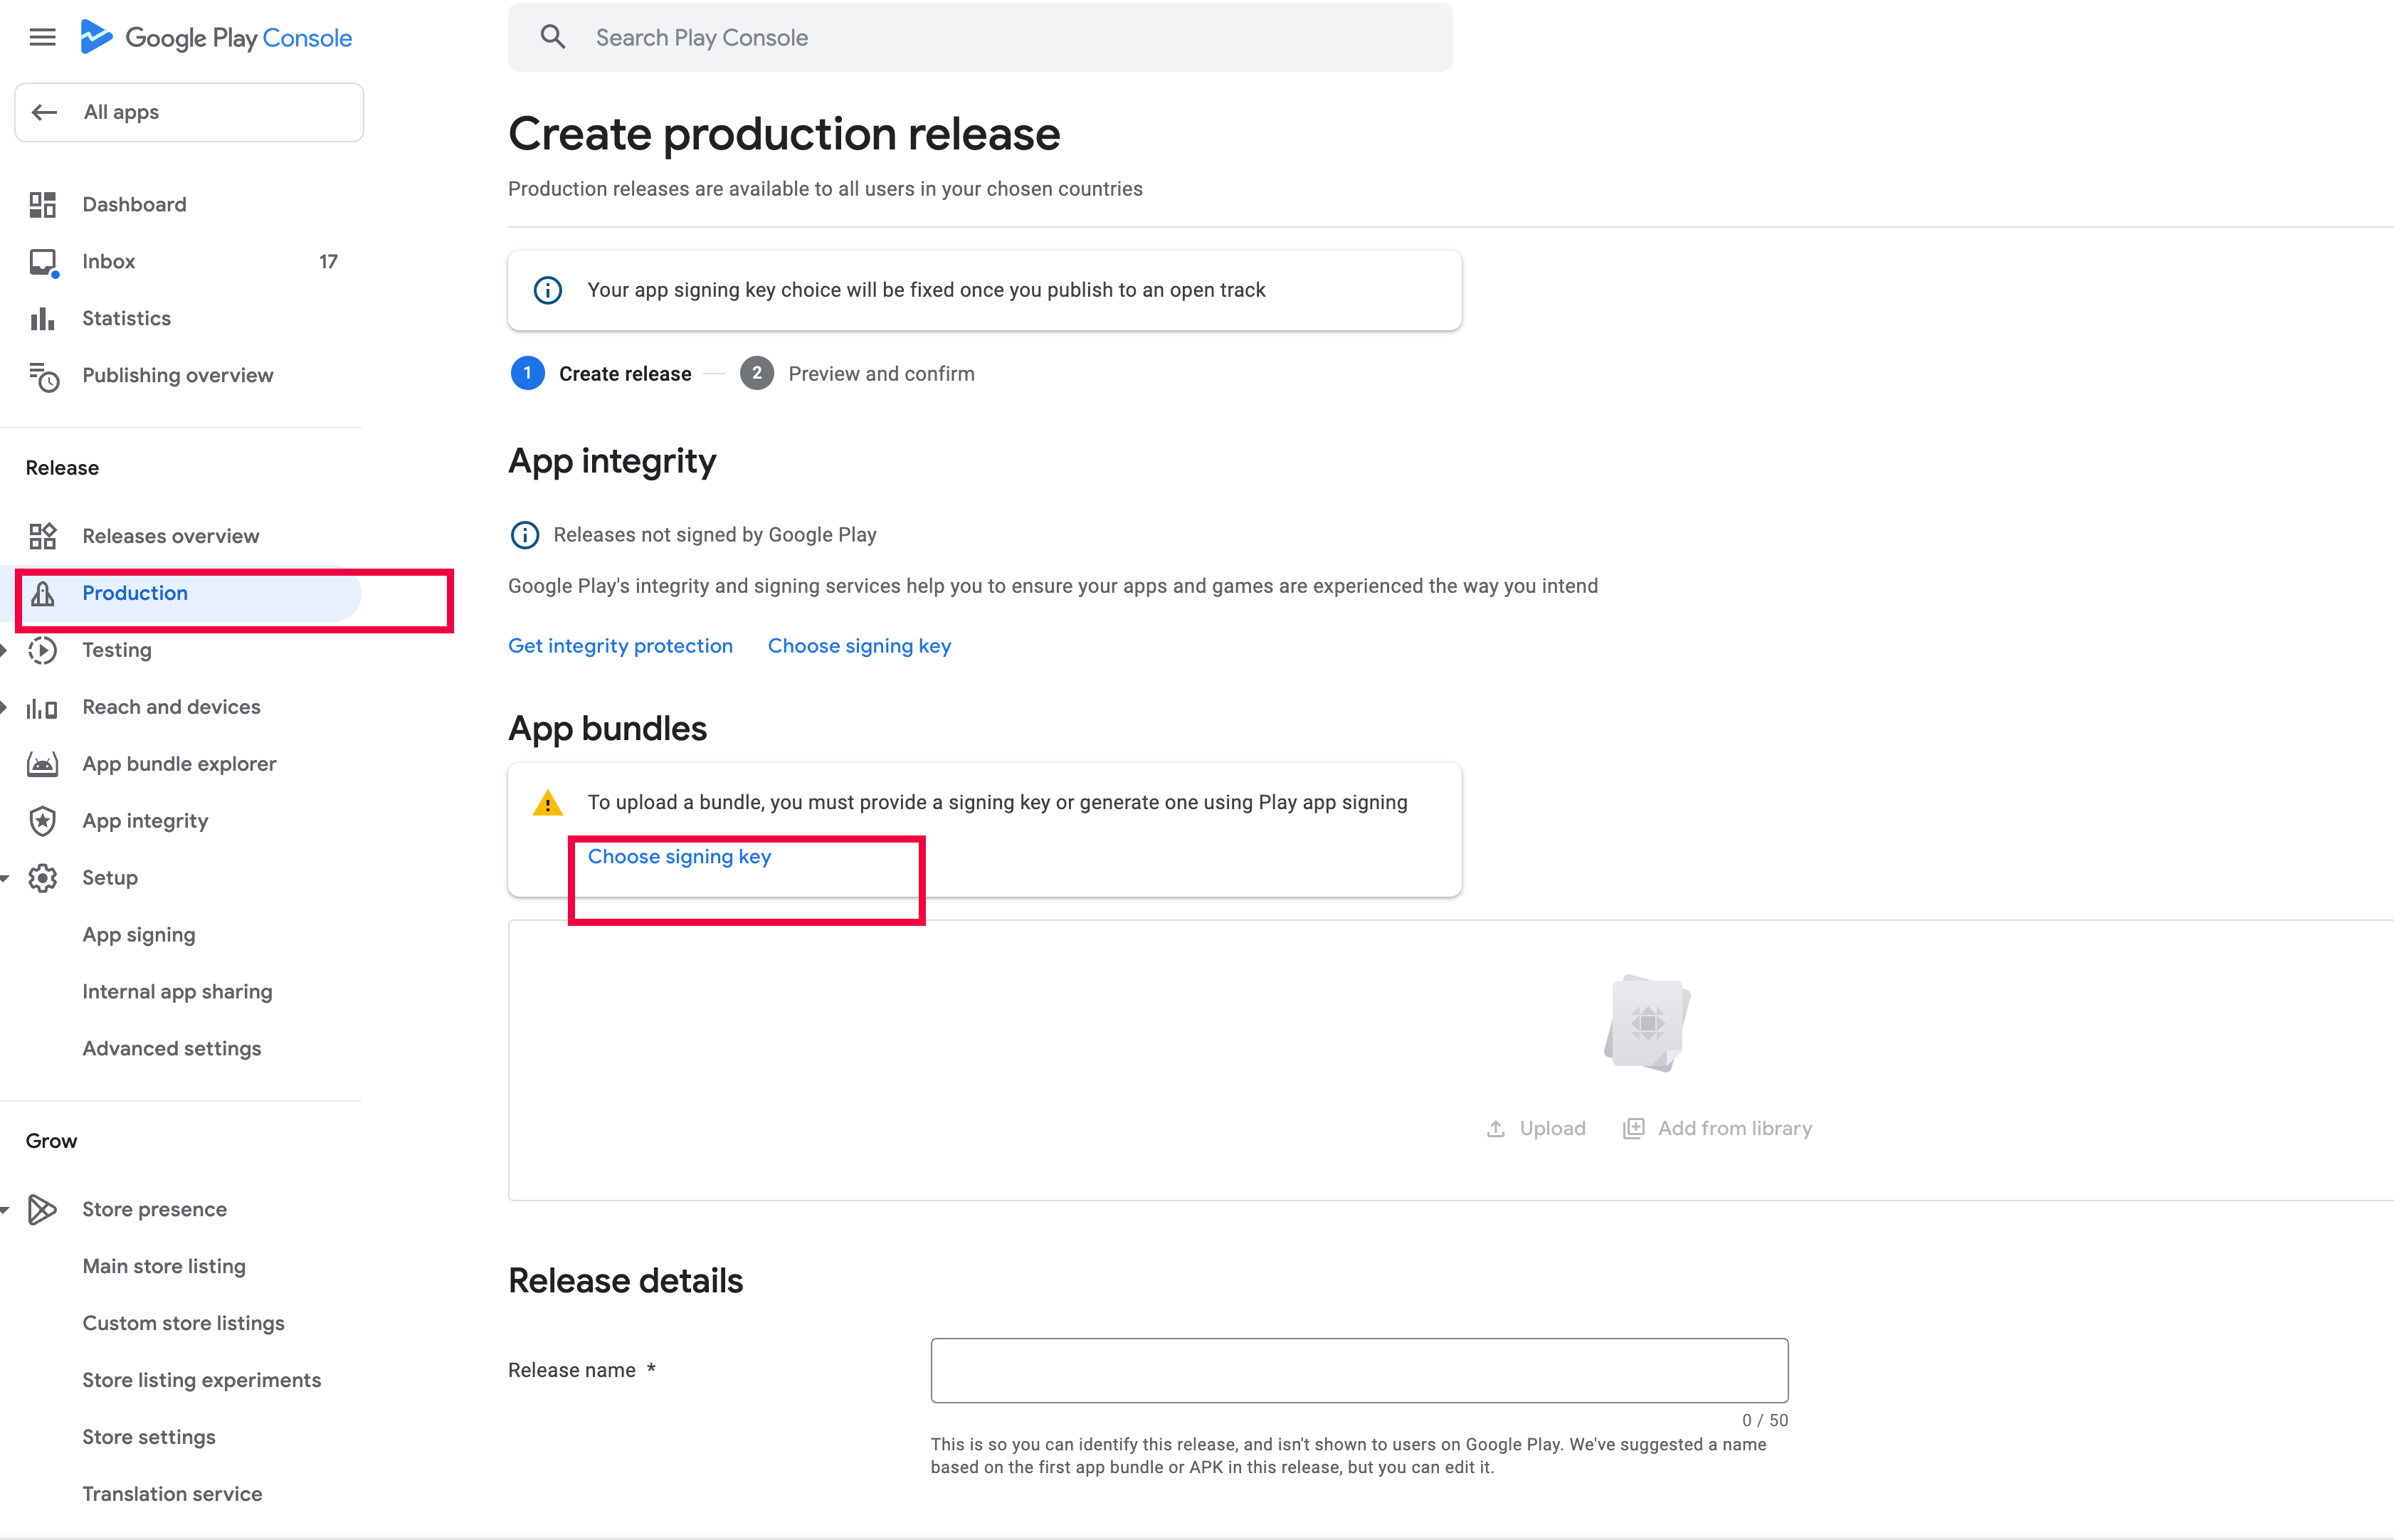
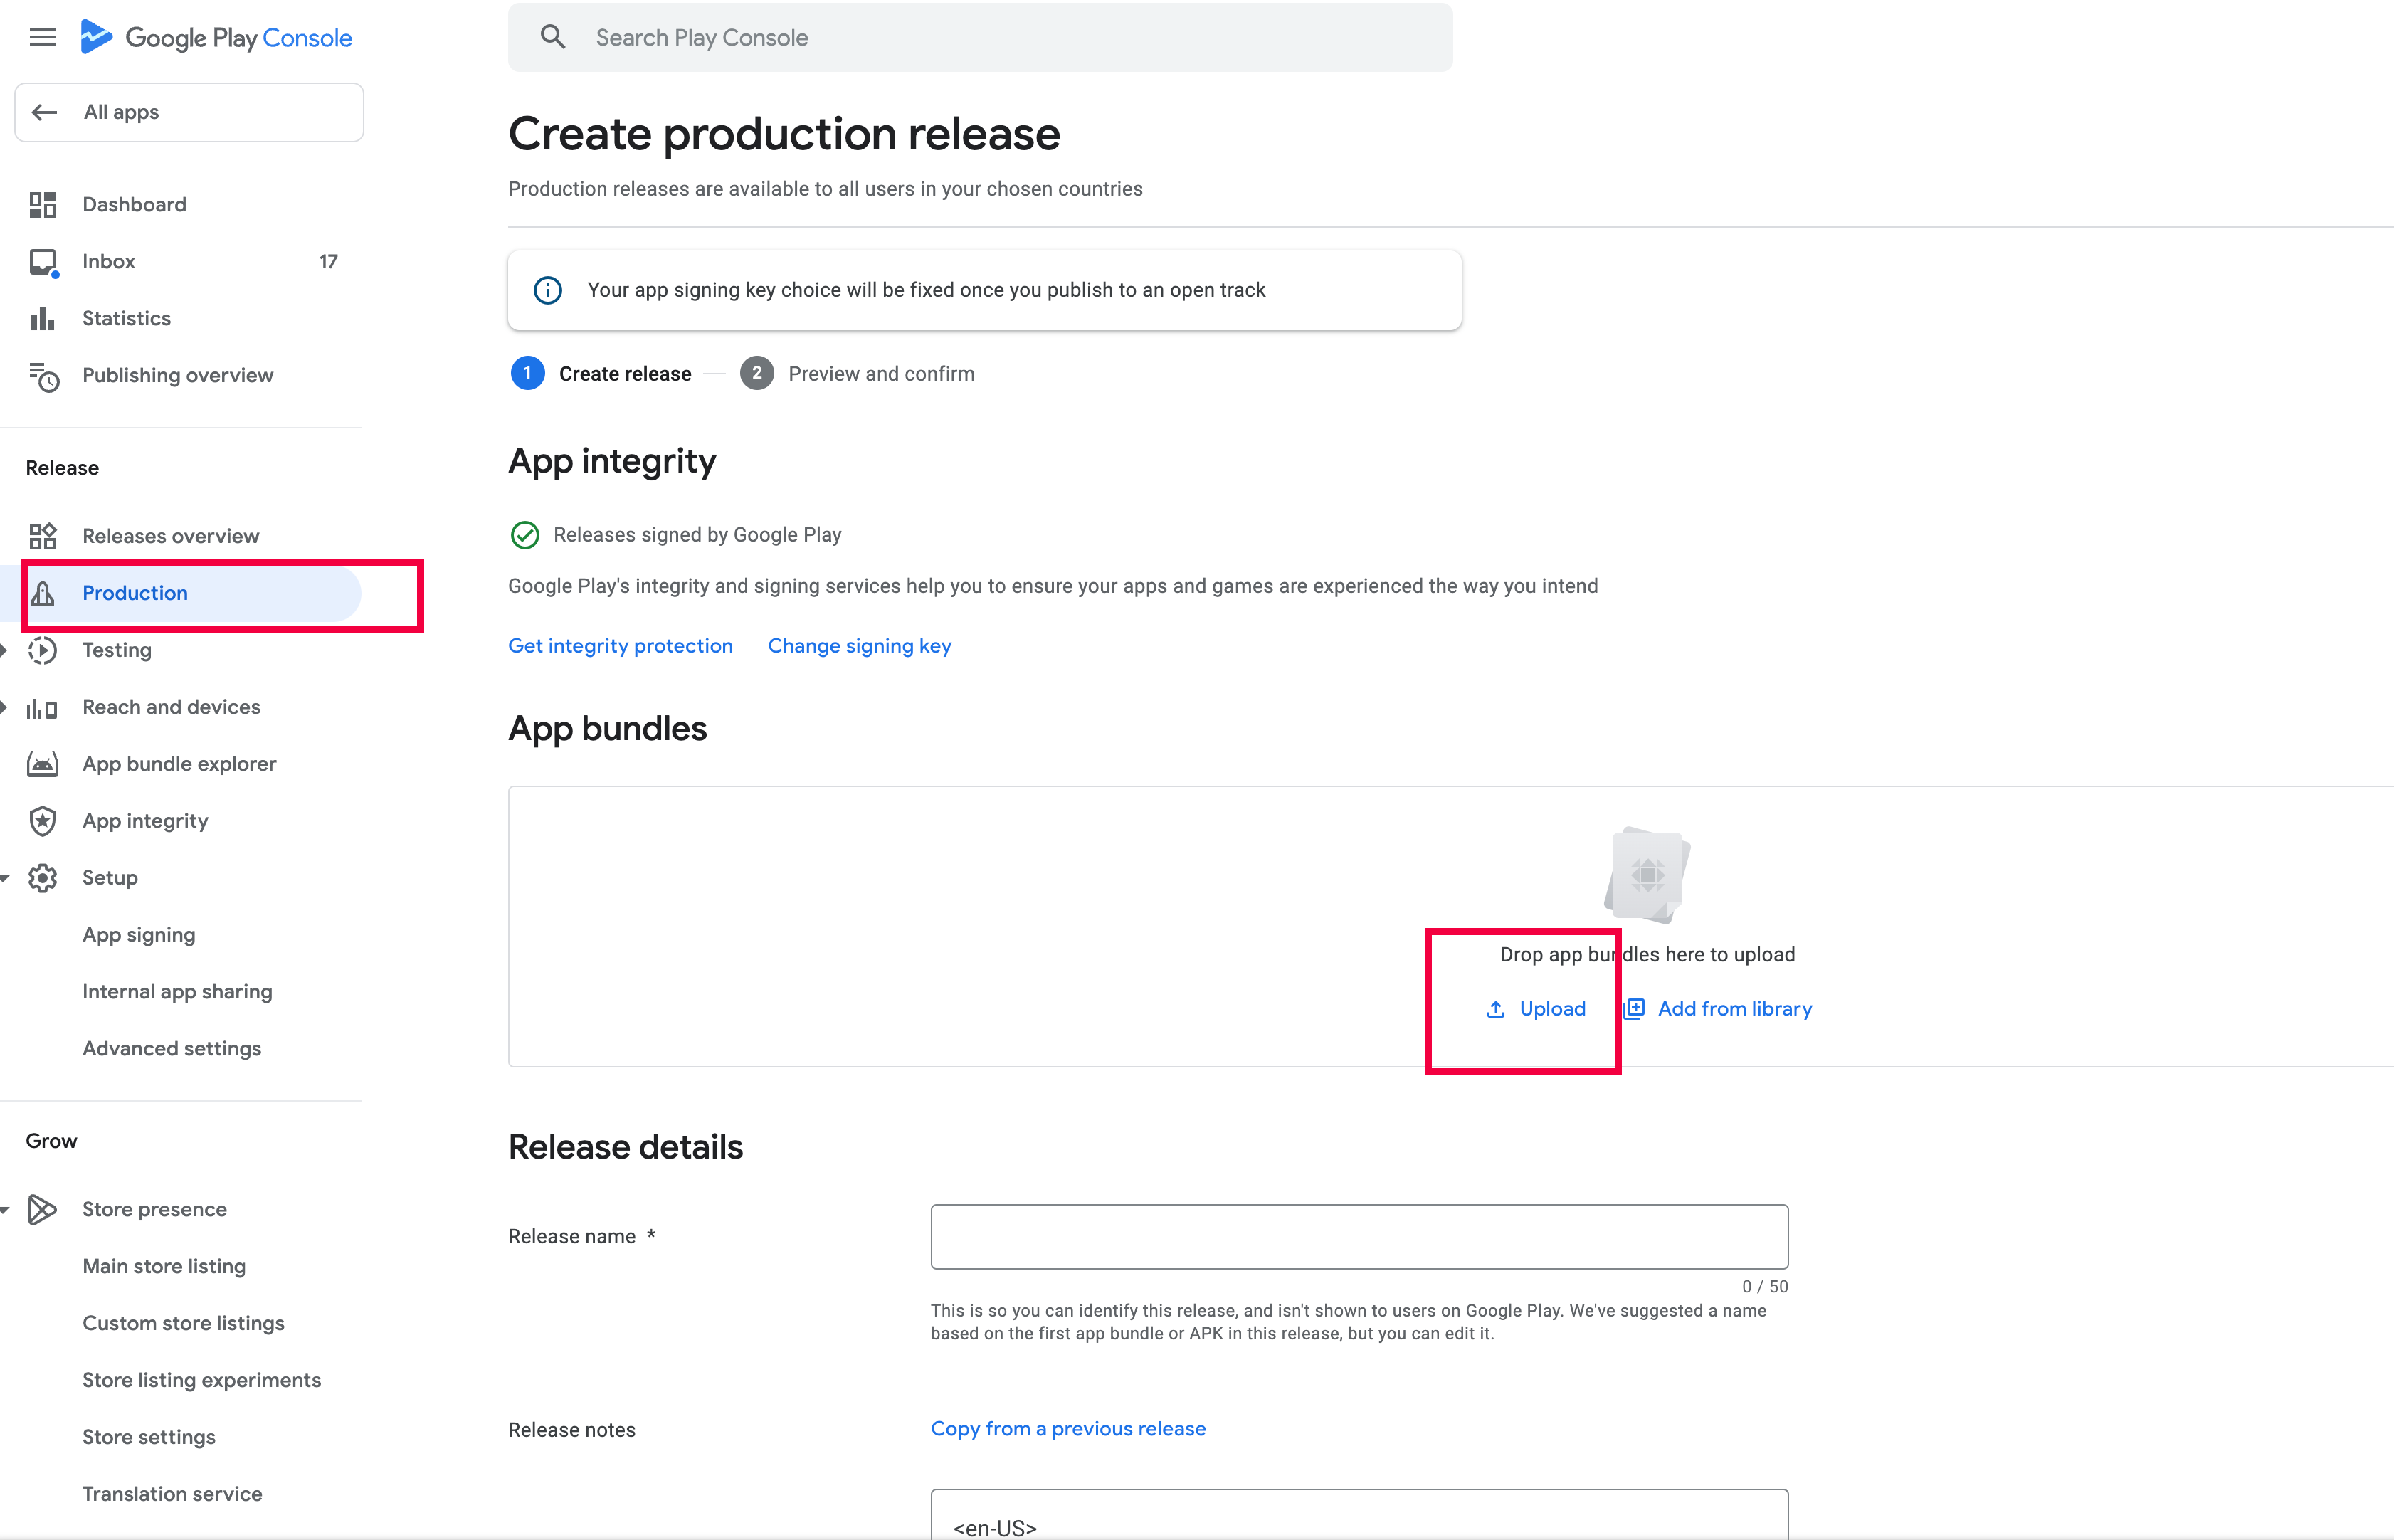
After uploading the APK or Bundle file, click on Review and then Start Rollout to Production.
Create Admob Account and Add an app
To monetize your Android app with AdMob, follow these steps to create an AdMob account and add your app:
Go to the AdMob website and click on Get Started. https://admob.google.com/home
Sign in with your Google account (or create a new Google account if you don’t have one).
Follow the on-screen instructions to complete the account setup process, including selecting your time zone, currency, and accepting the terms of service.
Once your AdMob account is set up, navigate to the Apps section in the AdMob dashboard.
Click on the Add App button.

Select Yes if your app is already published on the Google Play Store, or No if it’s not yet published.
Enter your app’s details (name, platform - Android) and click Add.
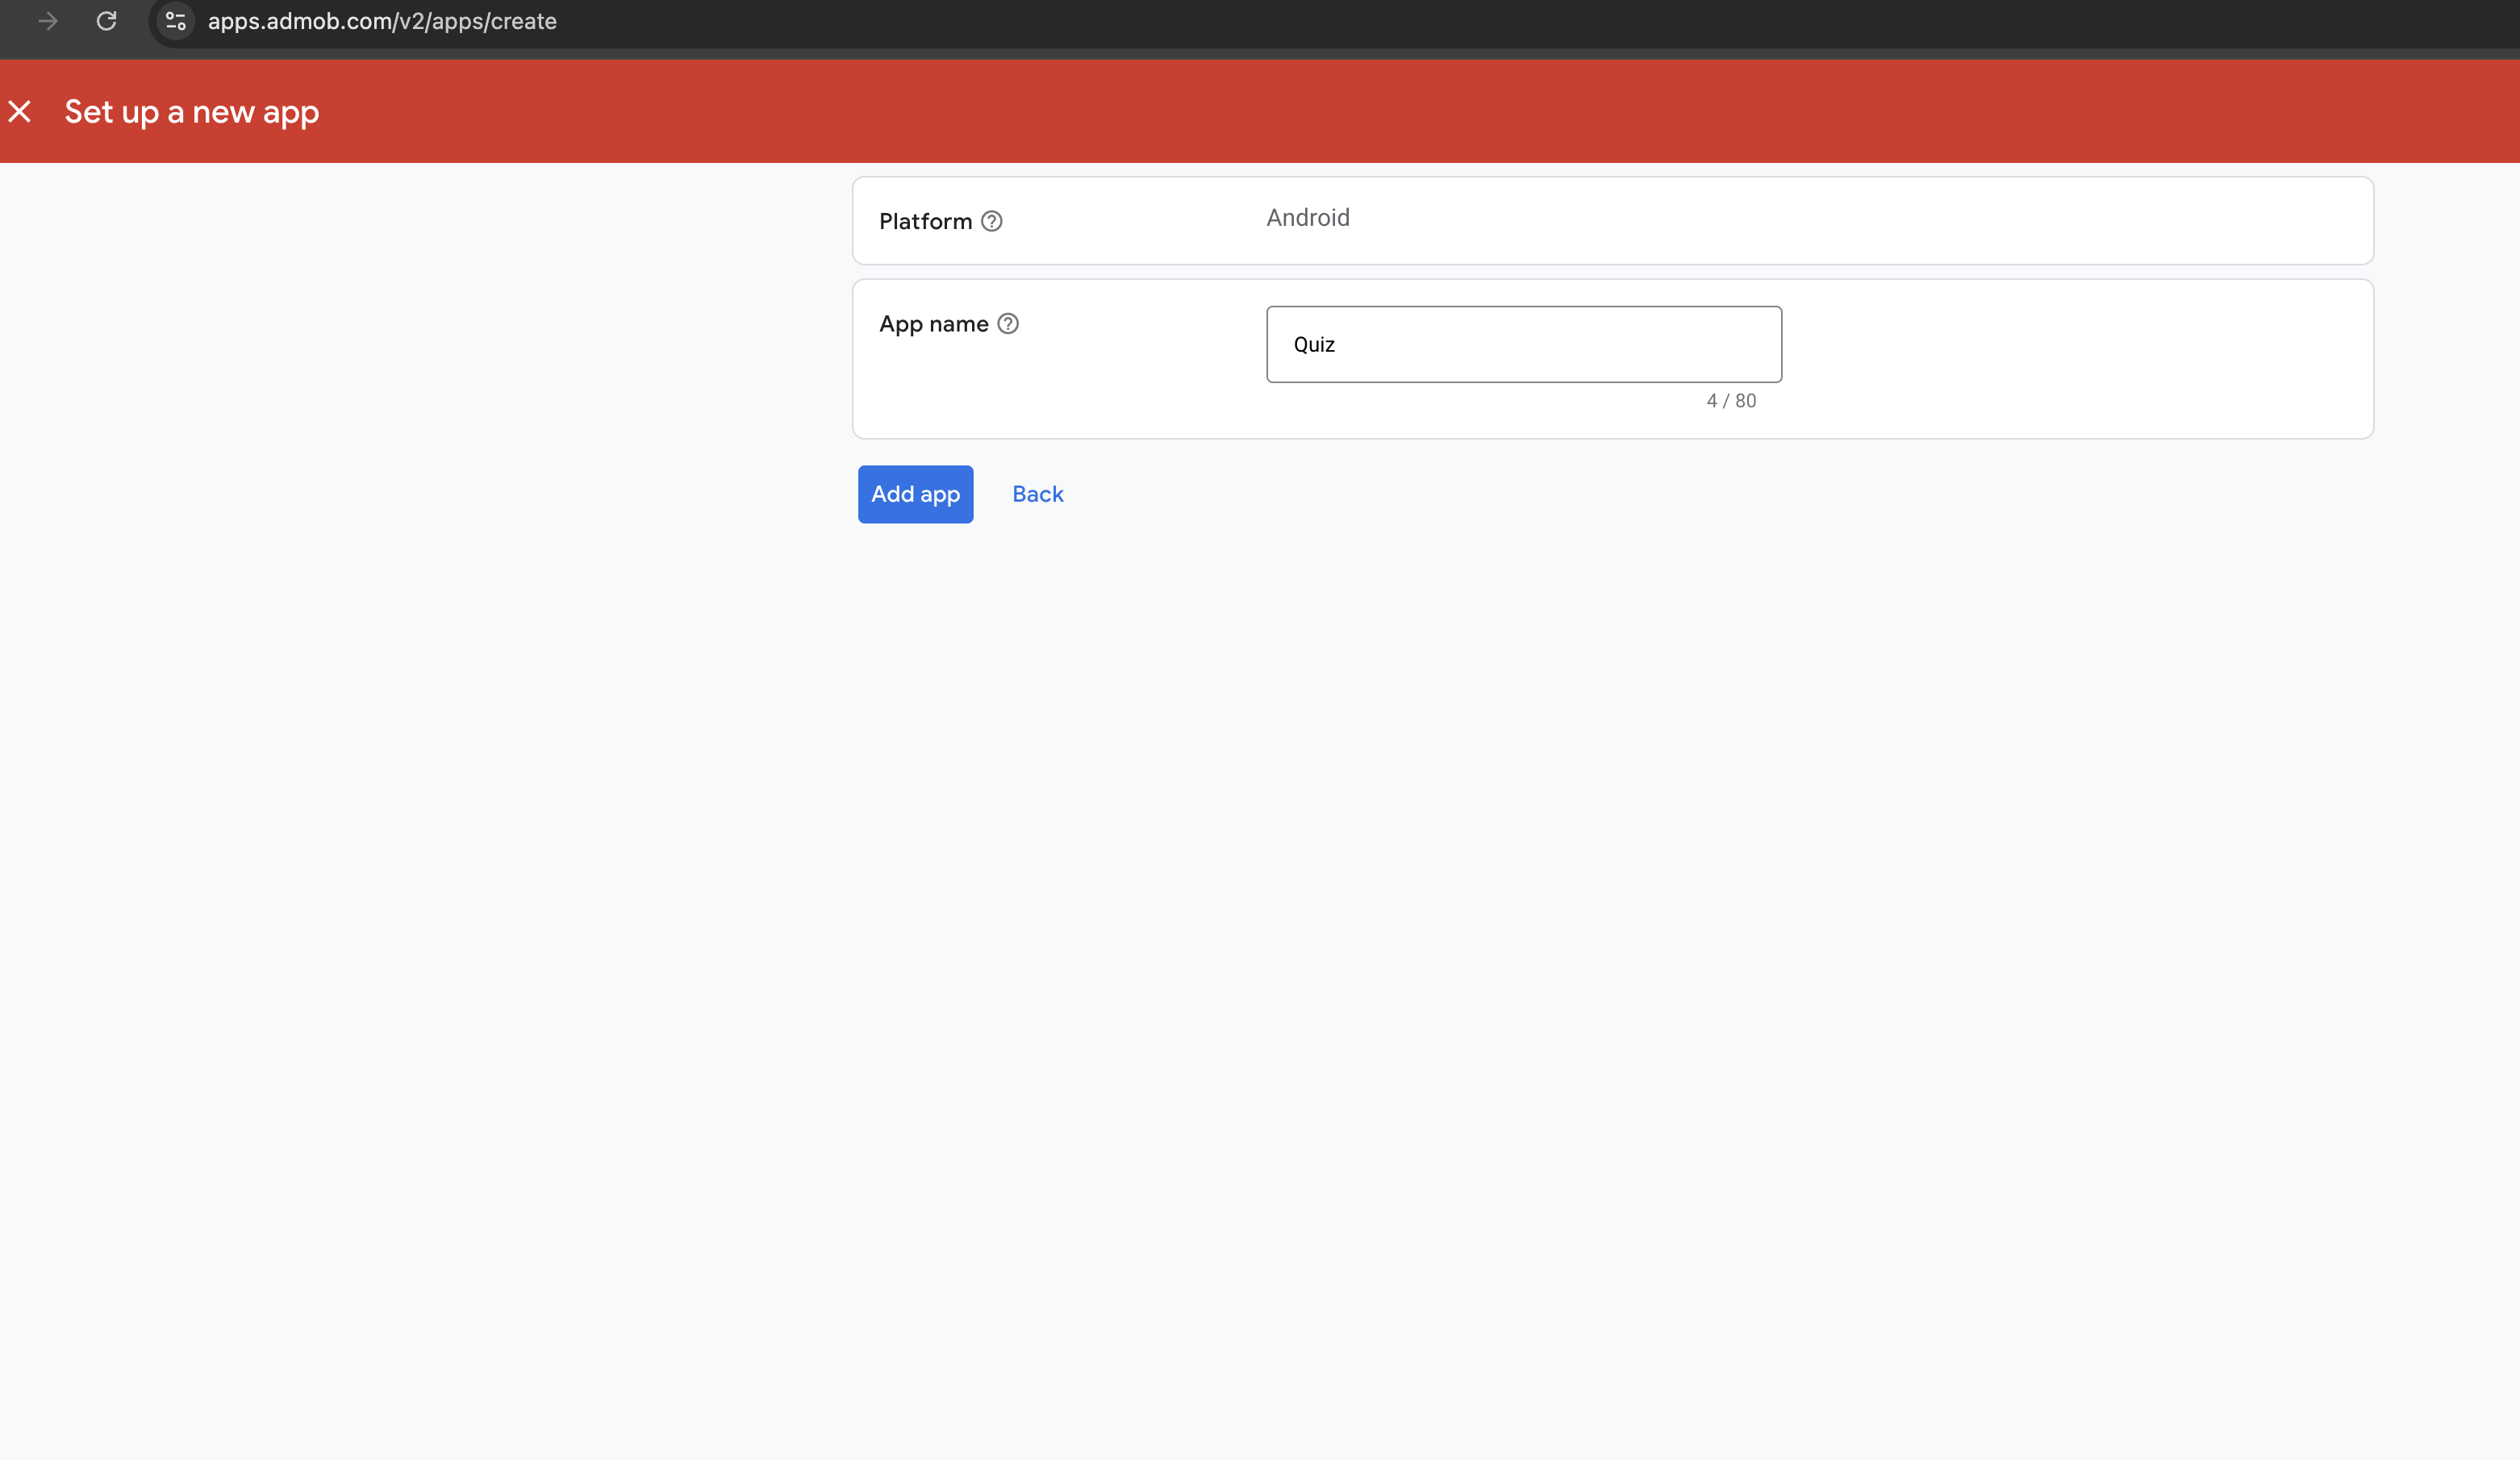
After adding your app, you will be shown an App ID that looks something like this: ca-app-pub-xxxxxxxxxxxxxxxx~yyyyyyyyyy
Banner Ad
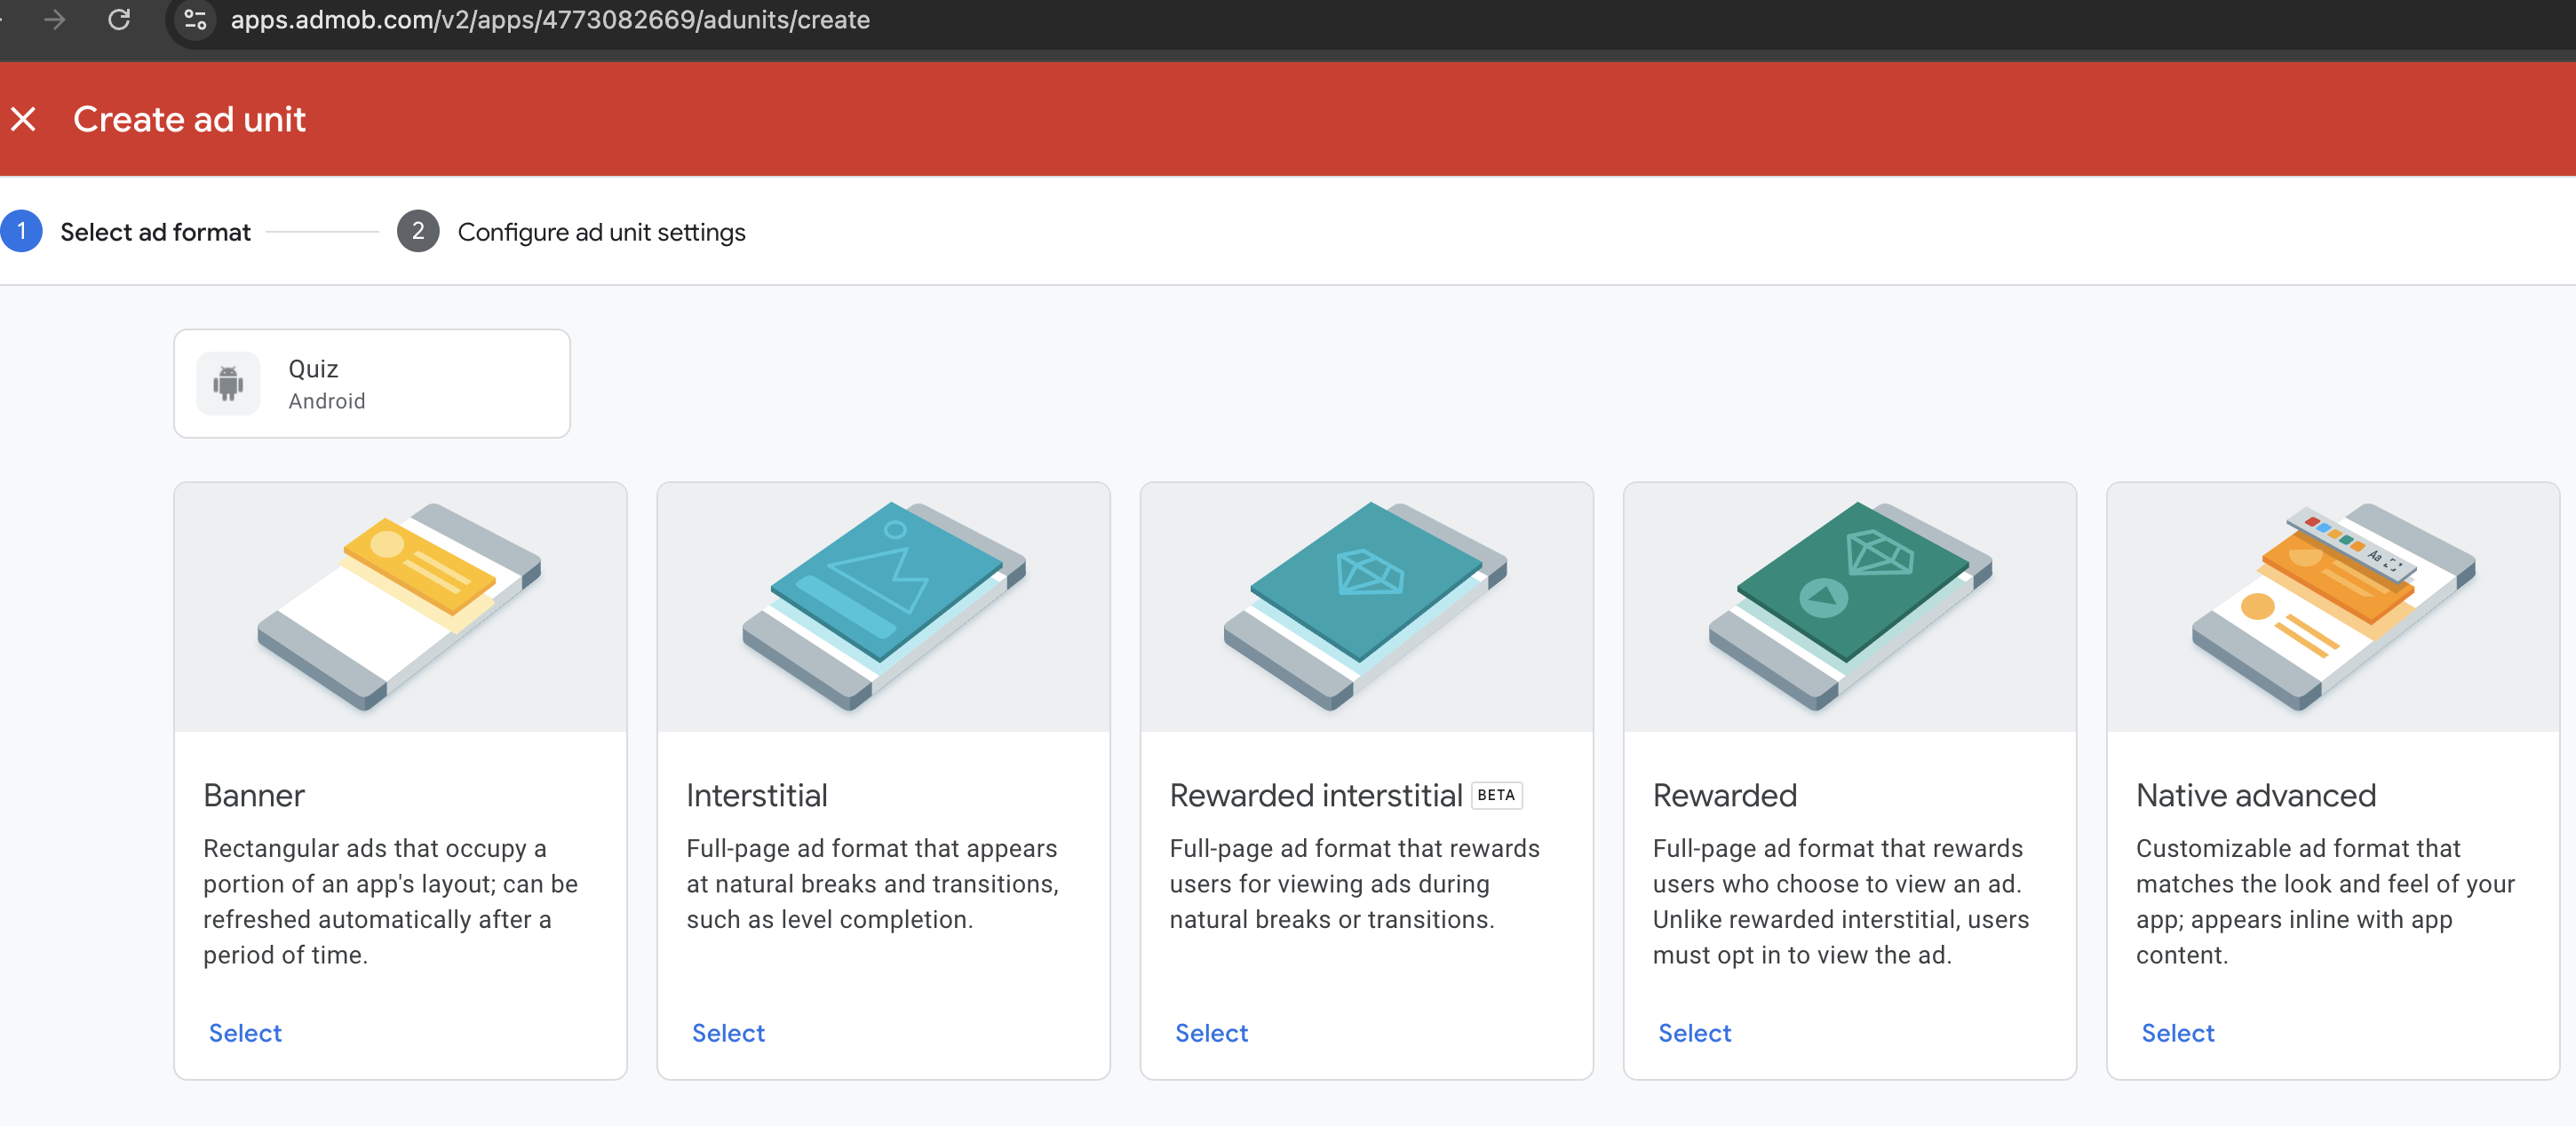
To create a banner ad in AdMob, follow these steps:
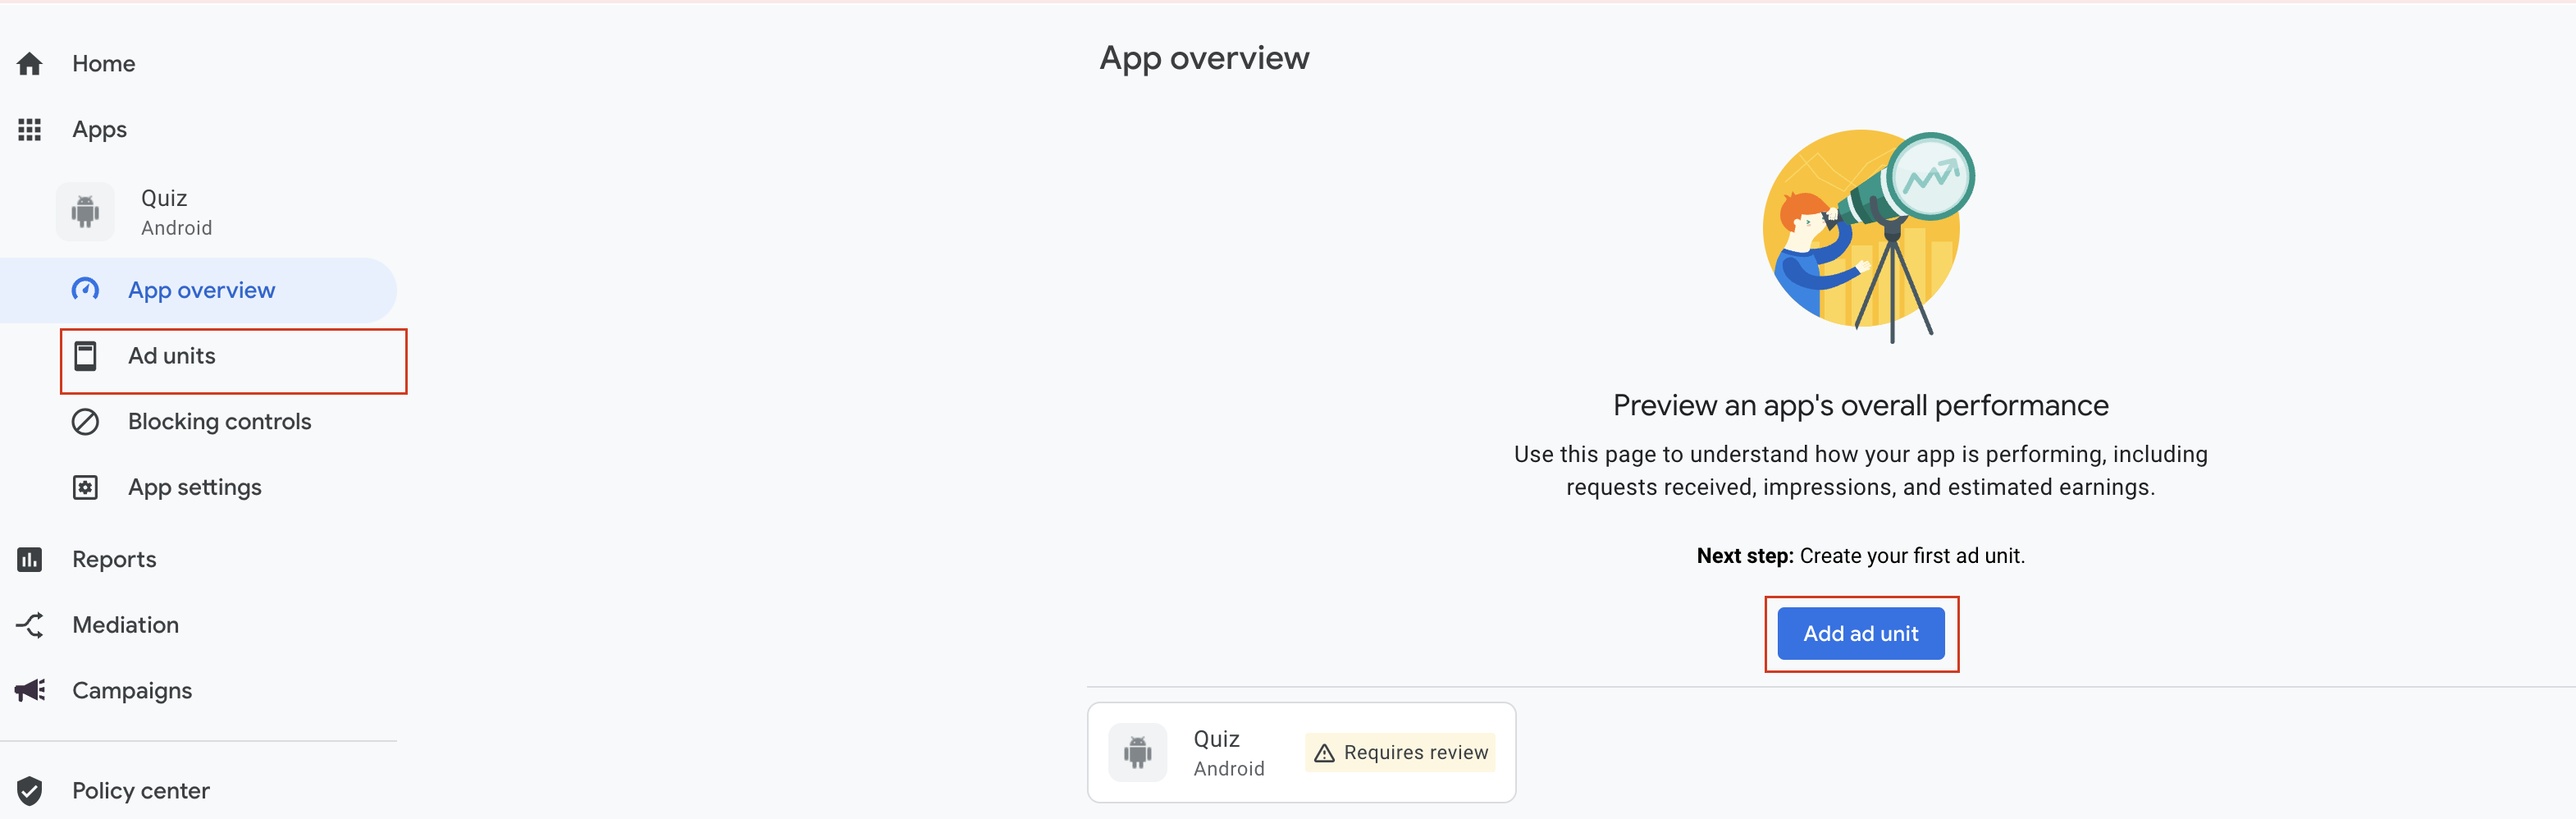
In the AdMob dashboard, navigate to the Apps section and select your app.
Click on the Ad Units tab and then the Add Ad Unit button.
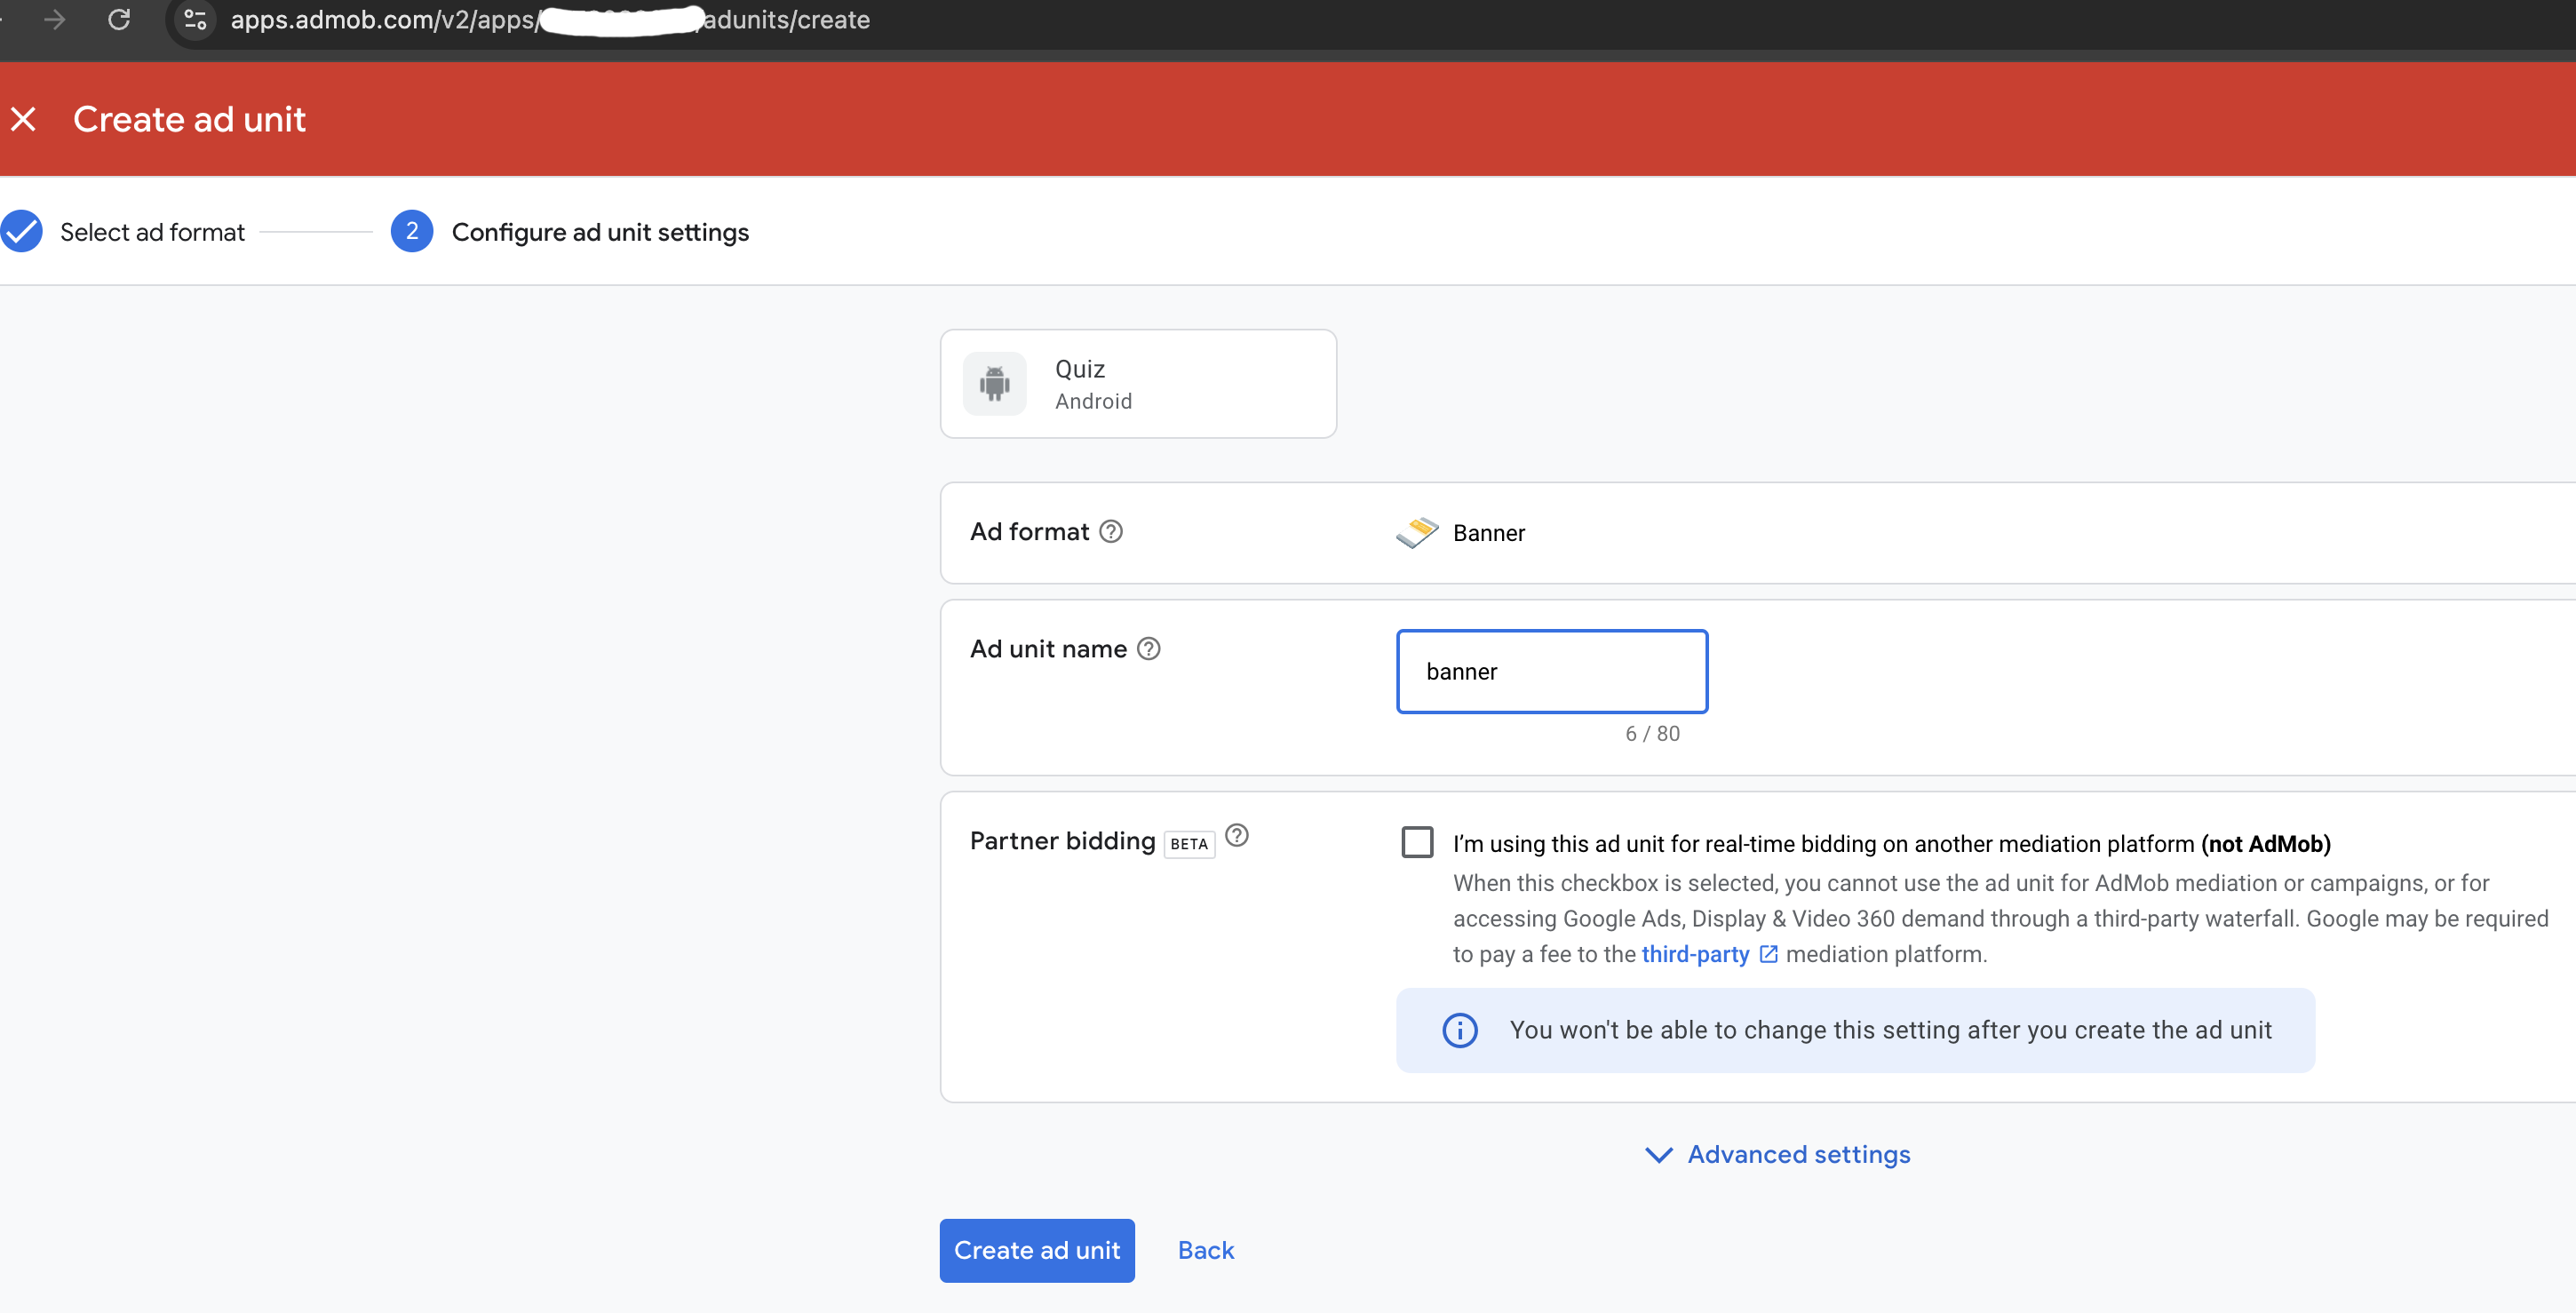
Select Banner as the ad format and enter a name for your ad unit.
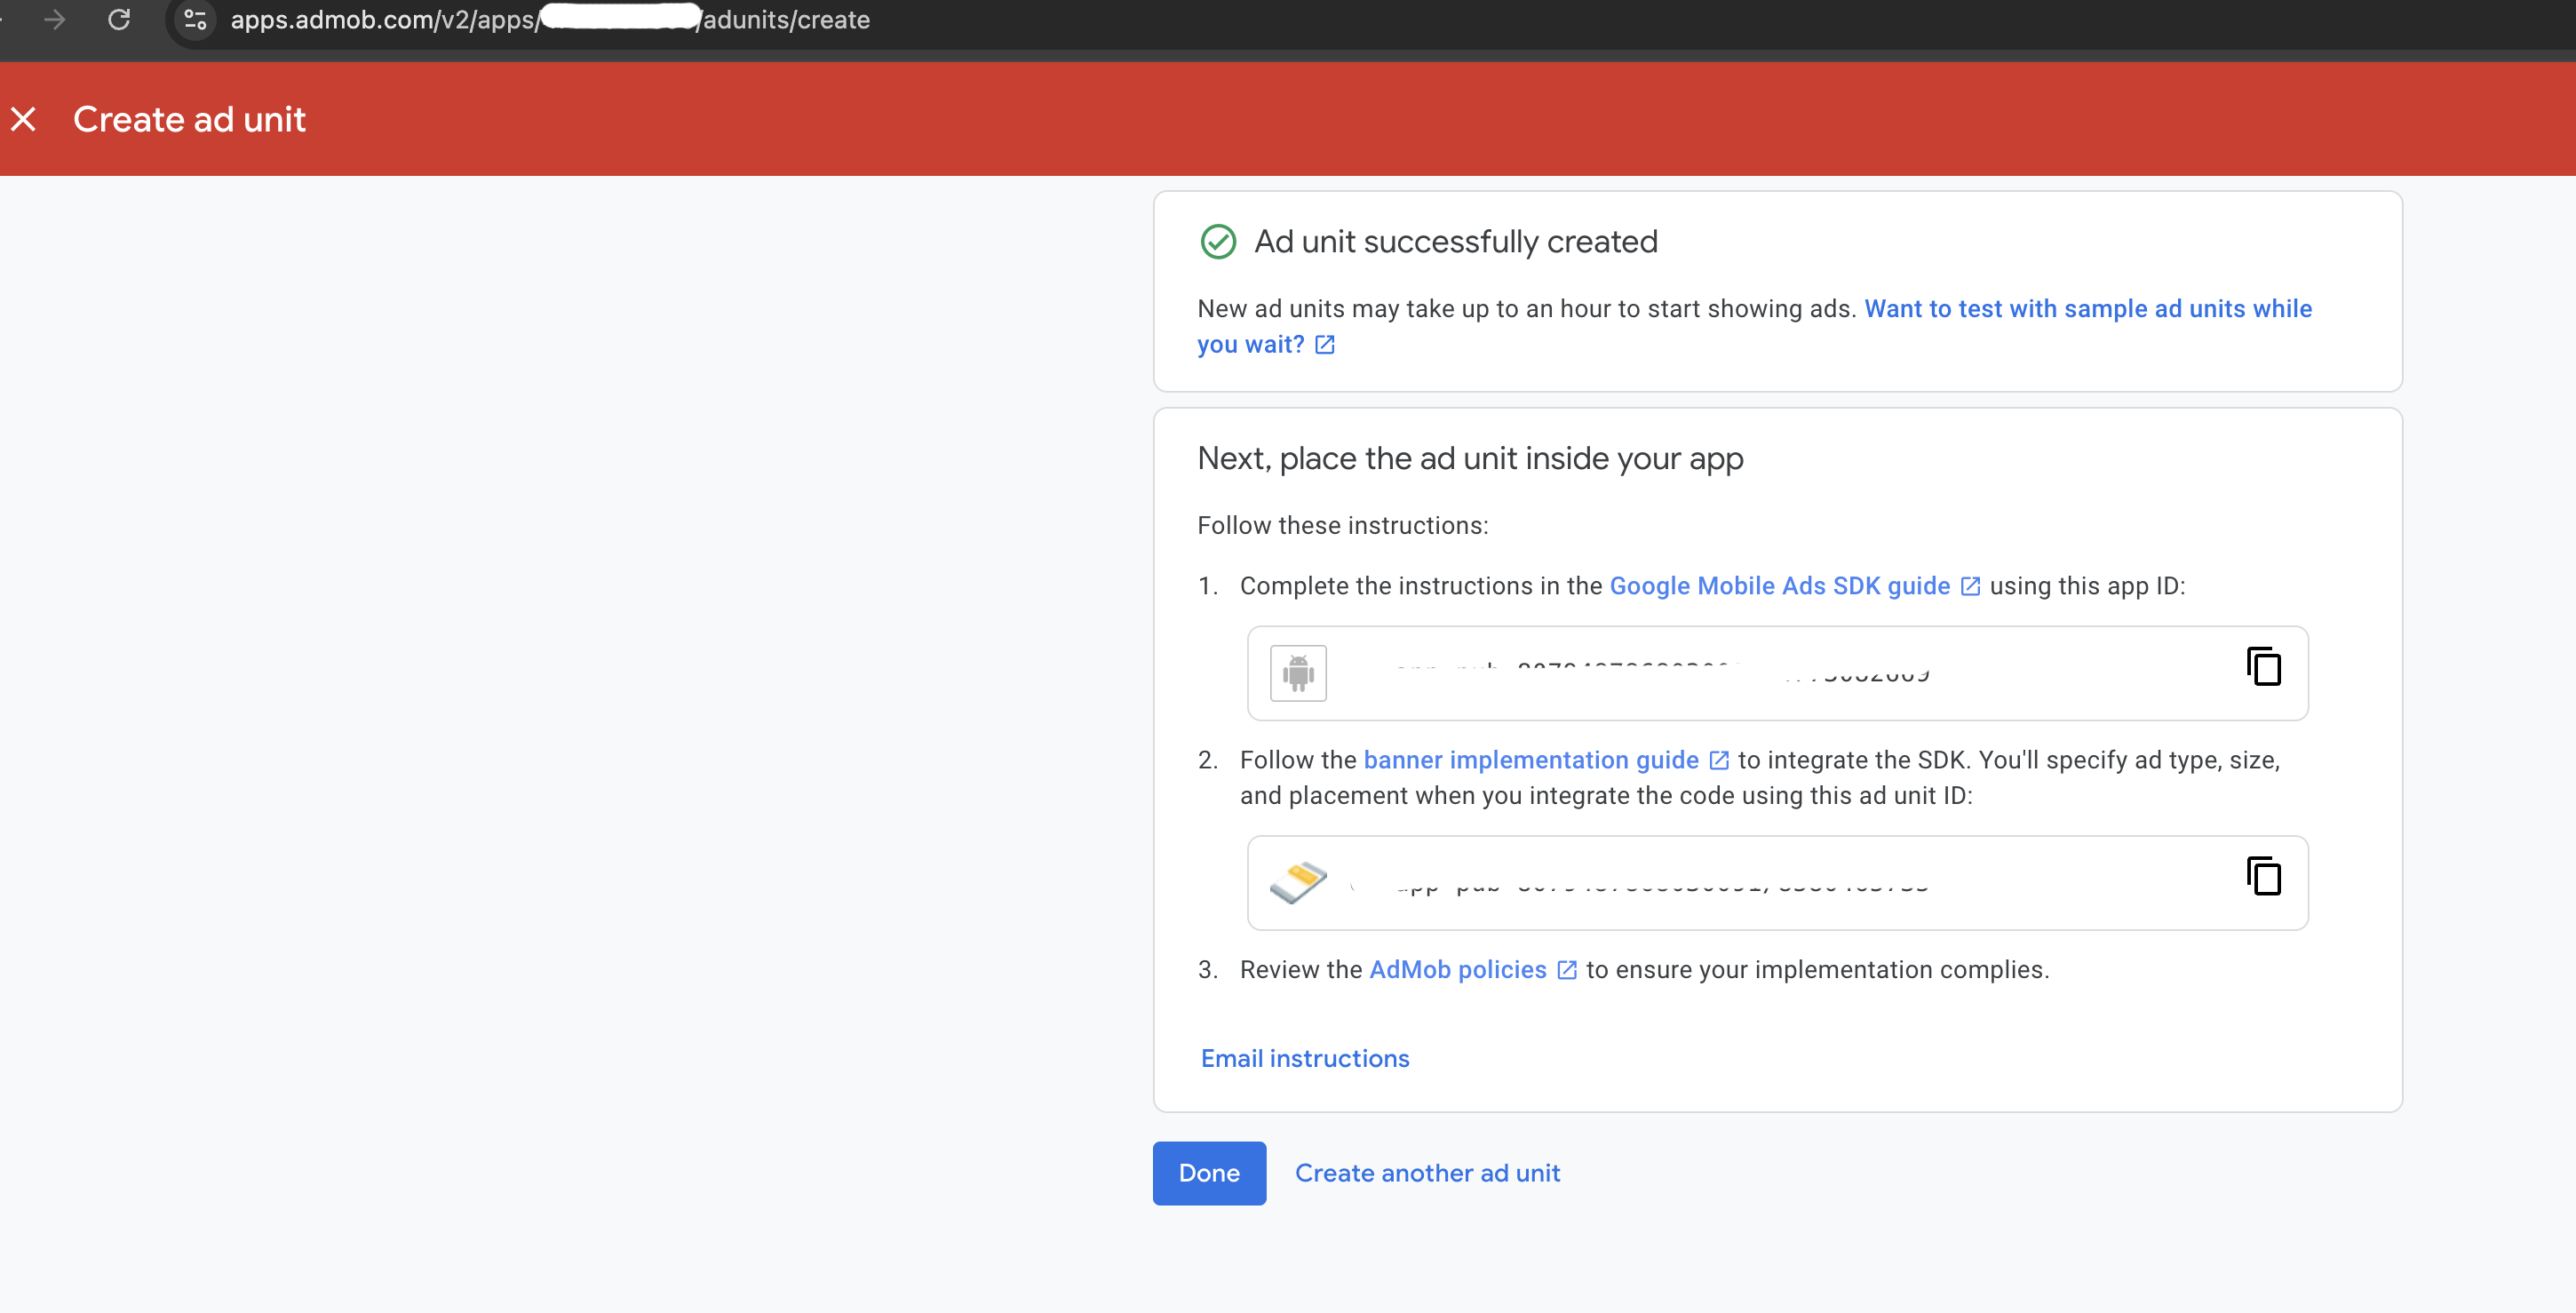
Click on Create Ad Unit.
Interstitial Ad
To create a intersitial ad in AdMob, follow these steps:
In the AdMob dashboard, navigate to the Apps section and select your app.
Click on the Ad Units tab and then the Add Ad Unit button.
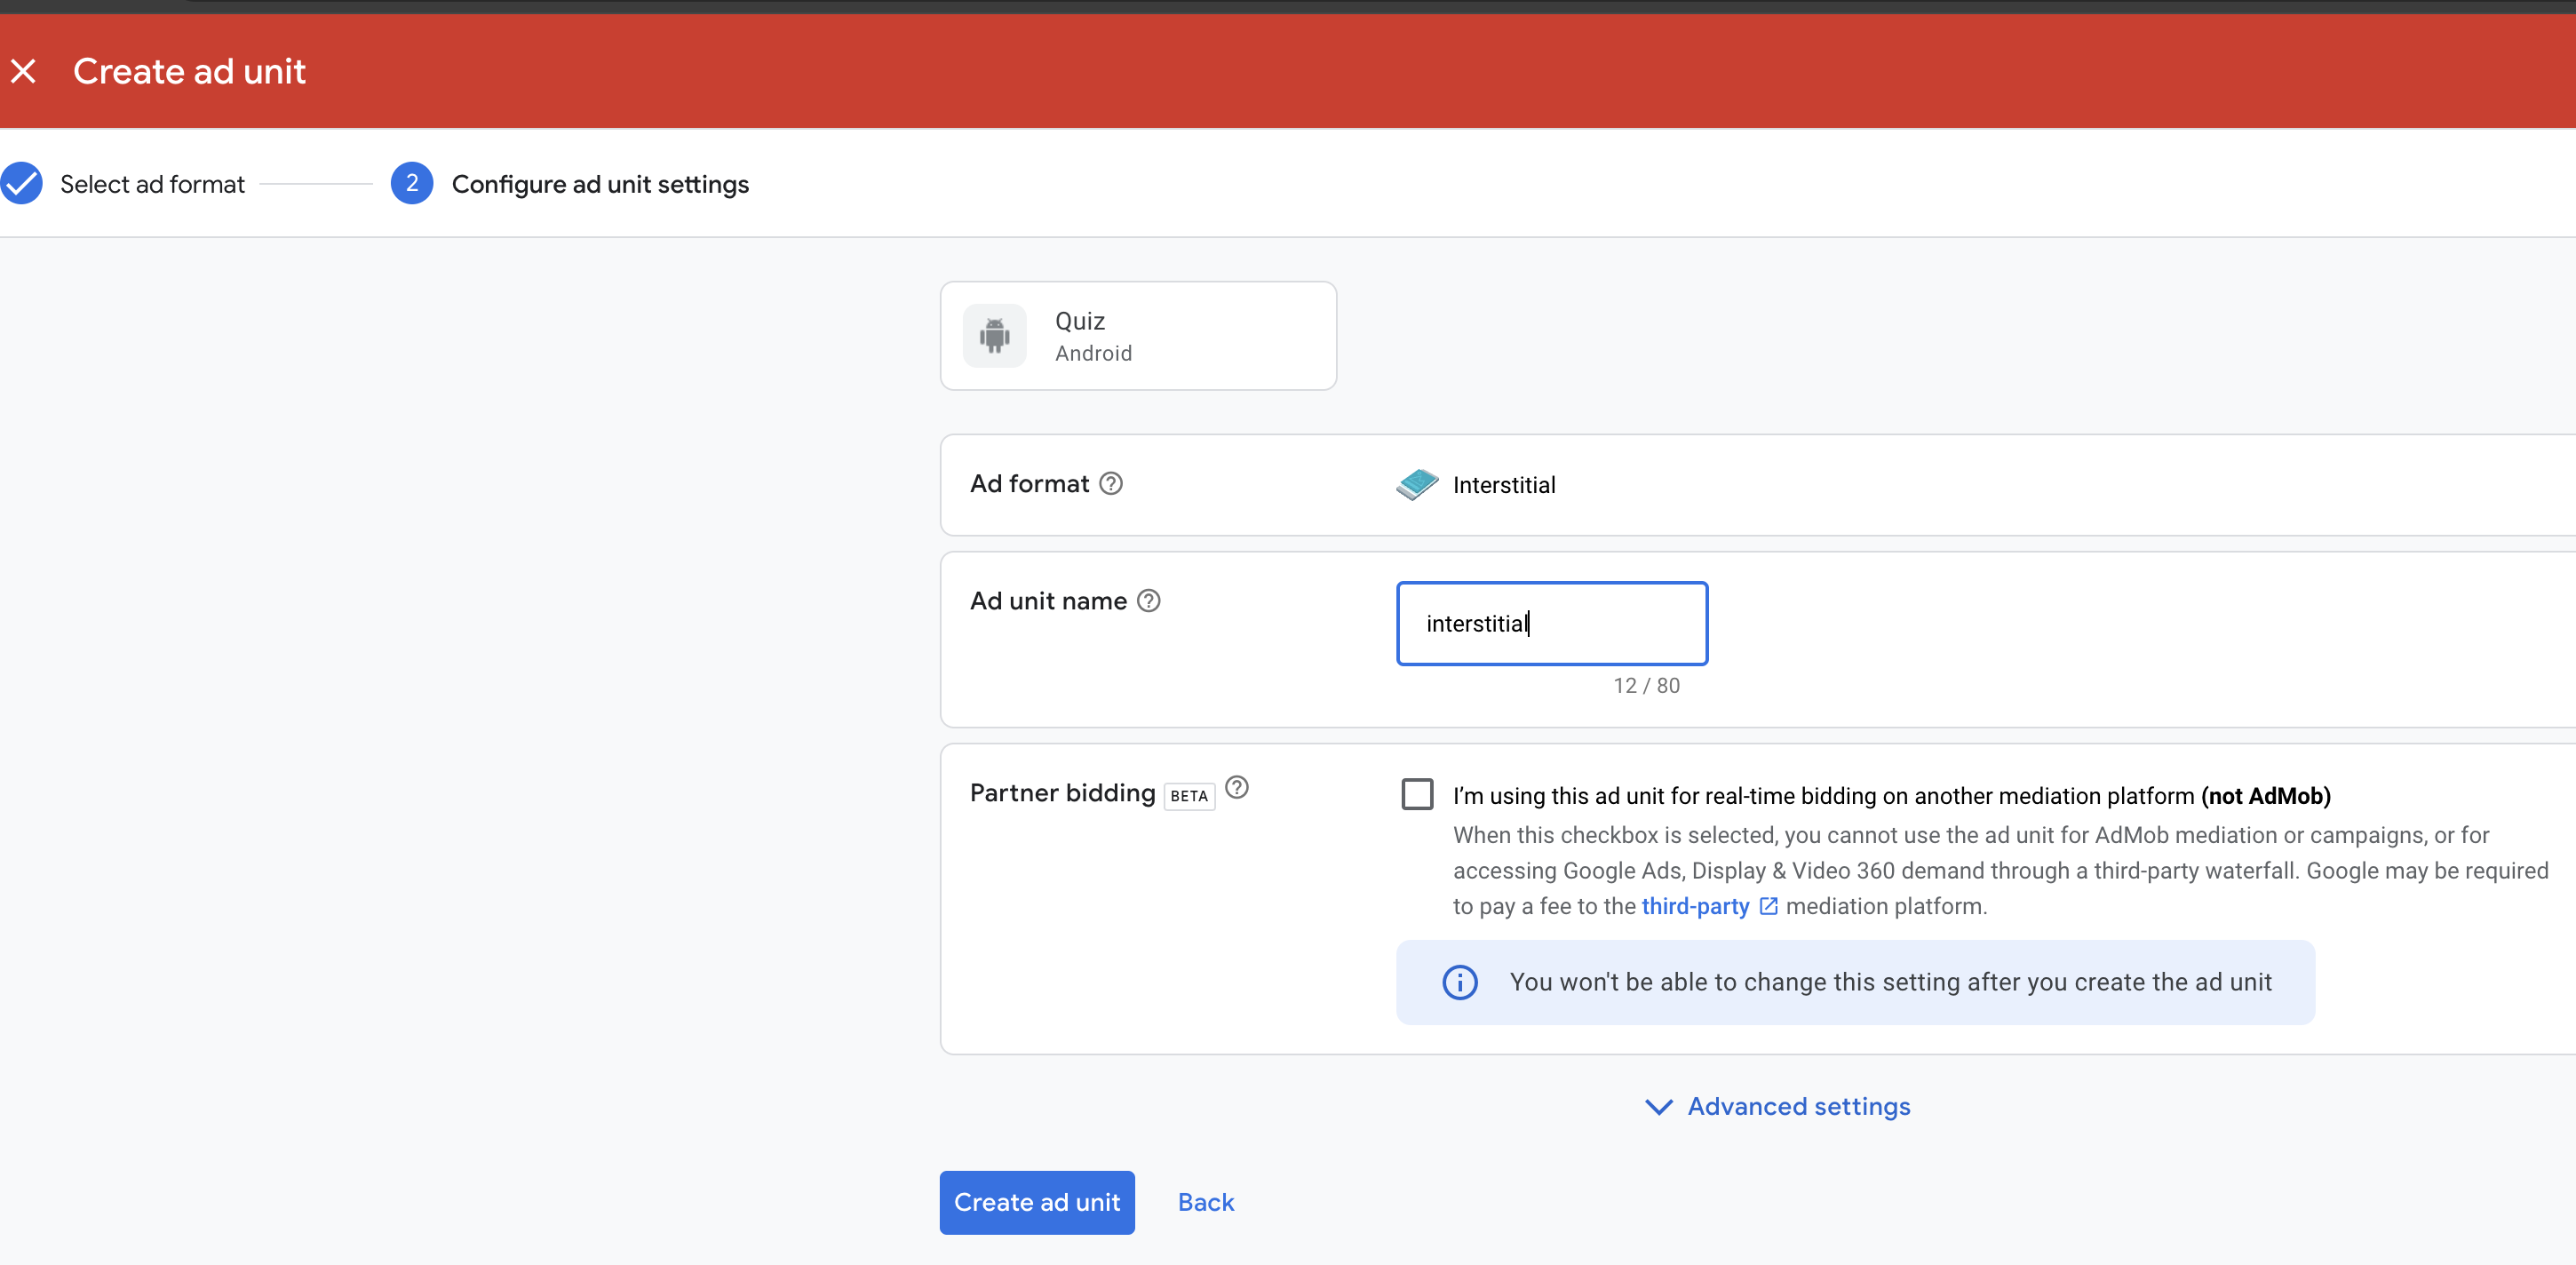
Select Interstitial as the ad format and enter a name for your ad unit.
Click on Create Ad Unit.
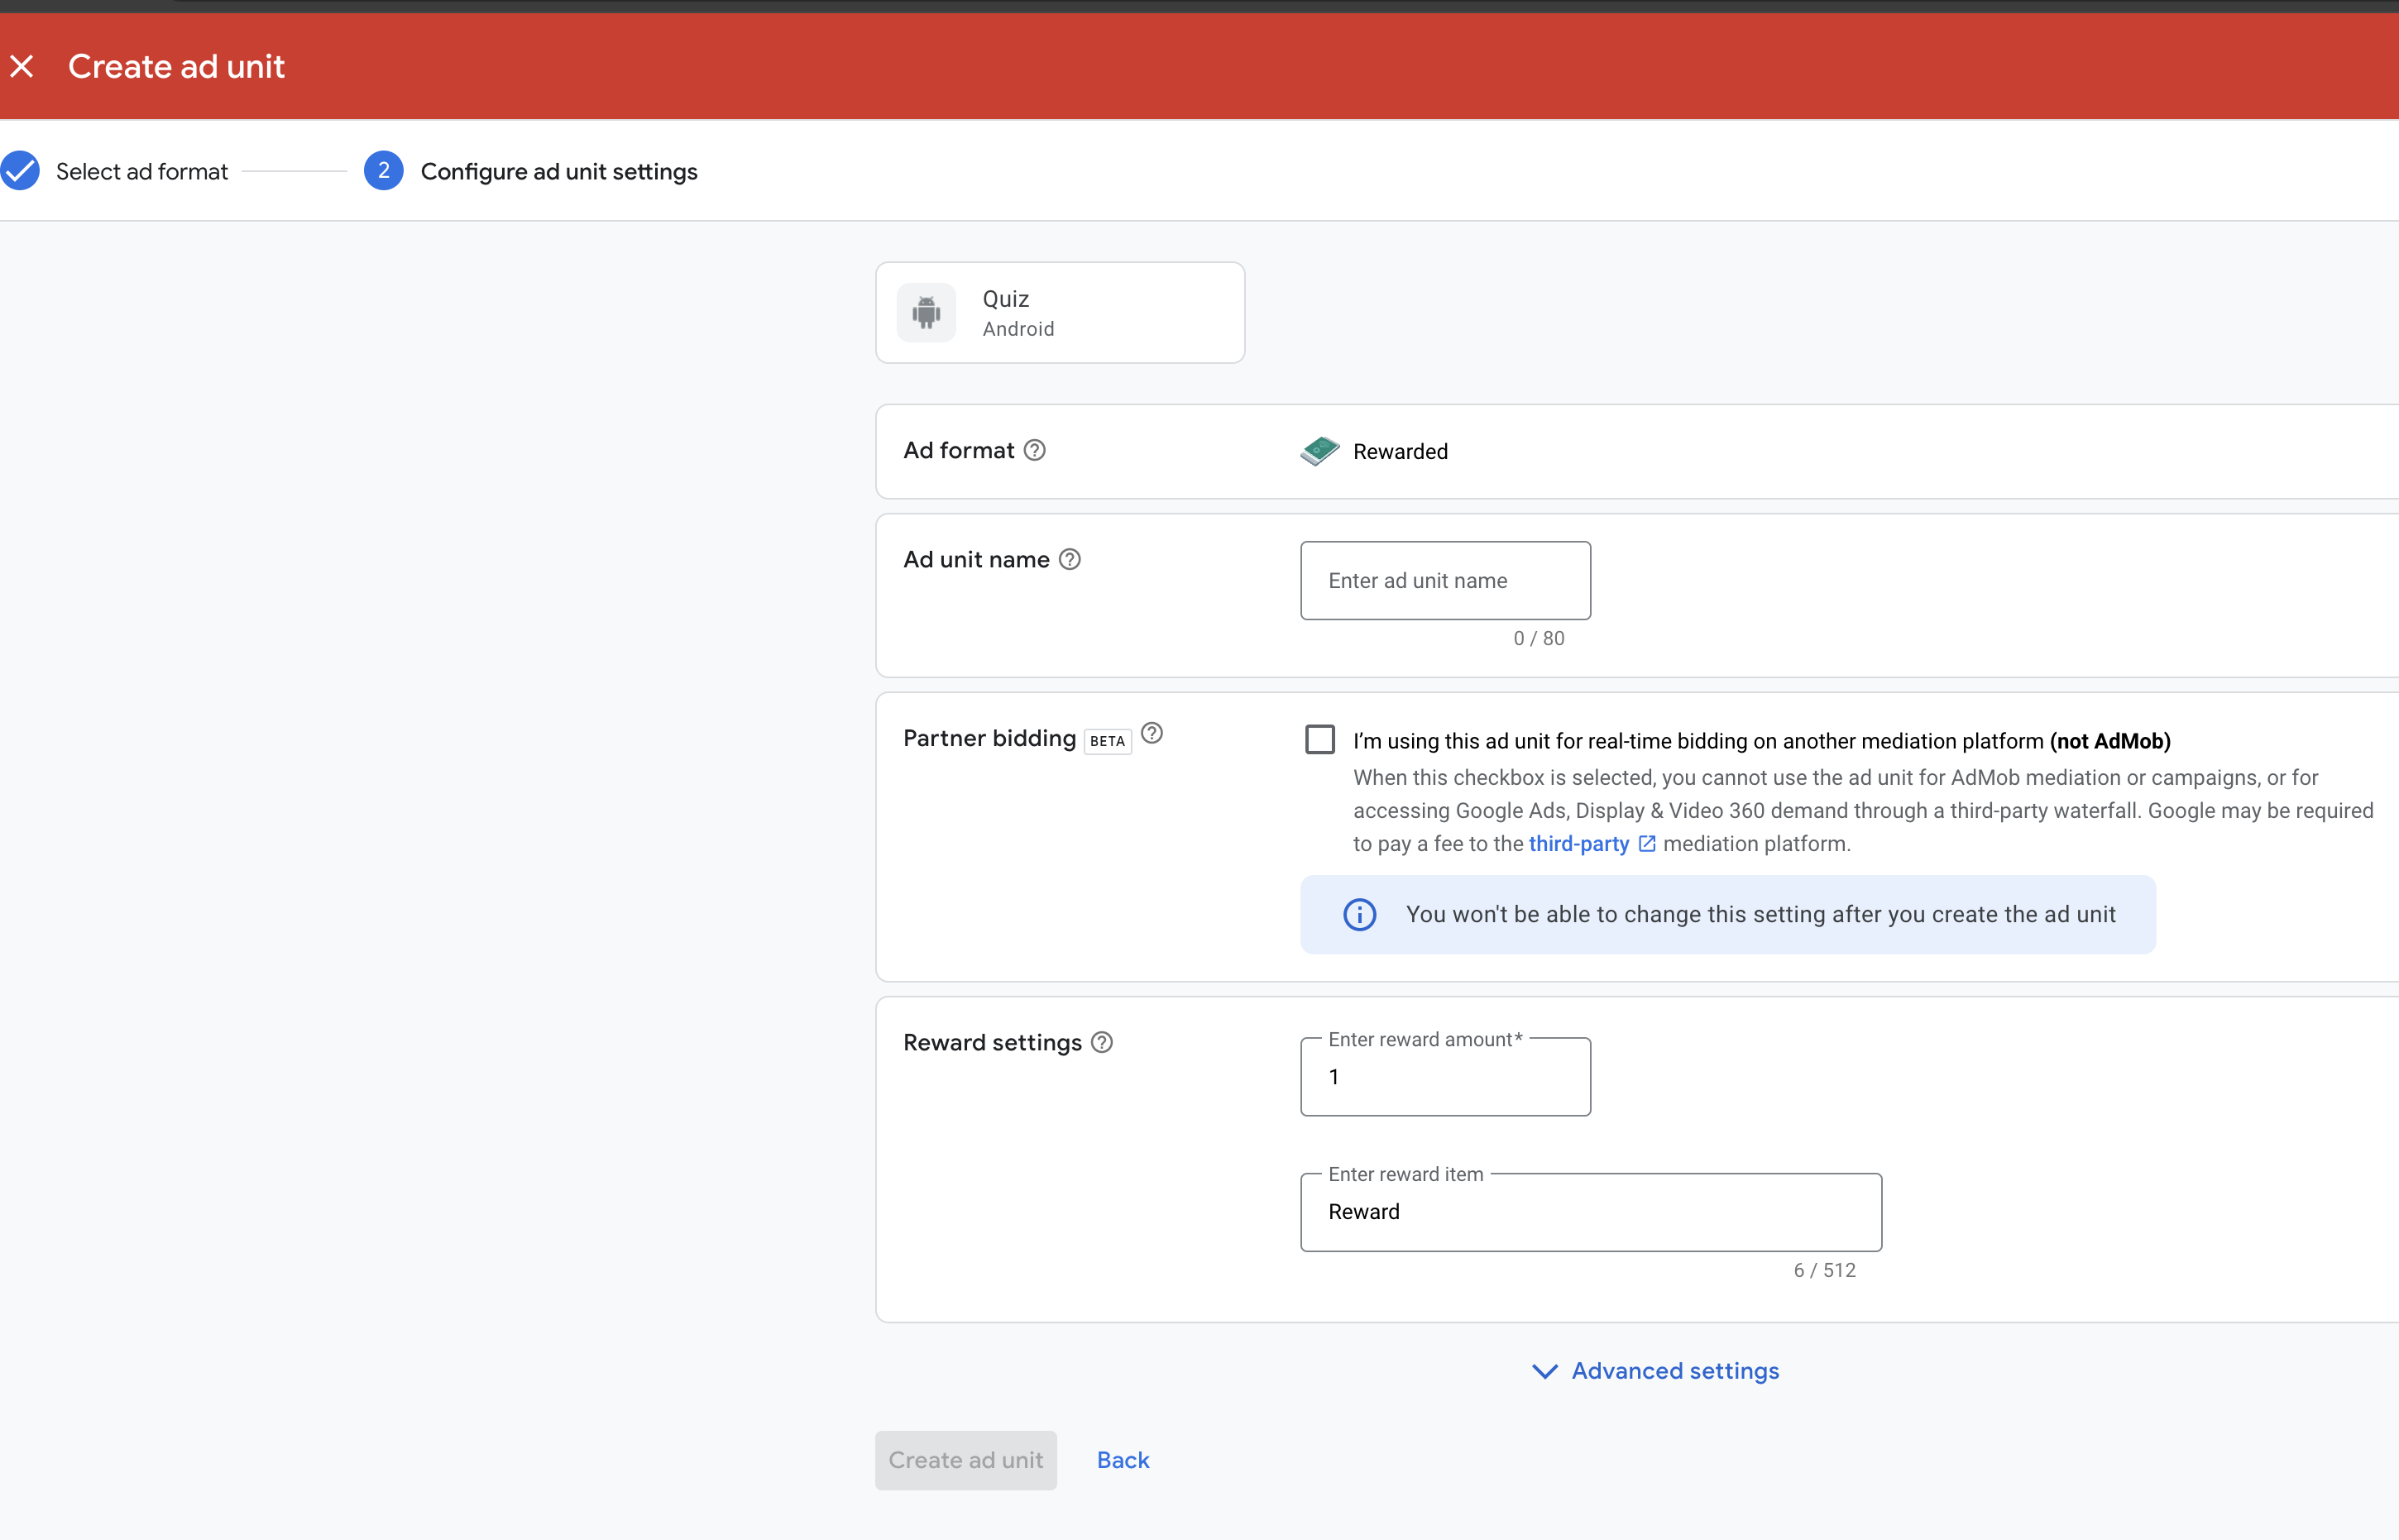
Rewarded Ad
To create a rewarded ad in AdMob, follow these steps:
In the AdMob dashboard, navigate to the Apps section and select your app.
Click on the Ad Units tab and then the Add Ad Unit button.
Select Rewarded as the ad format and enter a name for your ad unit.
Click on Create Ad Unit.
Native Ad
To create a native ad in AdMob, follow these steps:
In the AdMob dashboard, navigate to the Apps section and select your app.
Click on the Ad Units tab and then the Add Ad Unit button.
Select Native as the ad format and enter a name for your ad unit.
Click on Create Ad Unit.

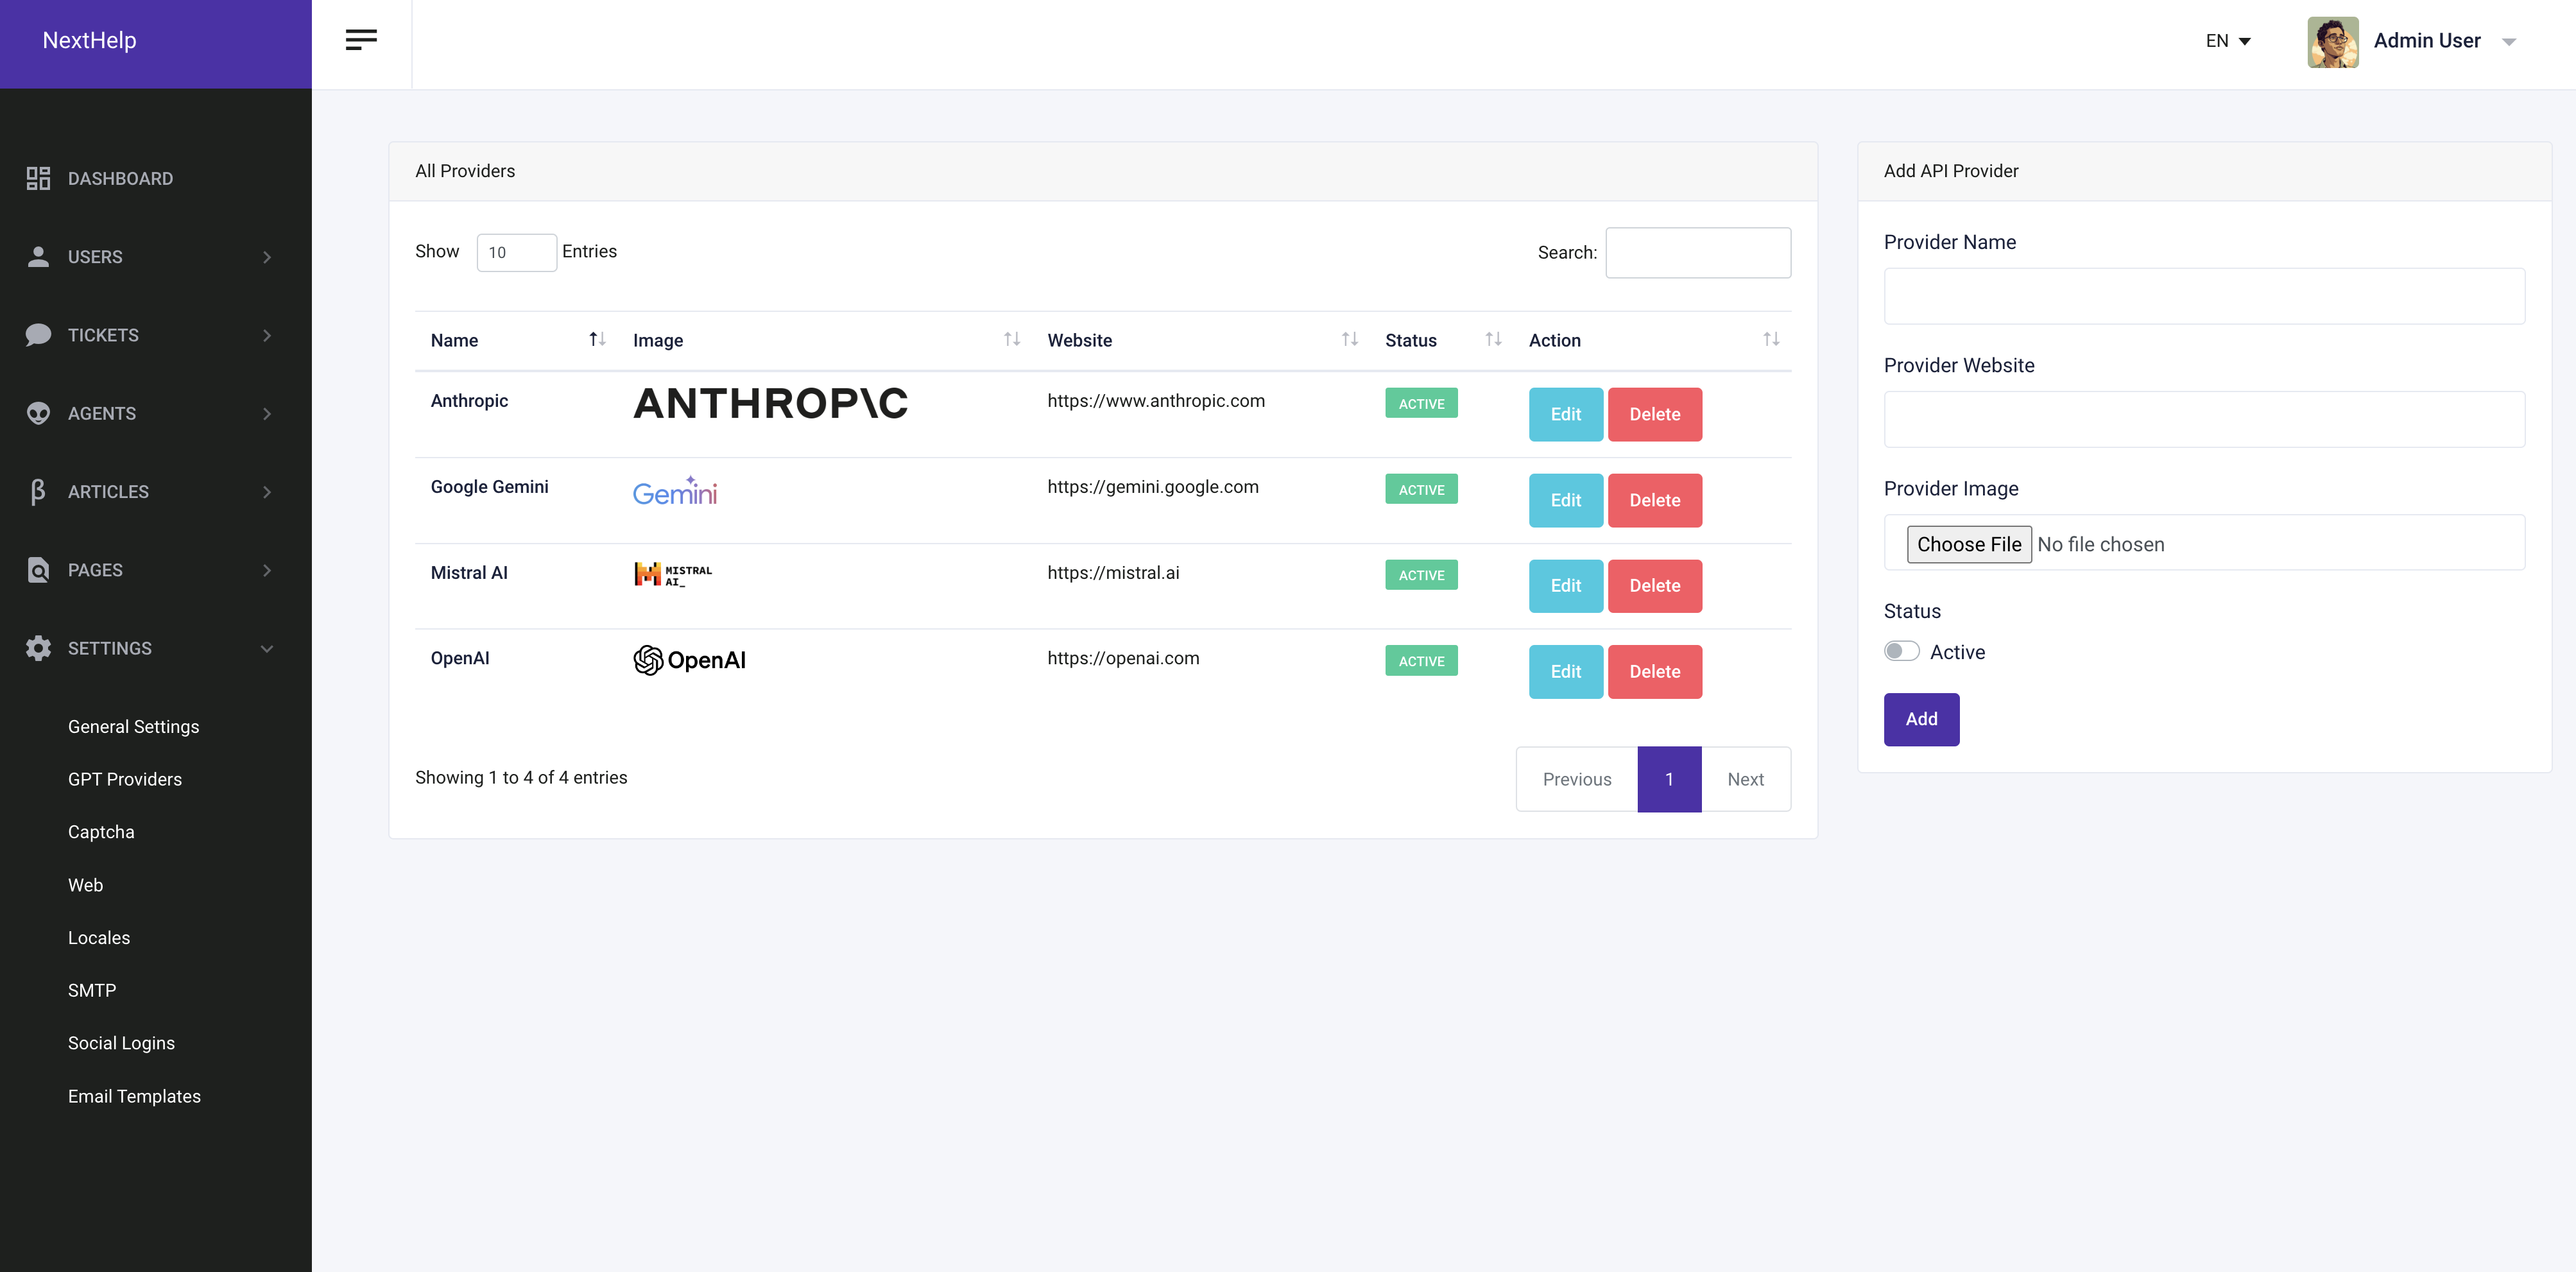
Prepare your GPT API Provider Keys
Our platform allows you to seamlessly integrate and manage multiple AI services by setting API keys and enabling your preferred services directly from an intuitive admin panel. Experience the flexibility and innovation of modern AI, tailored to your specific needs.
Anthropic
Important
Visit Anthropic's Website: Go to Anthropic's official website. https://www.anthropic.com
Sign Up: Click on the "Sign Up" button if you don't already have an account. Fill in the required details to create a new account.
Verify Email: After signing up, verify your email address by clicking on the verification link sent to your email.
API Dashboard: Navigate to the API section of your dashboard. This can usually be found in the account settings or a dedicated API section in the main menu.
Copy the Key: Copy the API key and store it in admin panel. You will need this key to authenticate your API requests.

Google Gemini
Important
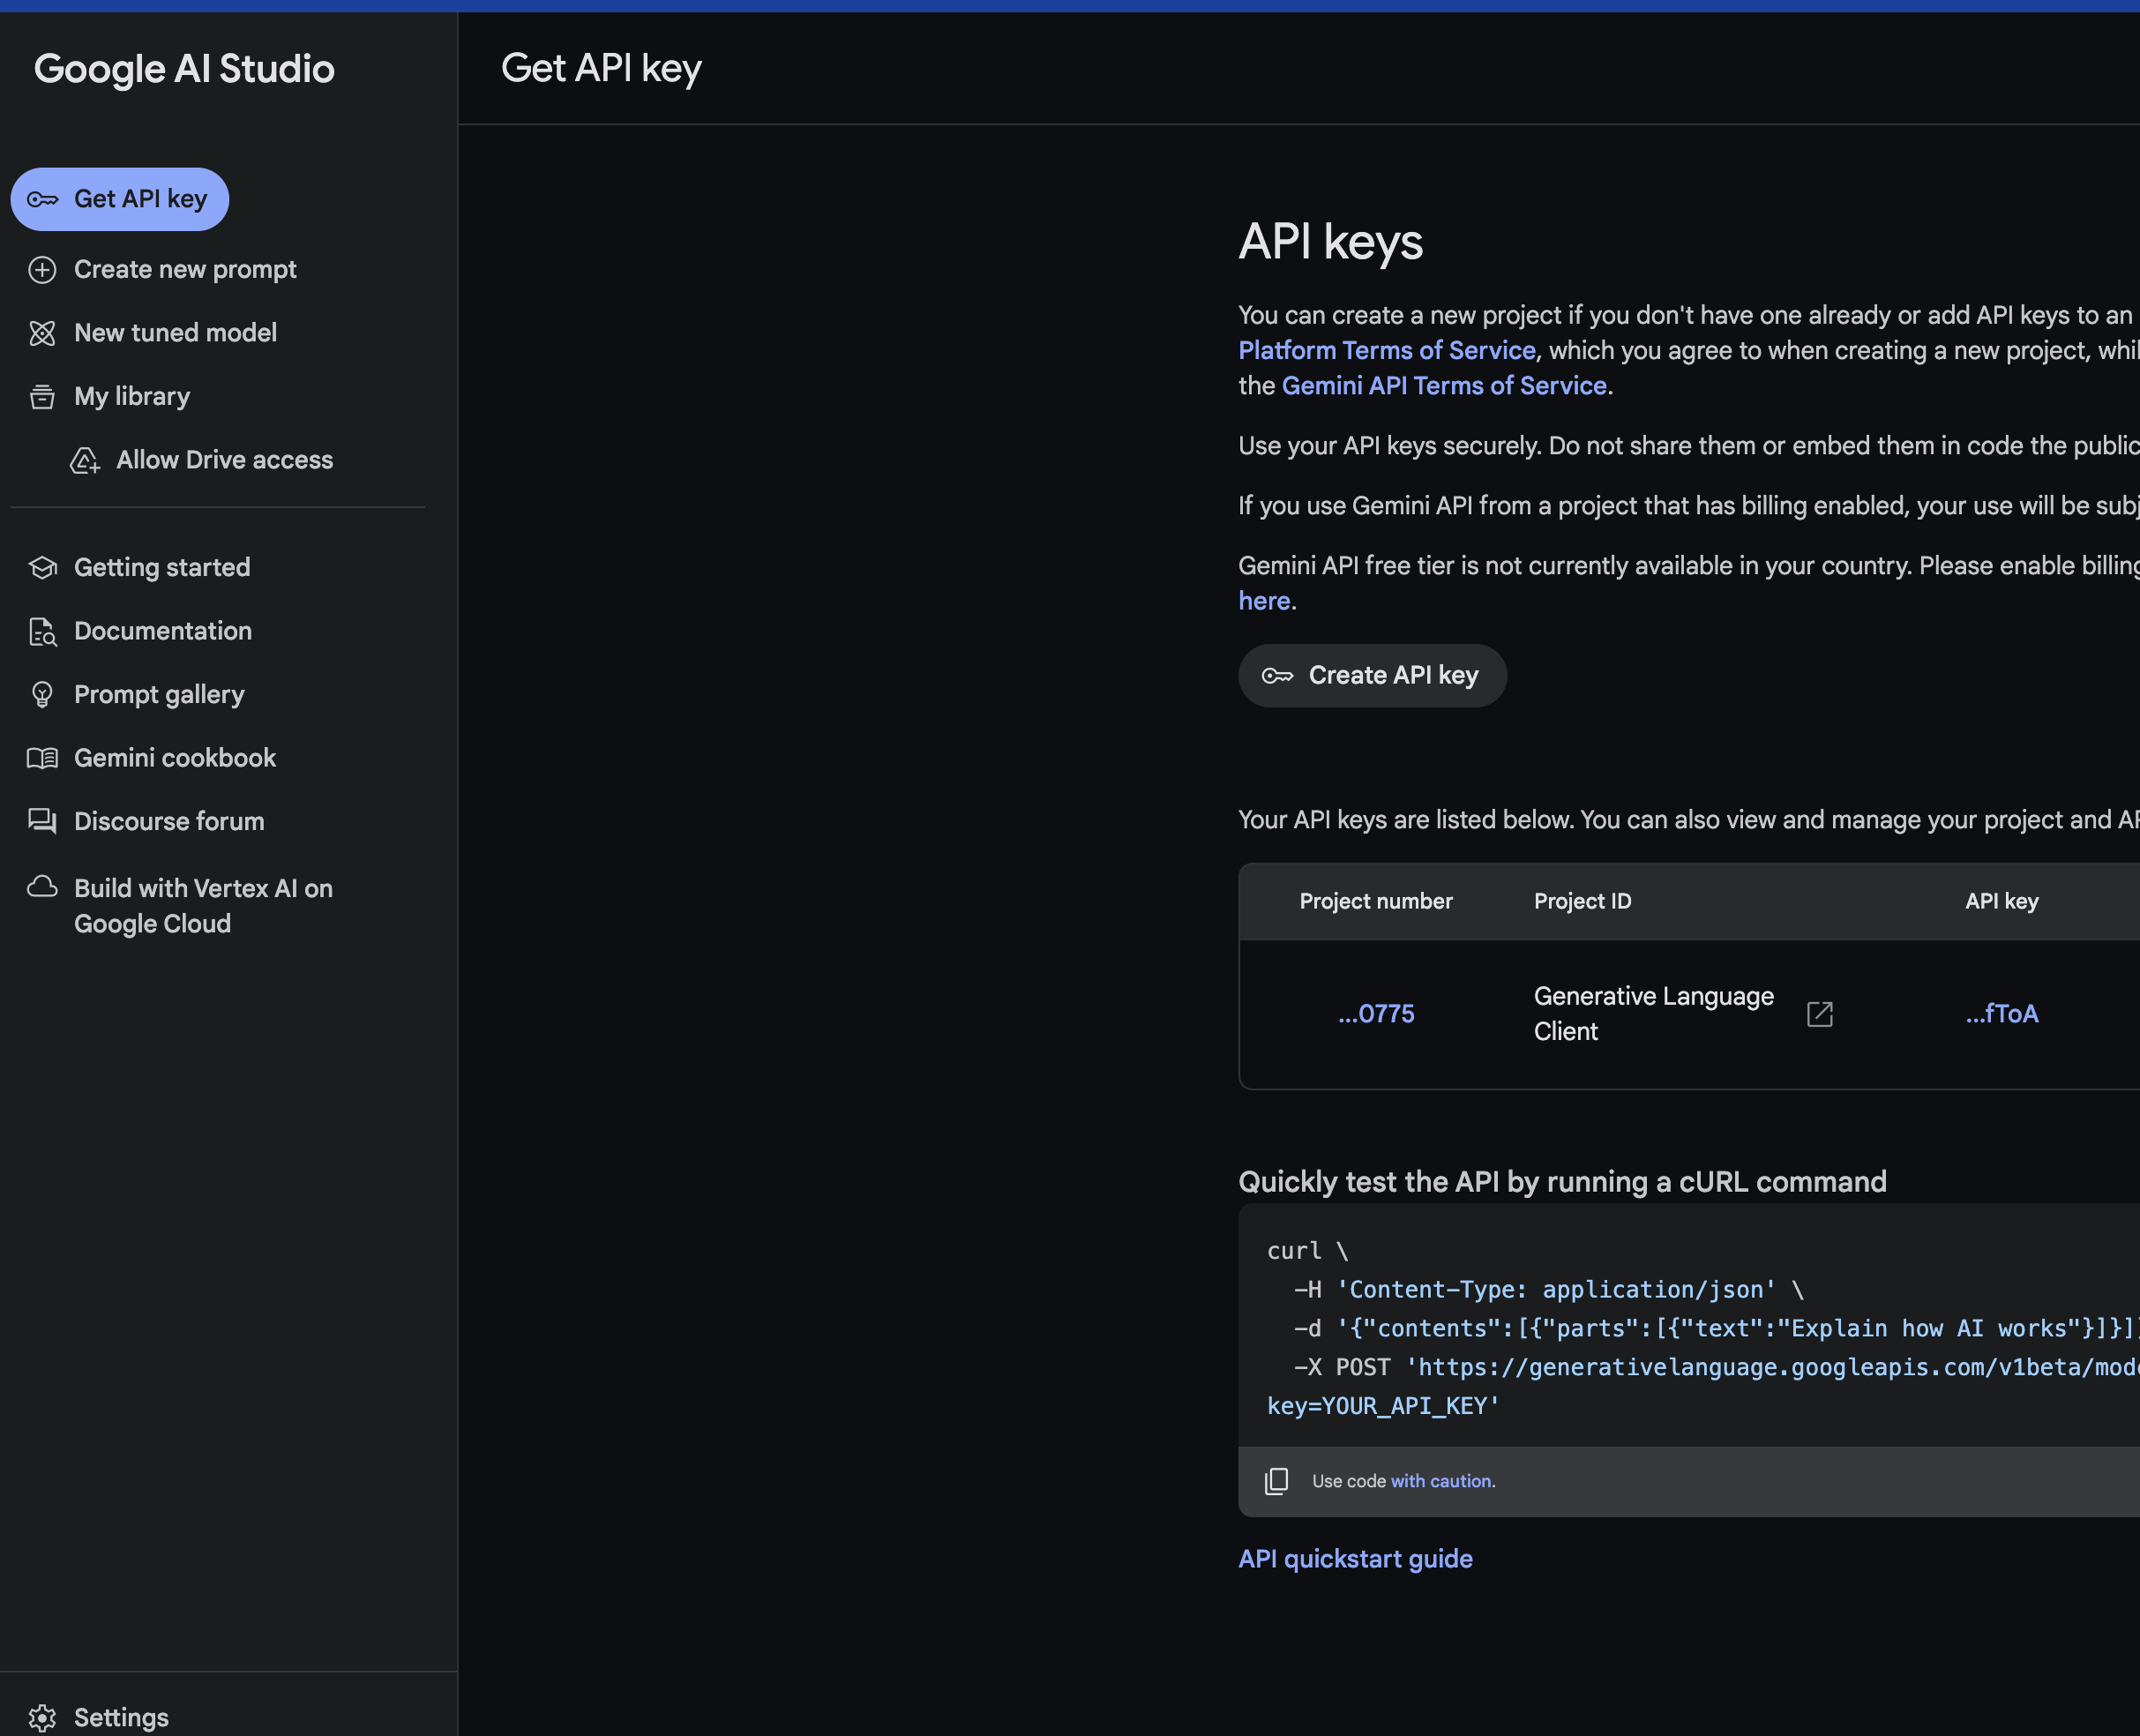
Visit Google Gemini's Website: Go to Google Gemini's official website. https://aistudio.google.com/app/apikey
Sign Up: Click on the "Sign Up" button if you don't already have an account. Fill in the required details to create a new account.
Verify Email: After signing up, verify your email address by clicking on the verification link sent to your email.
To use the Gemini API, you need an API key. You can create a key with one click in Google AI Studio.
Copy the Key: Copy the API key and store it in admin panel. You will need this key to authenticate your API requests.
Mistral AI
Important
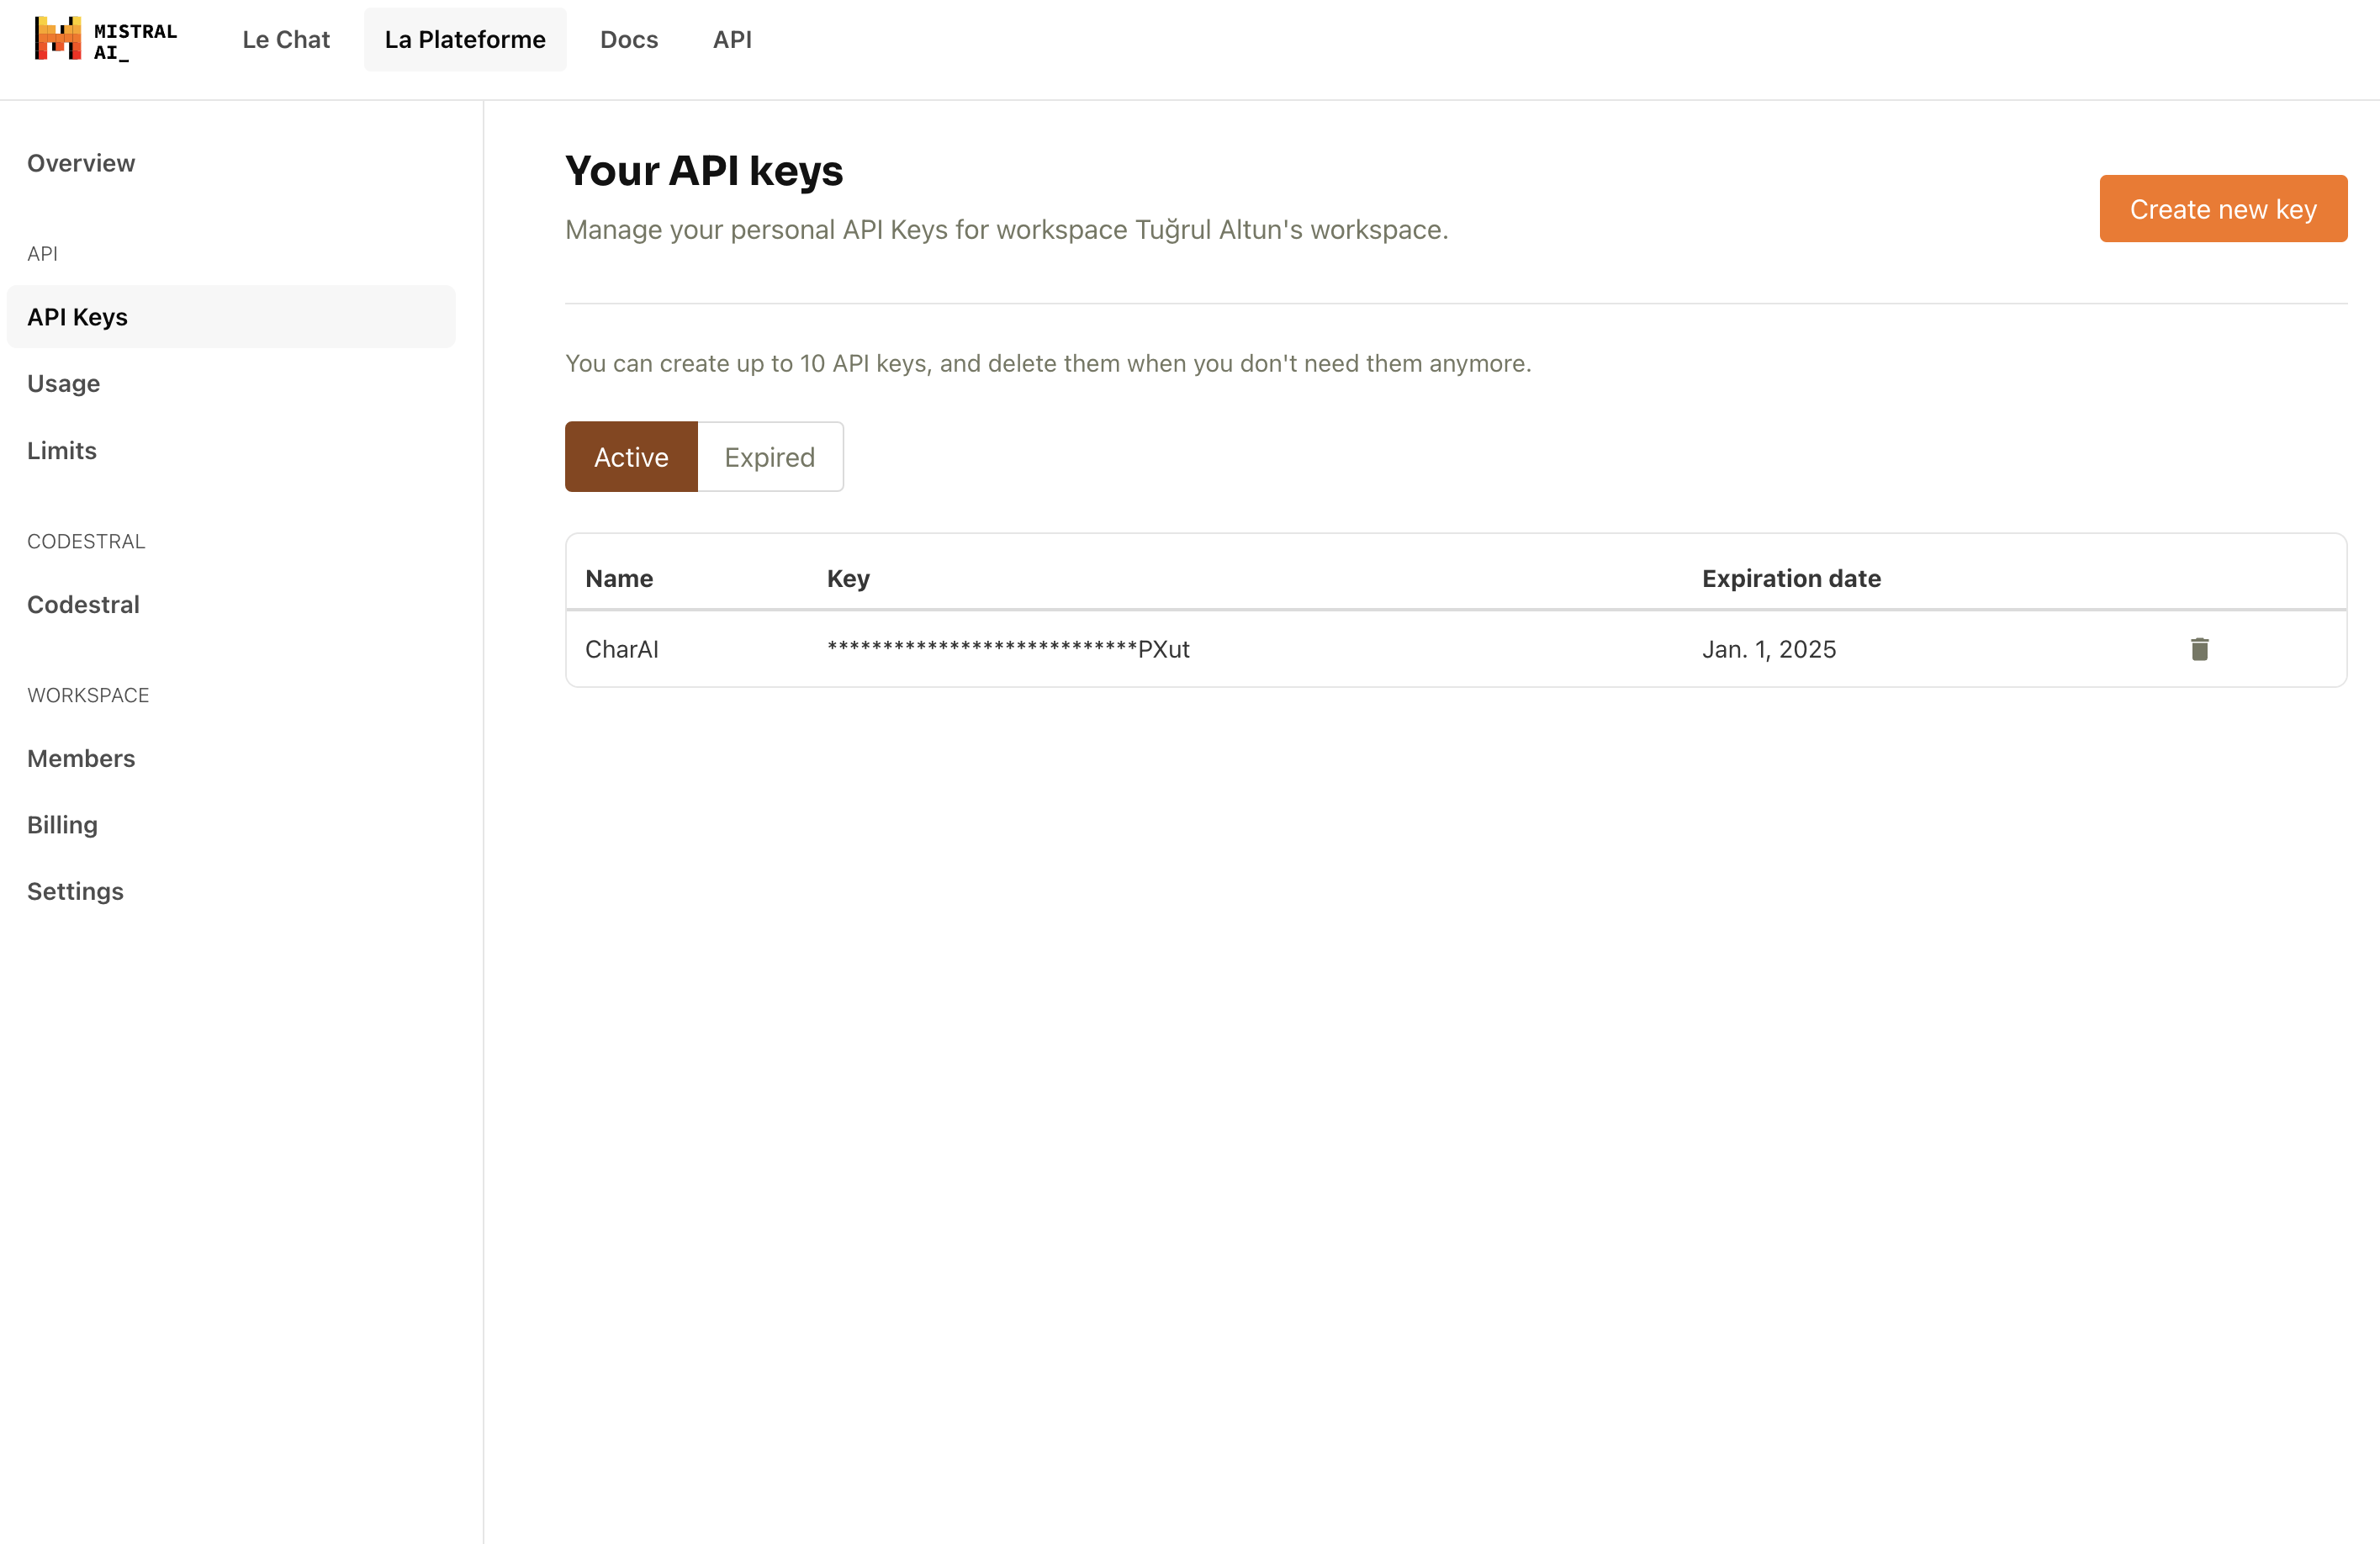
Visit Mistral AI's Website: Go to Mistral AI's official website. https://mistral.ai
Sign Up: Click on the "Sign Up" button if you don't already have an account. Fill in the required details to create a new account.
Verify Email: After signing up, verify your email address by clicking on the verification link sent to your email.
To use the Mistral AI API, you need an API key. You can create a key with one click in Mistral AI website.
Copy the Key: Copy the API key and store it in admin panel. You will need this key to authenticate your API requests.
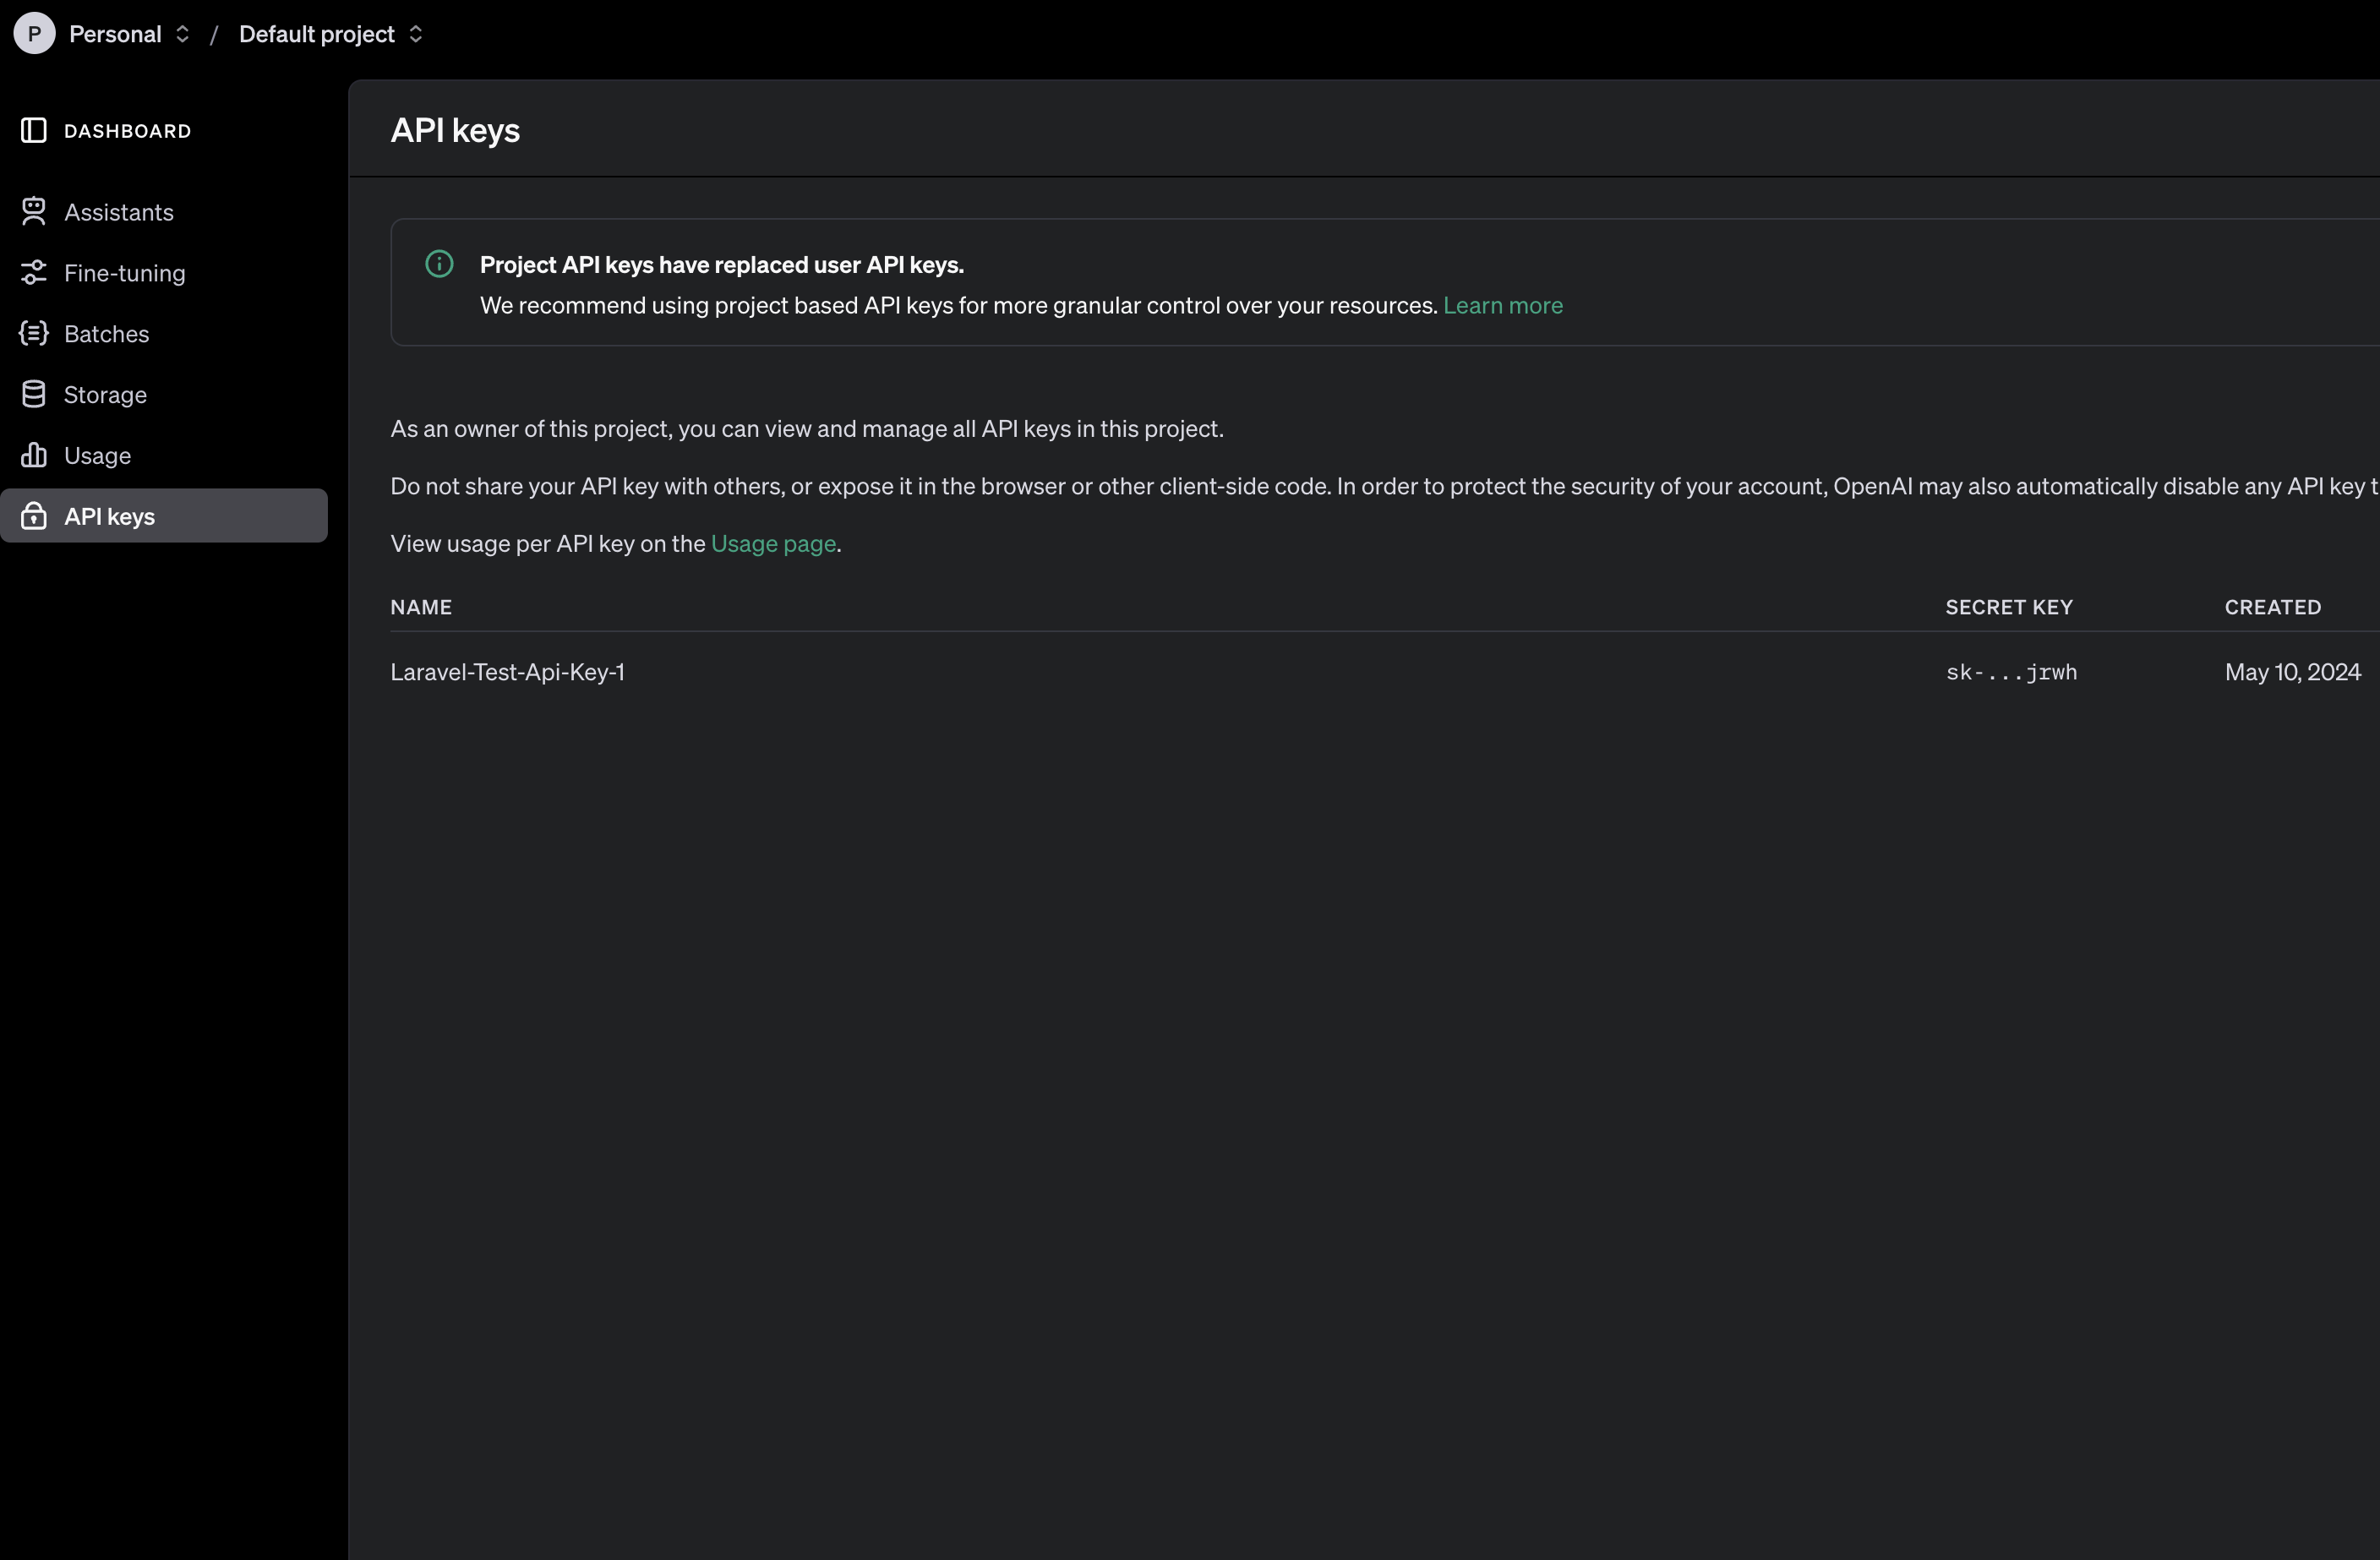
OpenAI
Important
Visit OpenAI's Website: Go to OpenAI's official website. https://platform.openai.com/api-keys
Sign Up: Click on the "Sign Up" button if you don't already have an account. Fill in the required details to create a new account.
Verify Email: After signing up, verify your email address by clicking on the verification link sent to your email.
To use the OpenAI API, you need an API key. You can create a key with one click in OpenAI website.
Copy the Key: Copy the API key and store it in admin panel. You will need this key to authenticate your API requests.
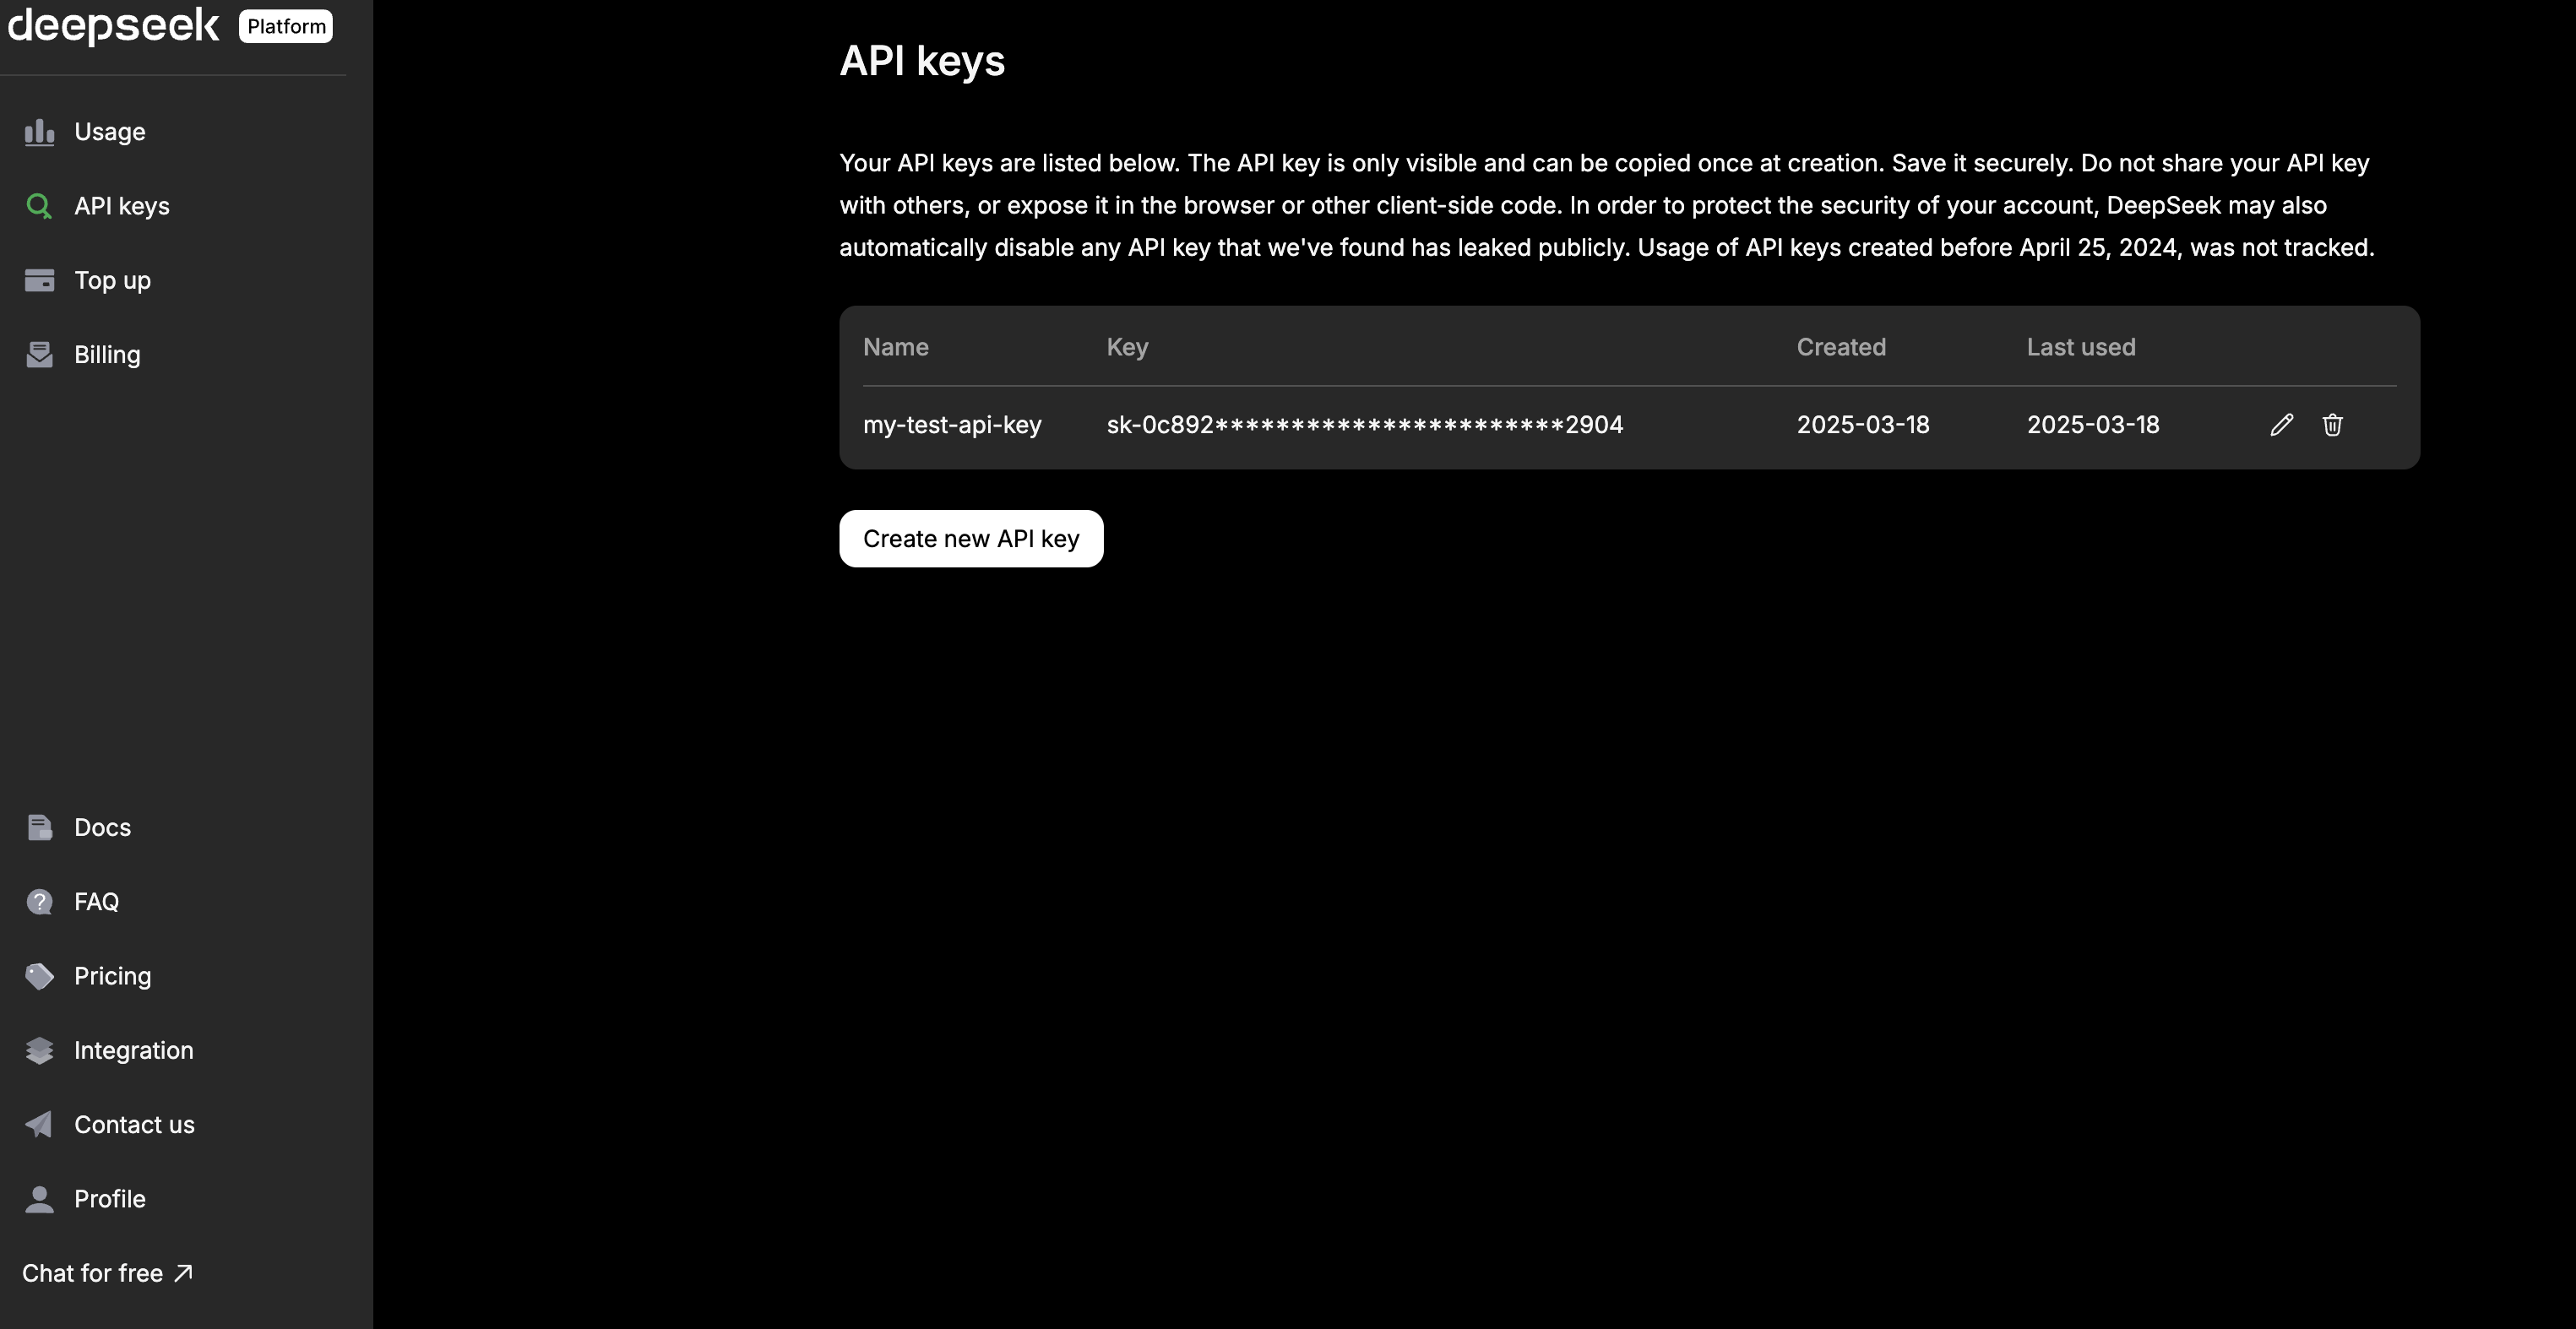
Deepseek
Important
Visit Deepseek's Website: Go to Deepseek's official website. https://platform.deepseek.com/api_keys
Sign Up: Click on the "Sign Up" button if you don't already have an account. Fill in the required details to create a new account.
To use the Deepseek API, you need an API key. You can create a key with one click in Deepseek website.
Copy the Key: Copy the API key and store it in admin panel. You will need this key to authenticate your API requests.
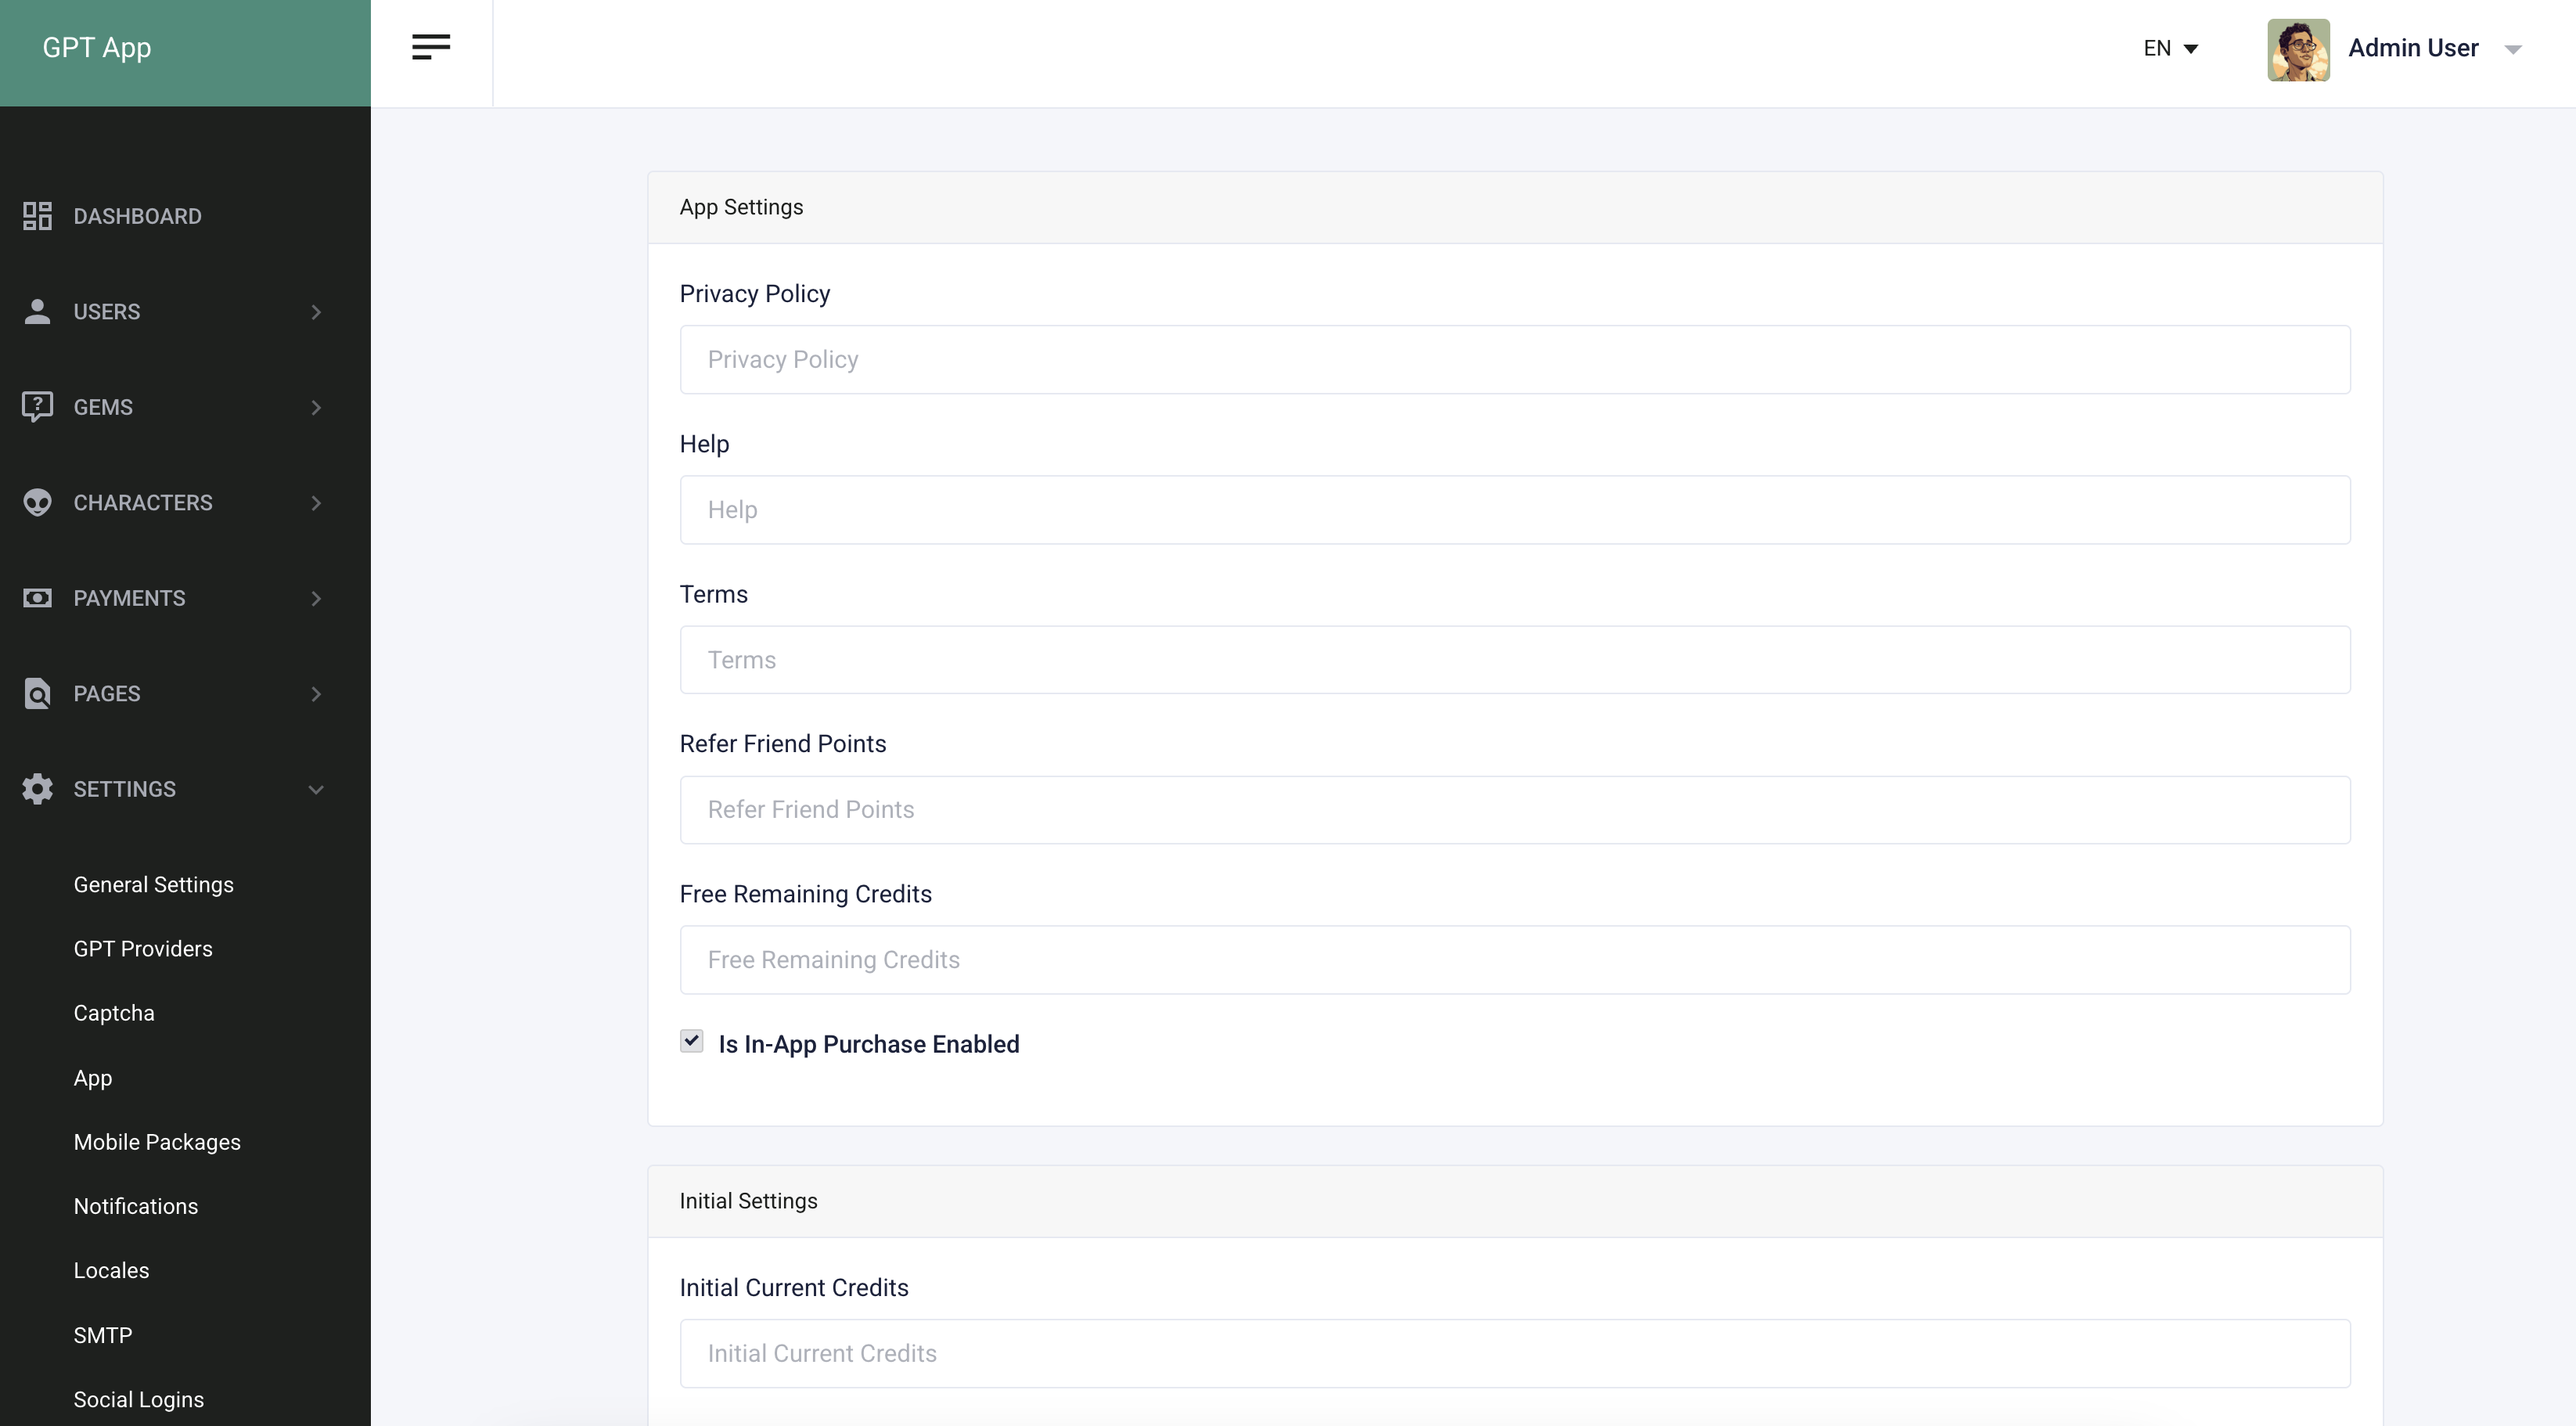
Setup App Settings
You can manage some app settings from the admin panel. Fill in the required details to configure the app settings.
App Settings
Important
You can manage the app's ad ids, in app purchase enable/disable, interstitial interval, and other settings from the admin panel.
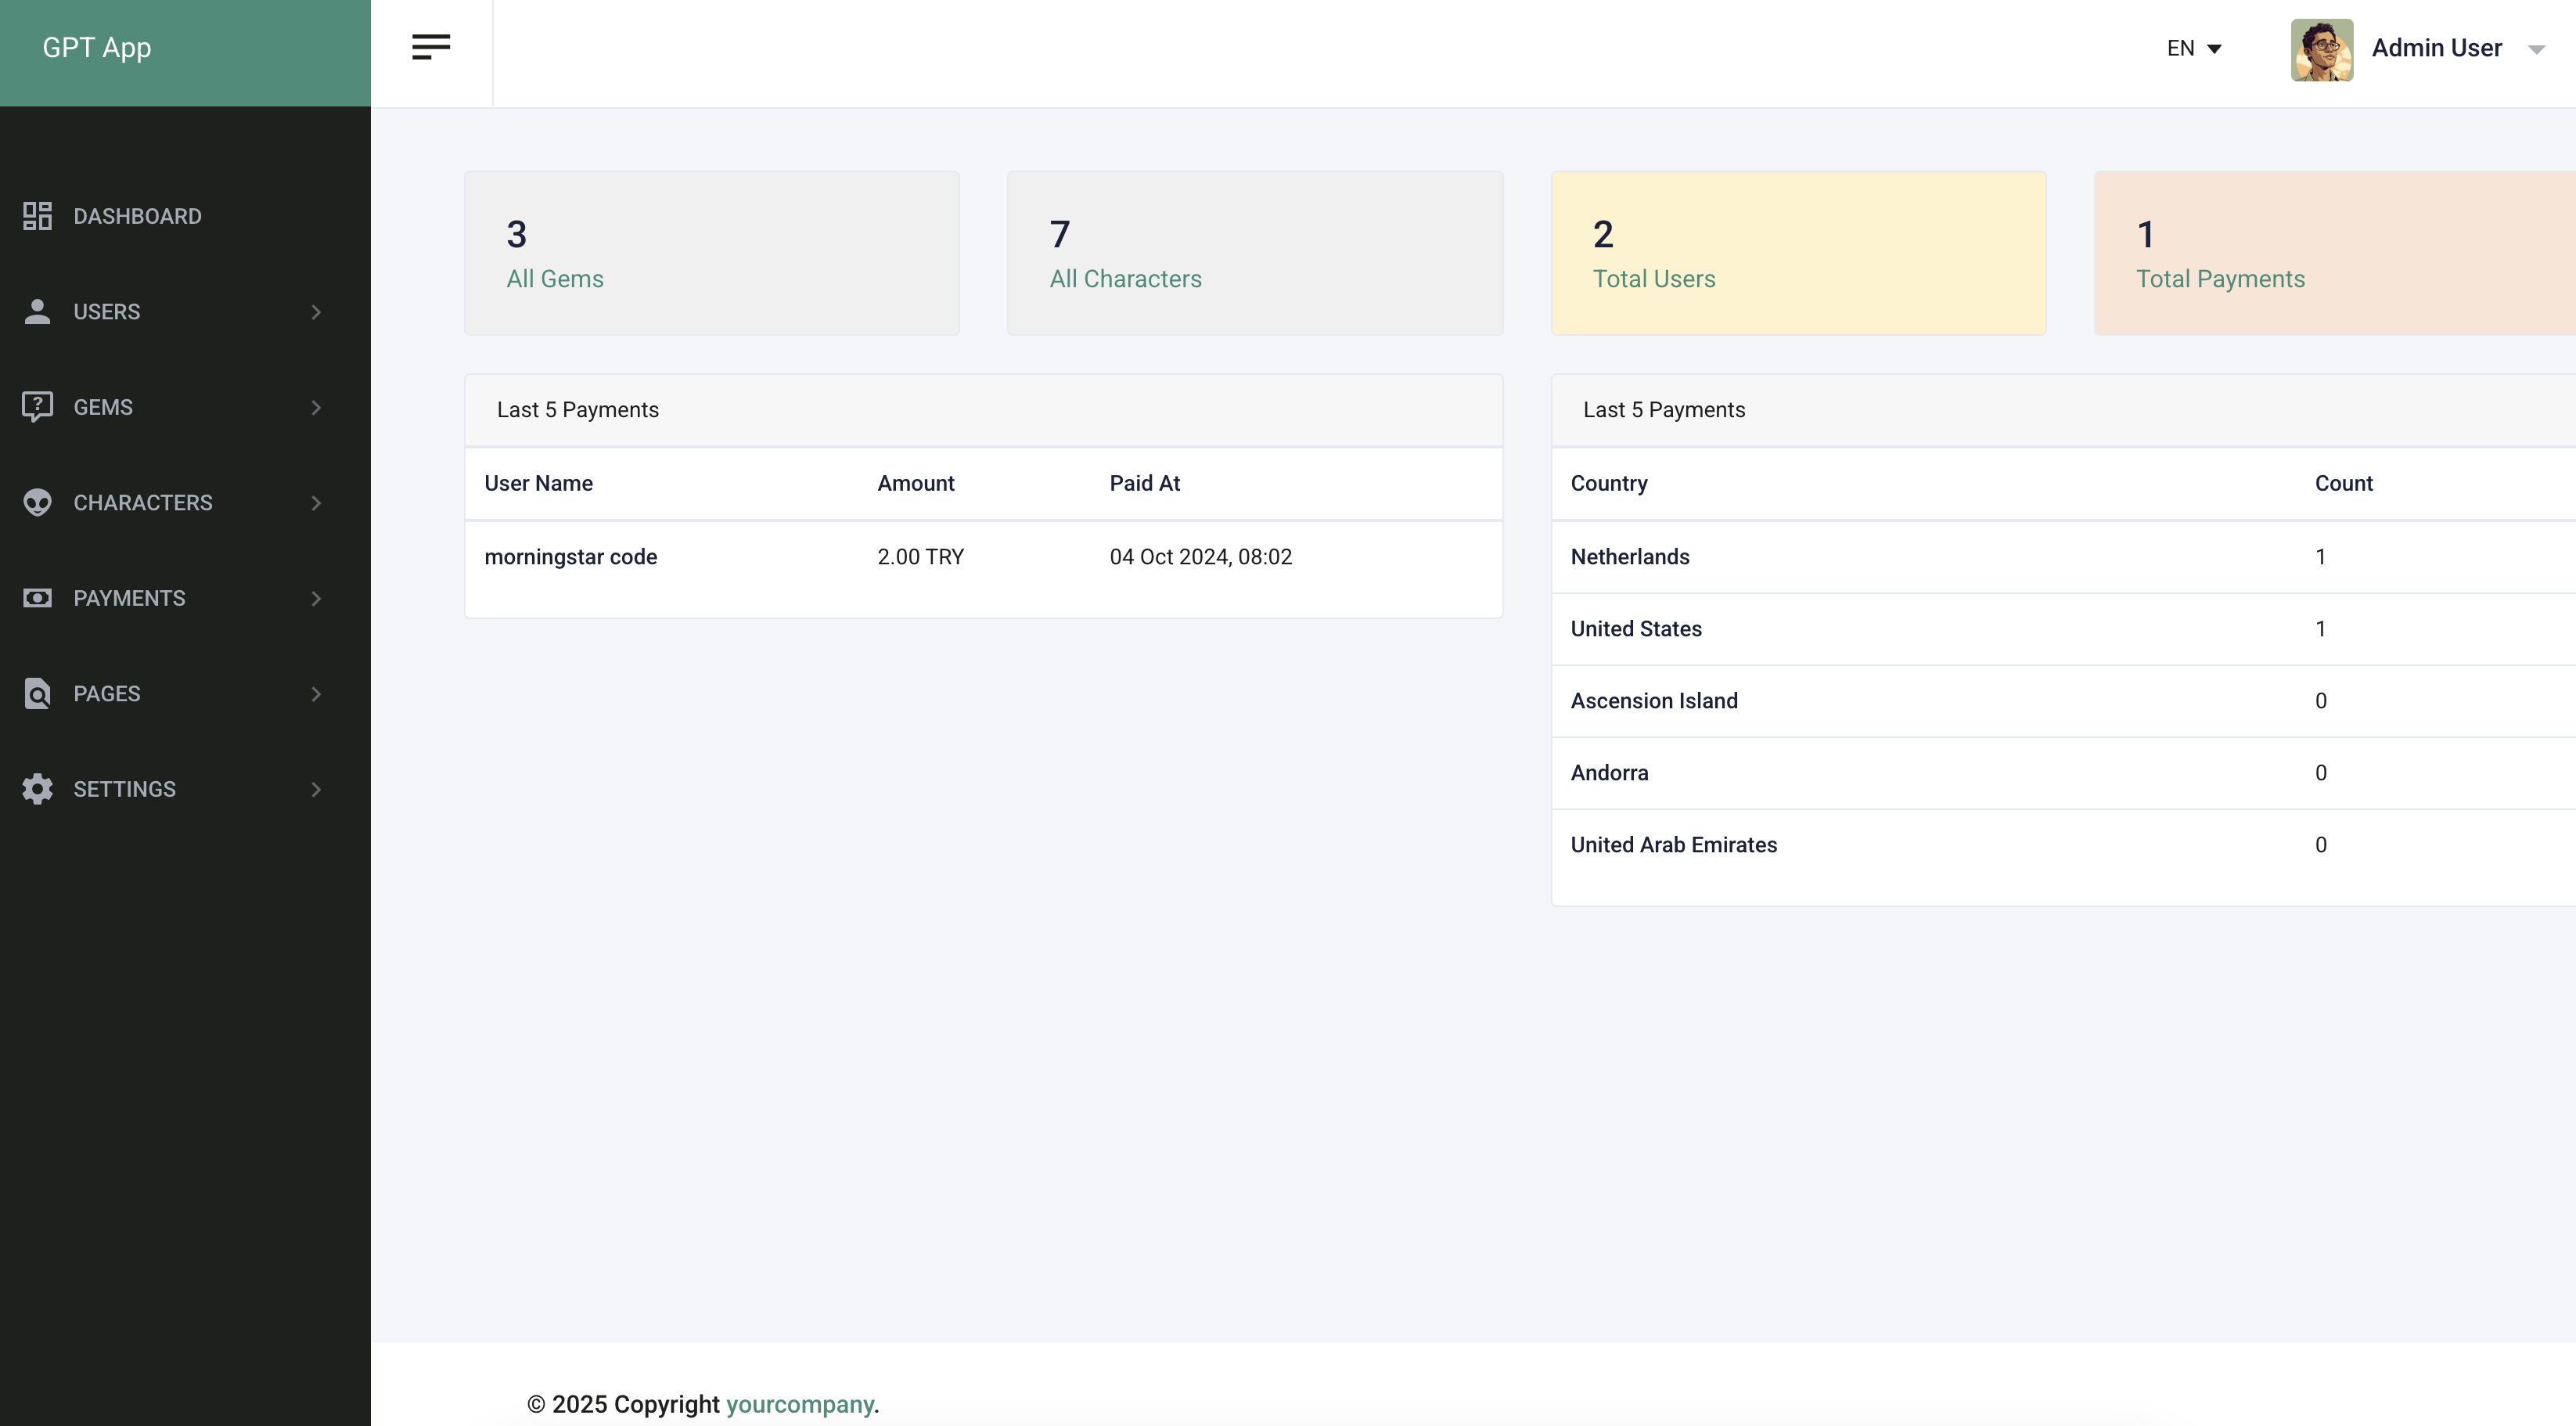
Admin Features
You can manage gems, characters, , AI models, users, locales, pages, and other settings from the admin panel.
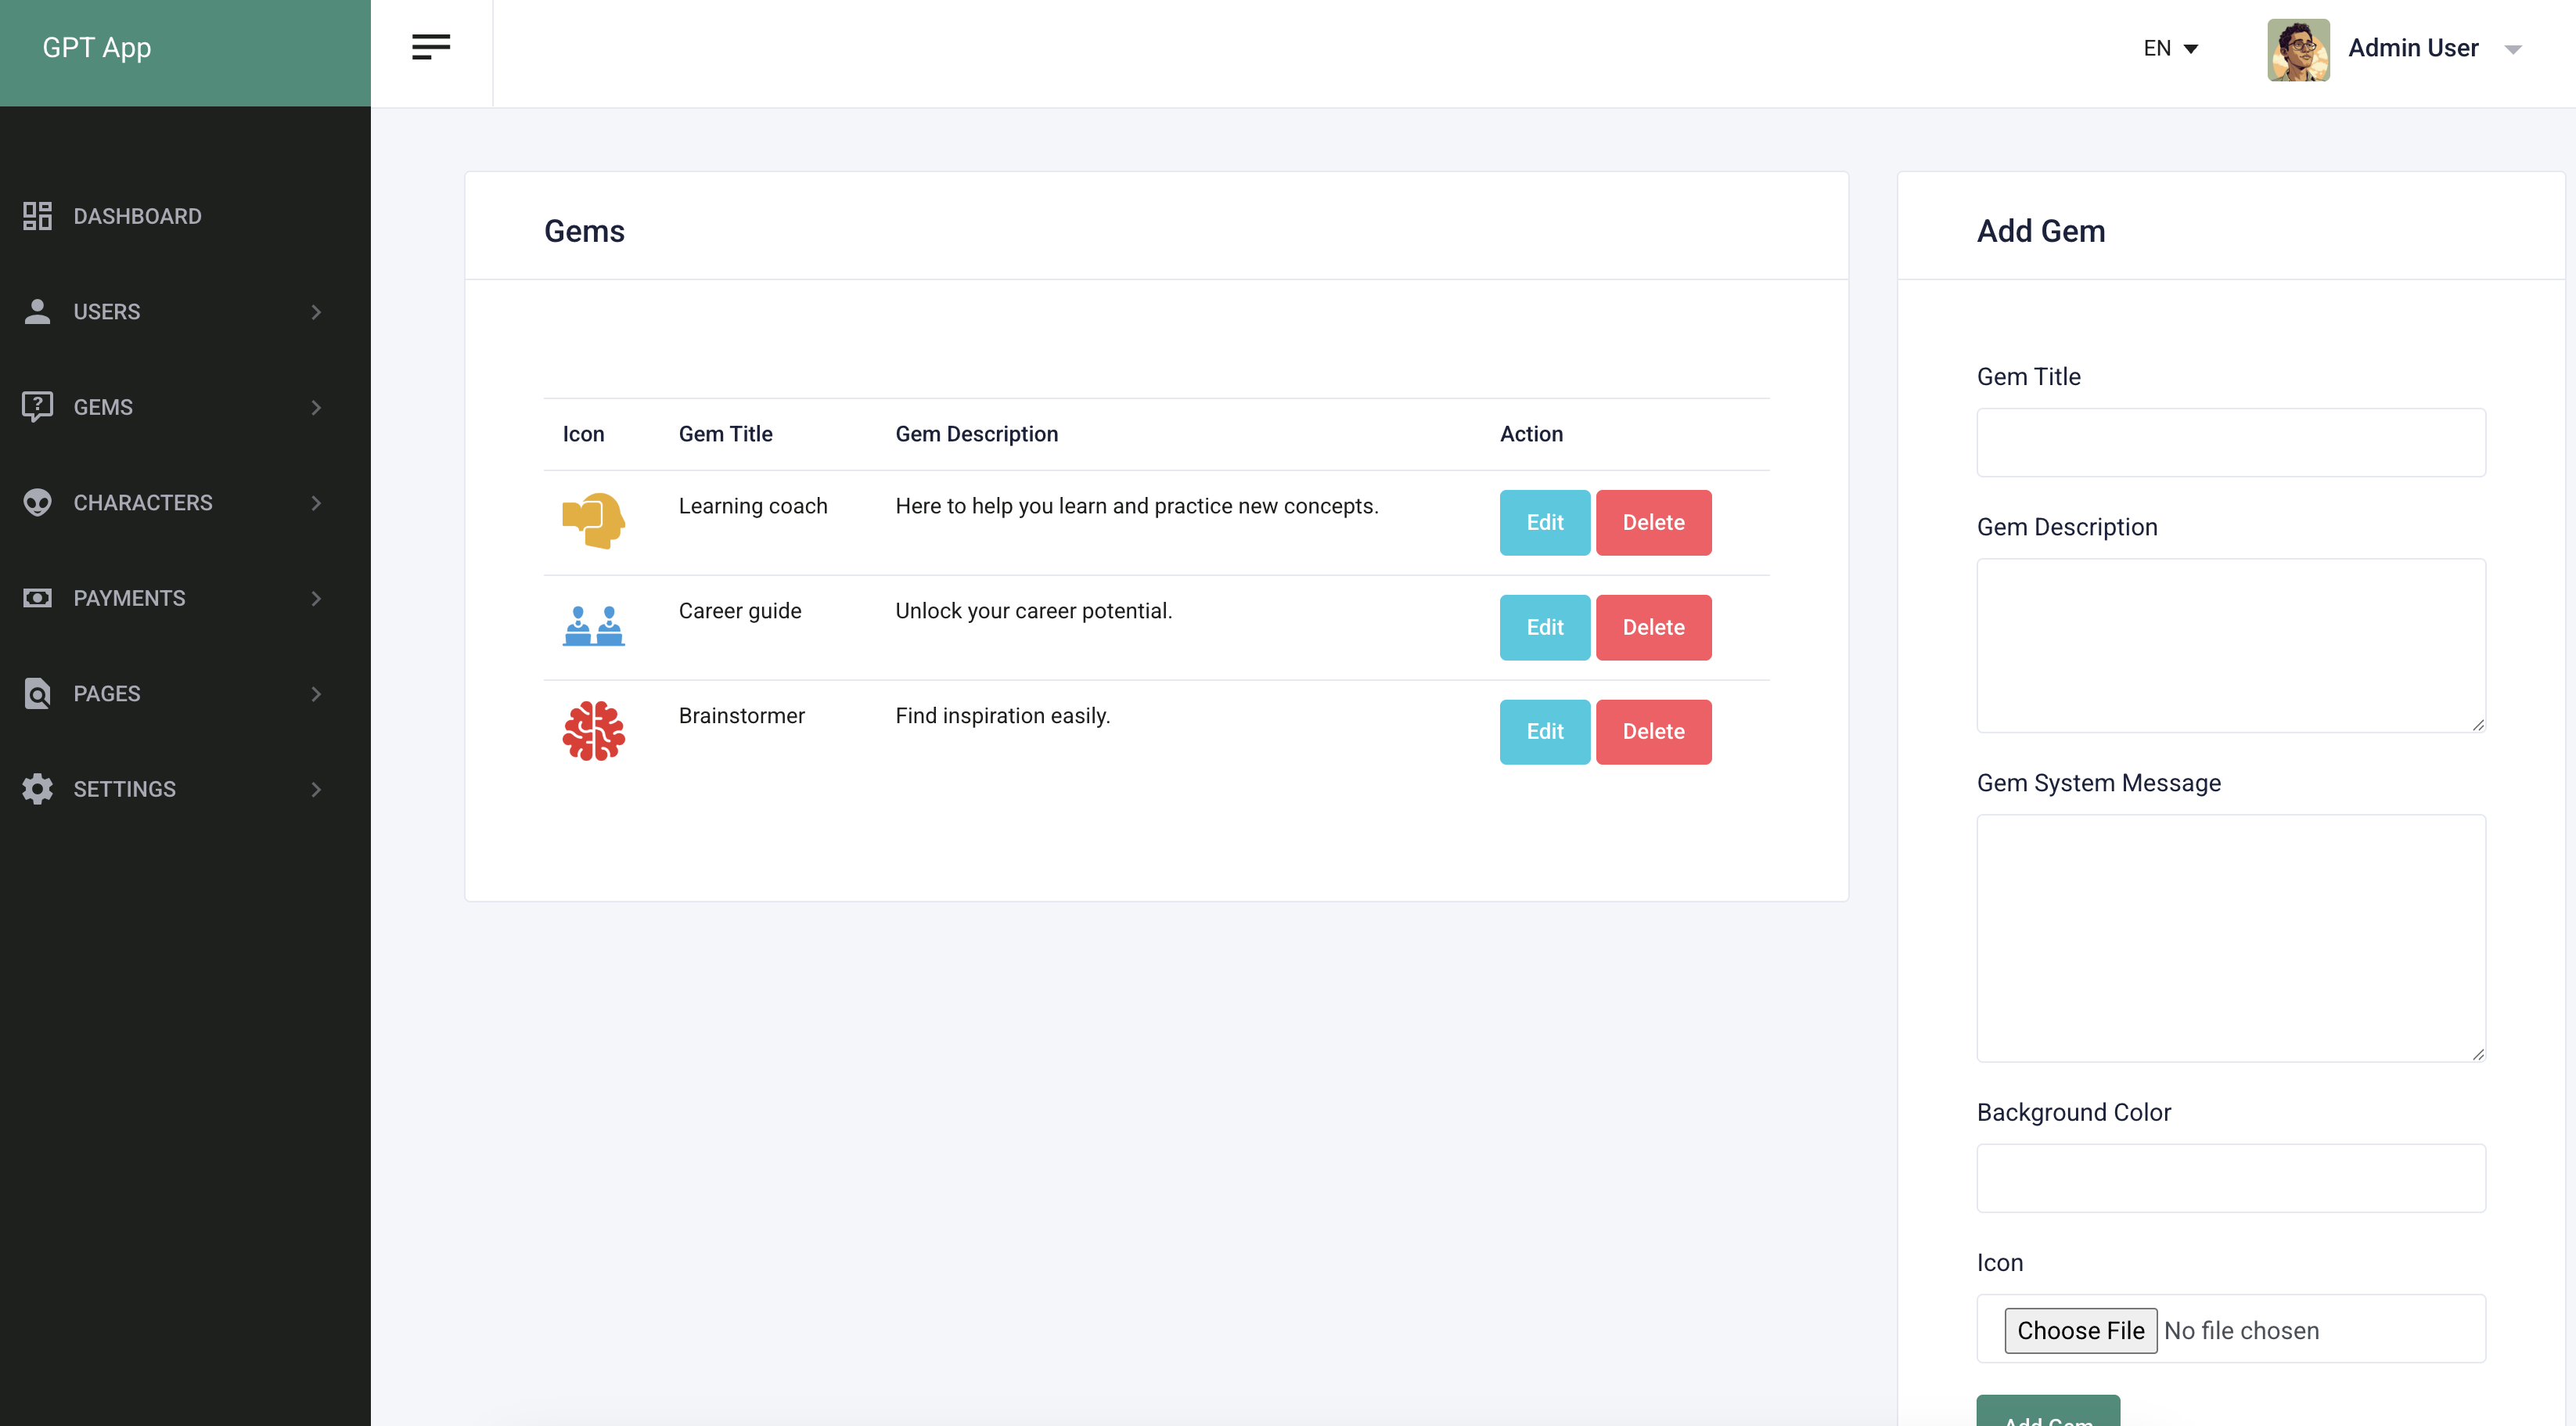
Gems
You can manage gems easily and dynamically from the admin panel. You can add, delete, edit, and manage gems. You can also add translations for gems.
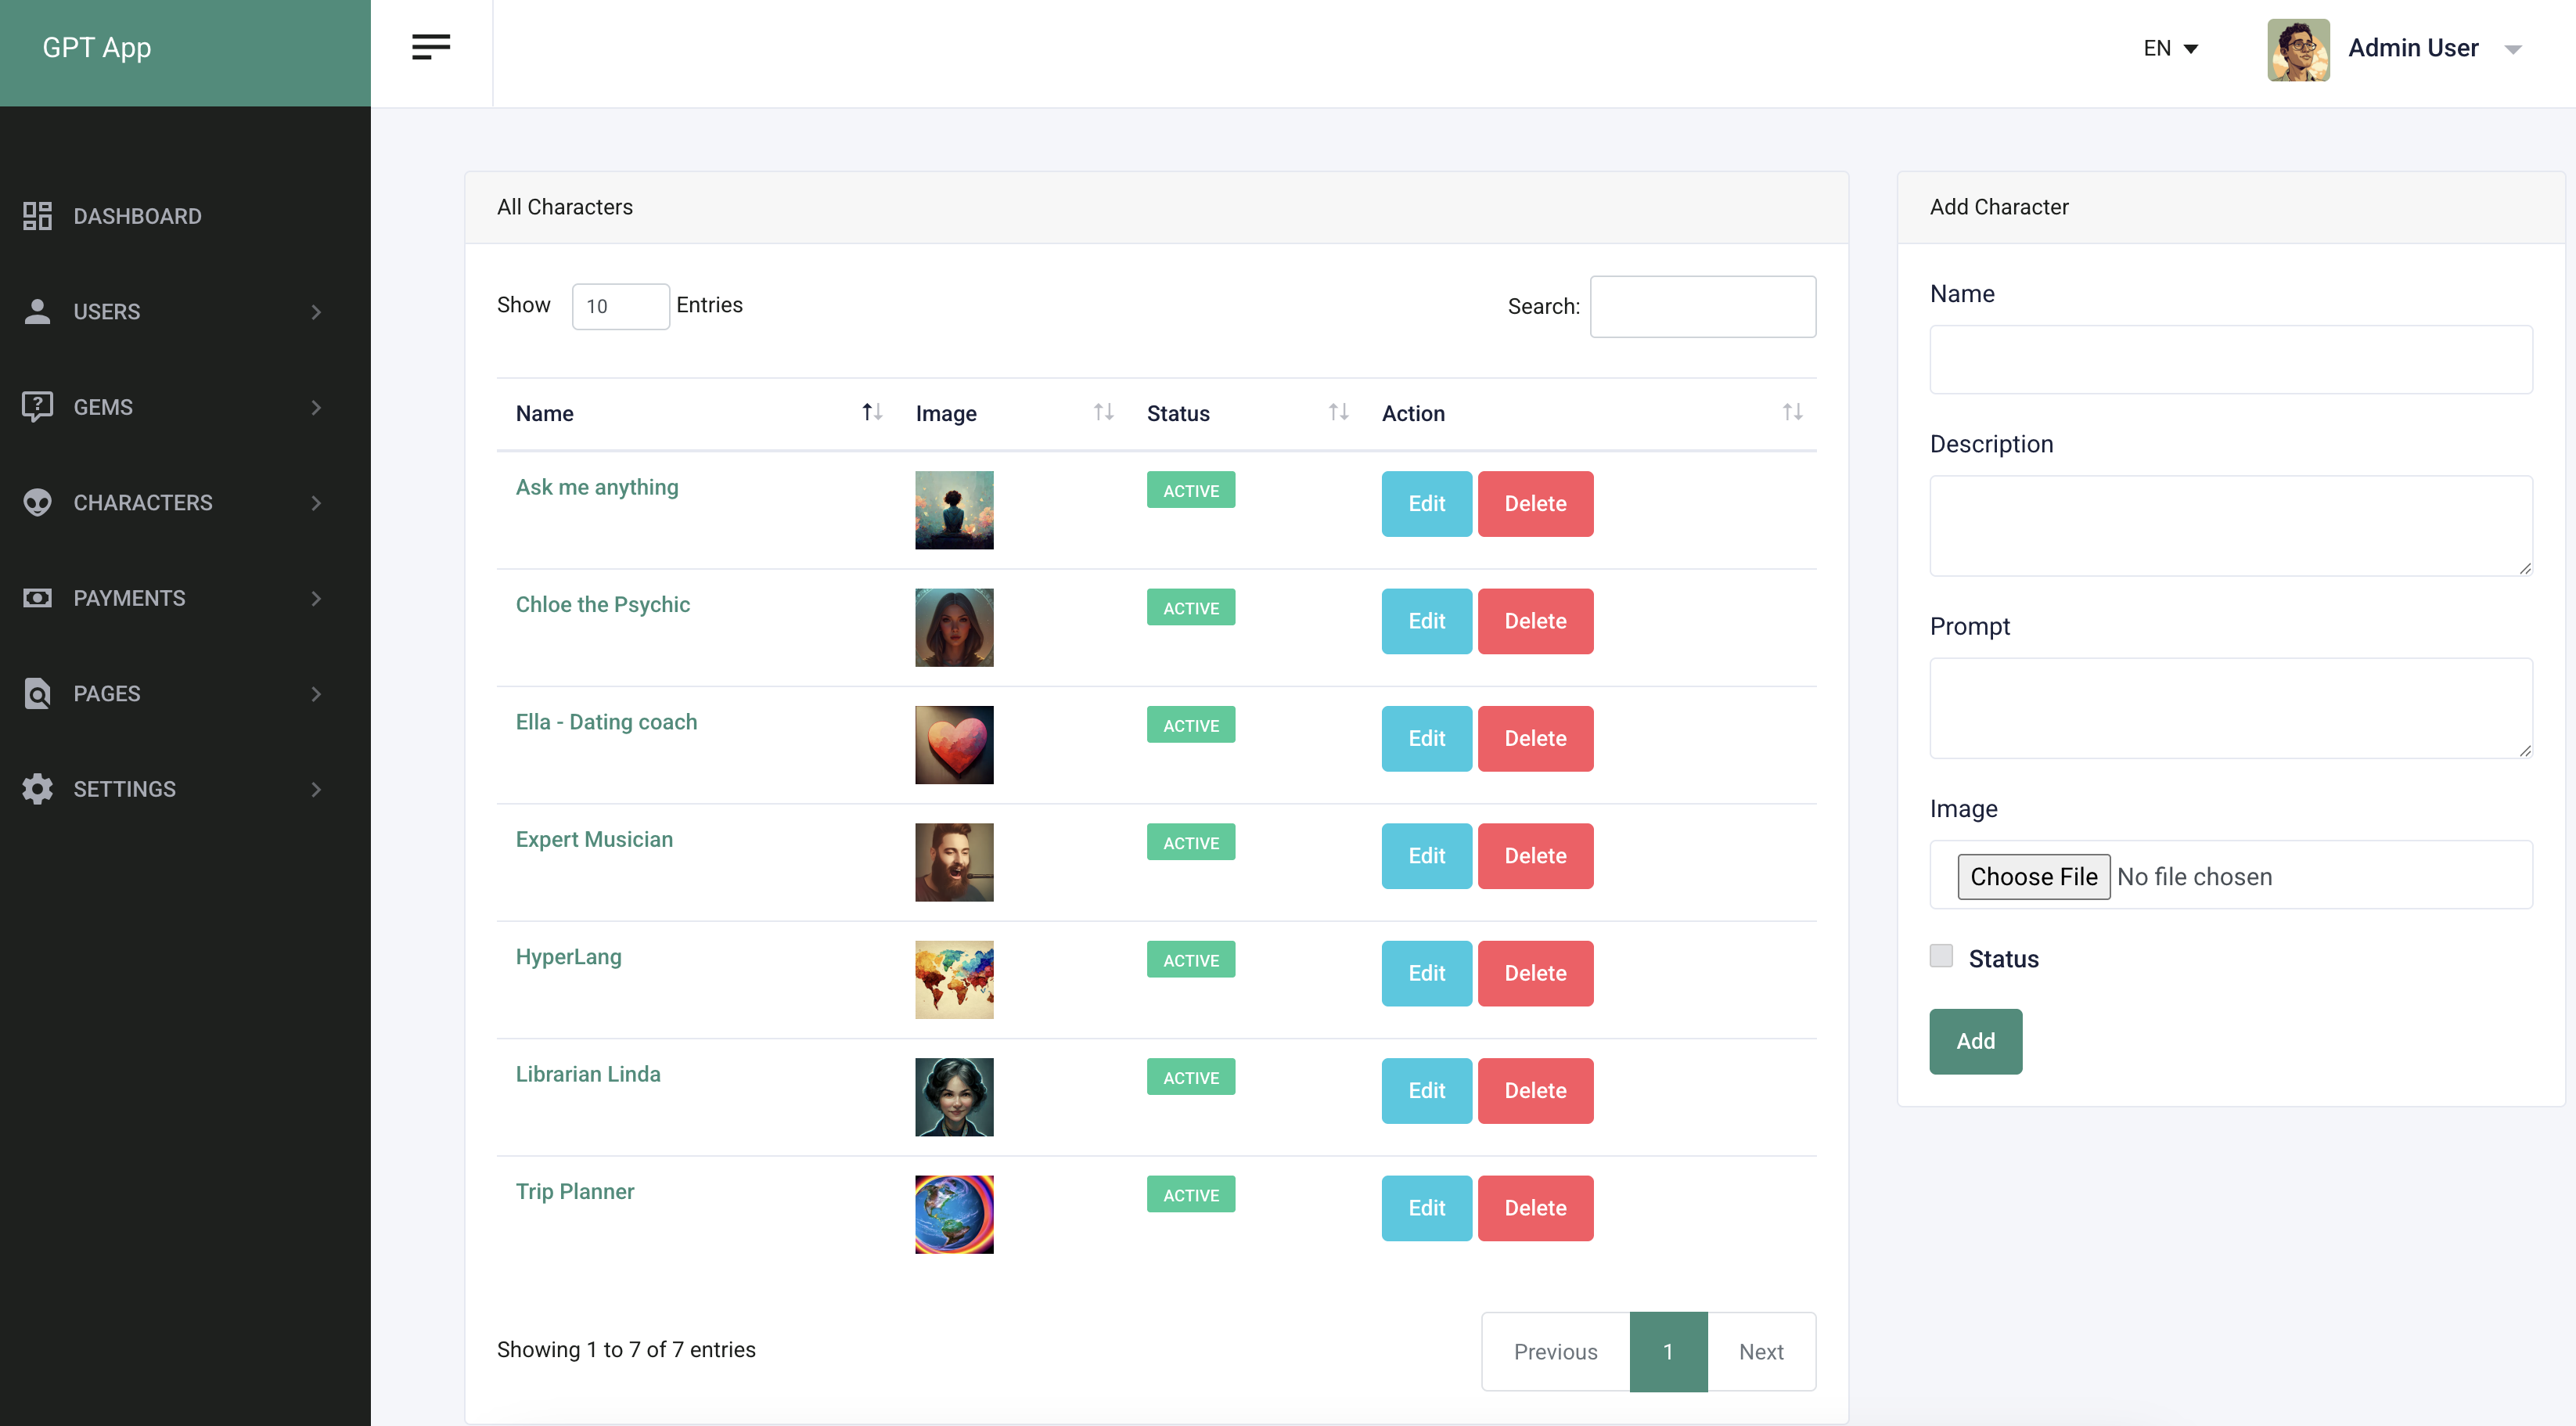
Characters
You can manage characters easily and dynamically from the admin panel. You can add, delete, edit, and manage quizzes.
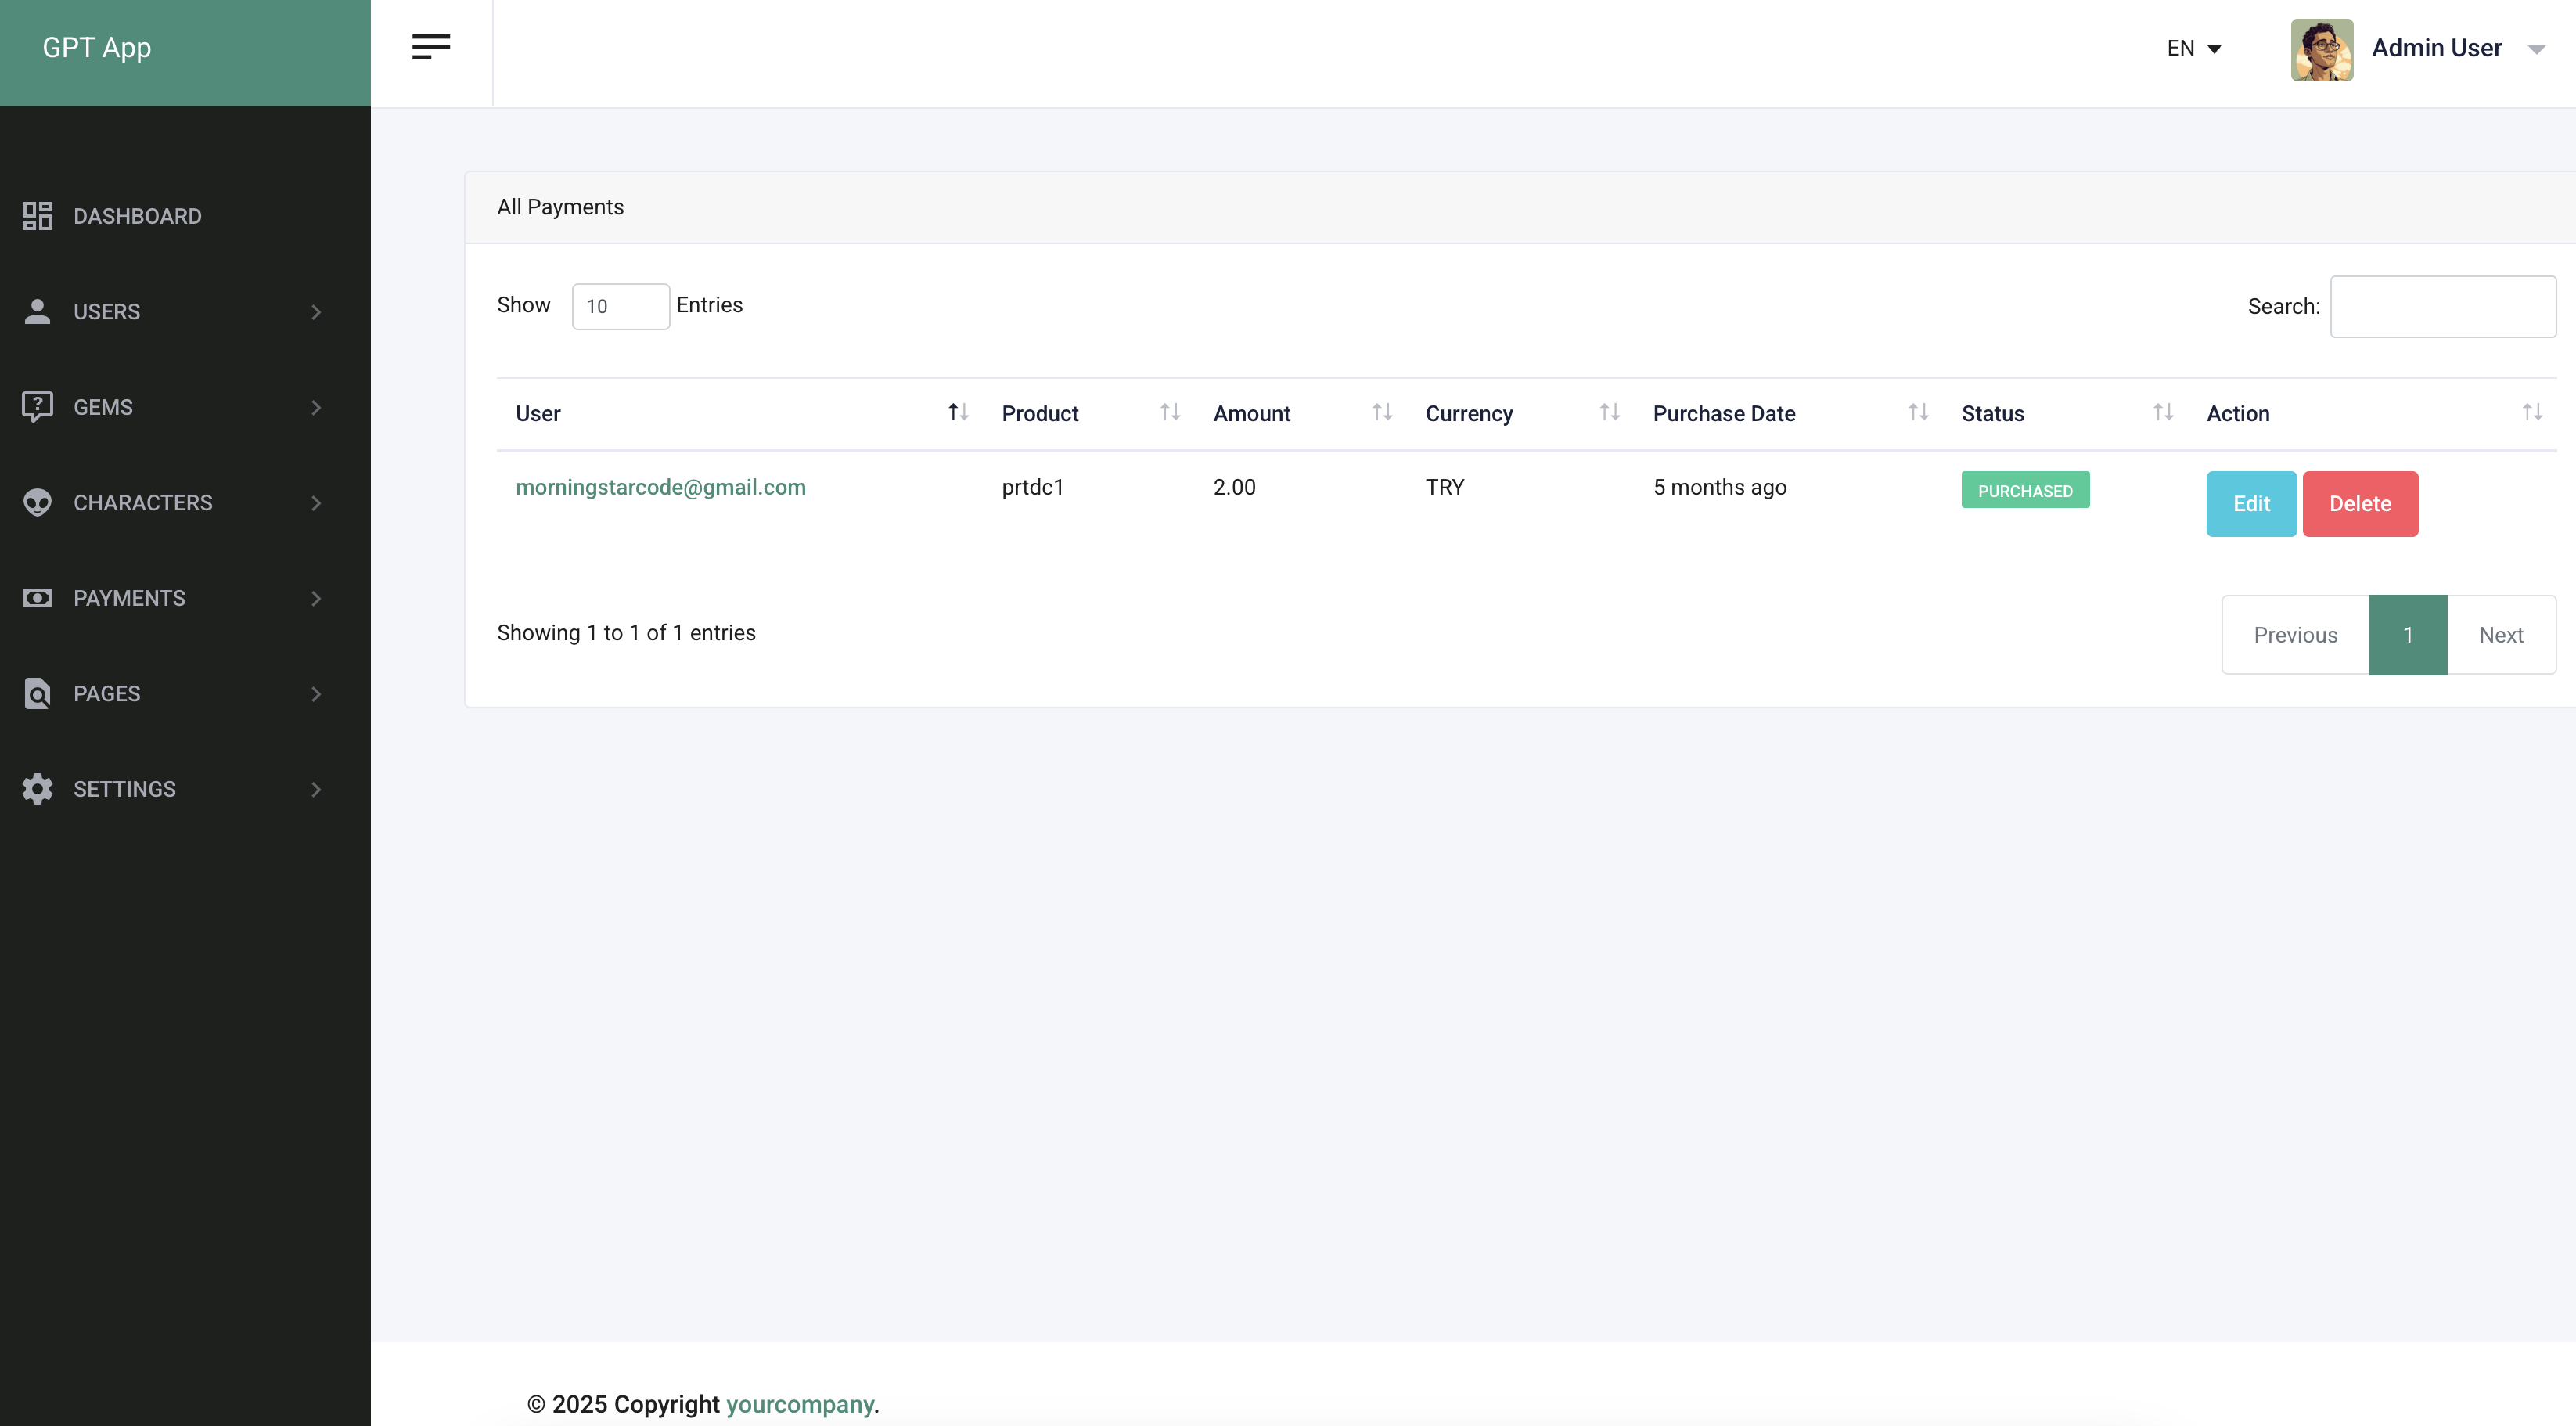
Payments
You can manage payments easily and dynamically from the admin panel. You can delete, edit, and manage payments.
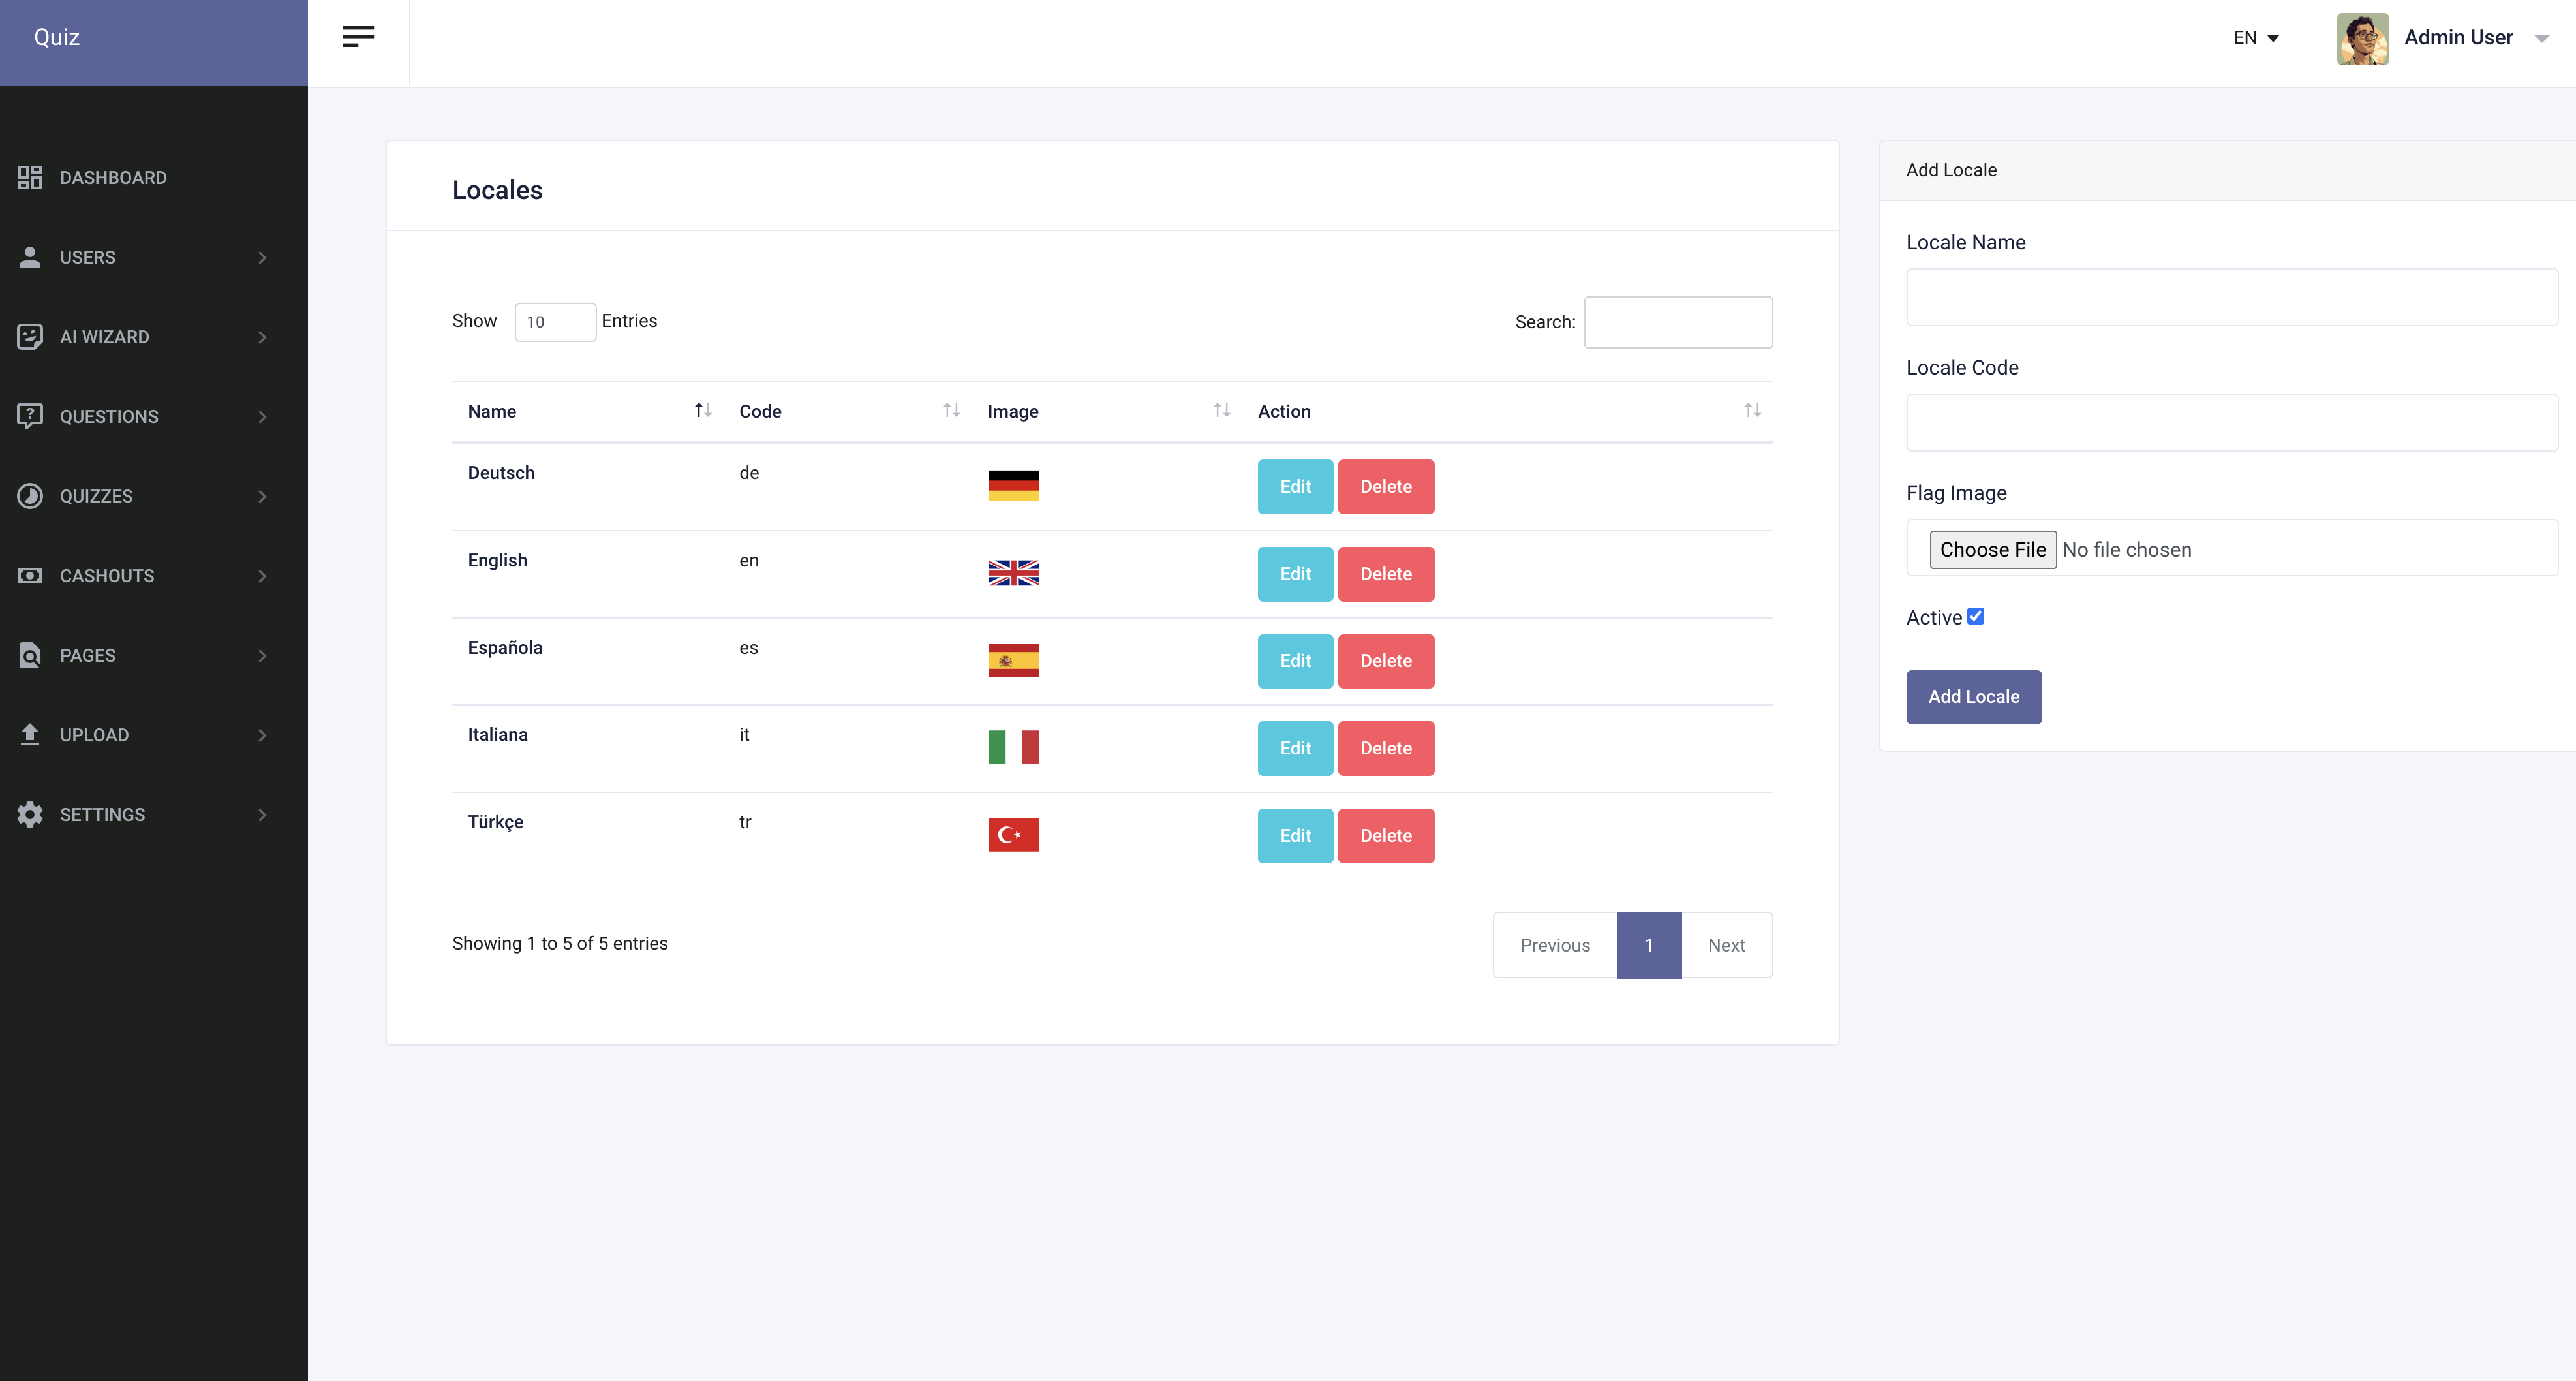
Locales
You can manage locales easily and dynamically from the admin panel. You can create, edit, delete, and manage locales. You can add unlimited locales.
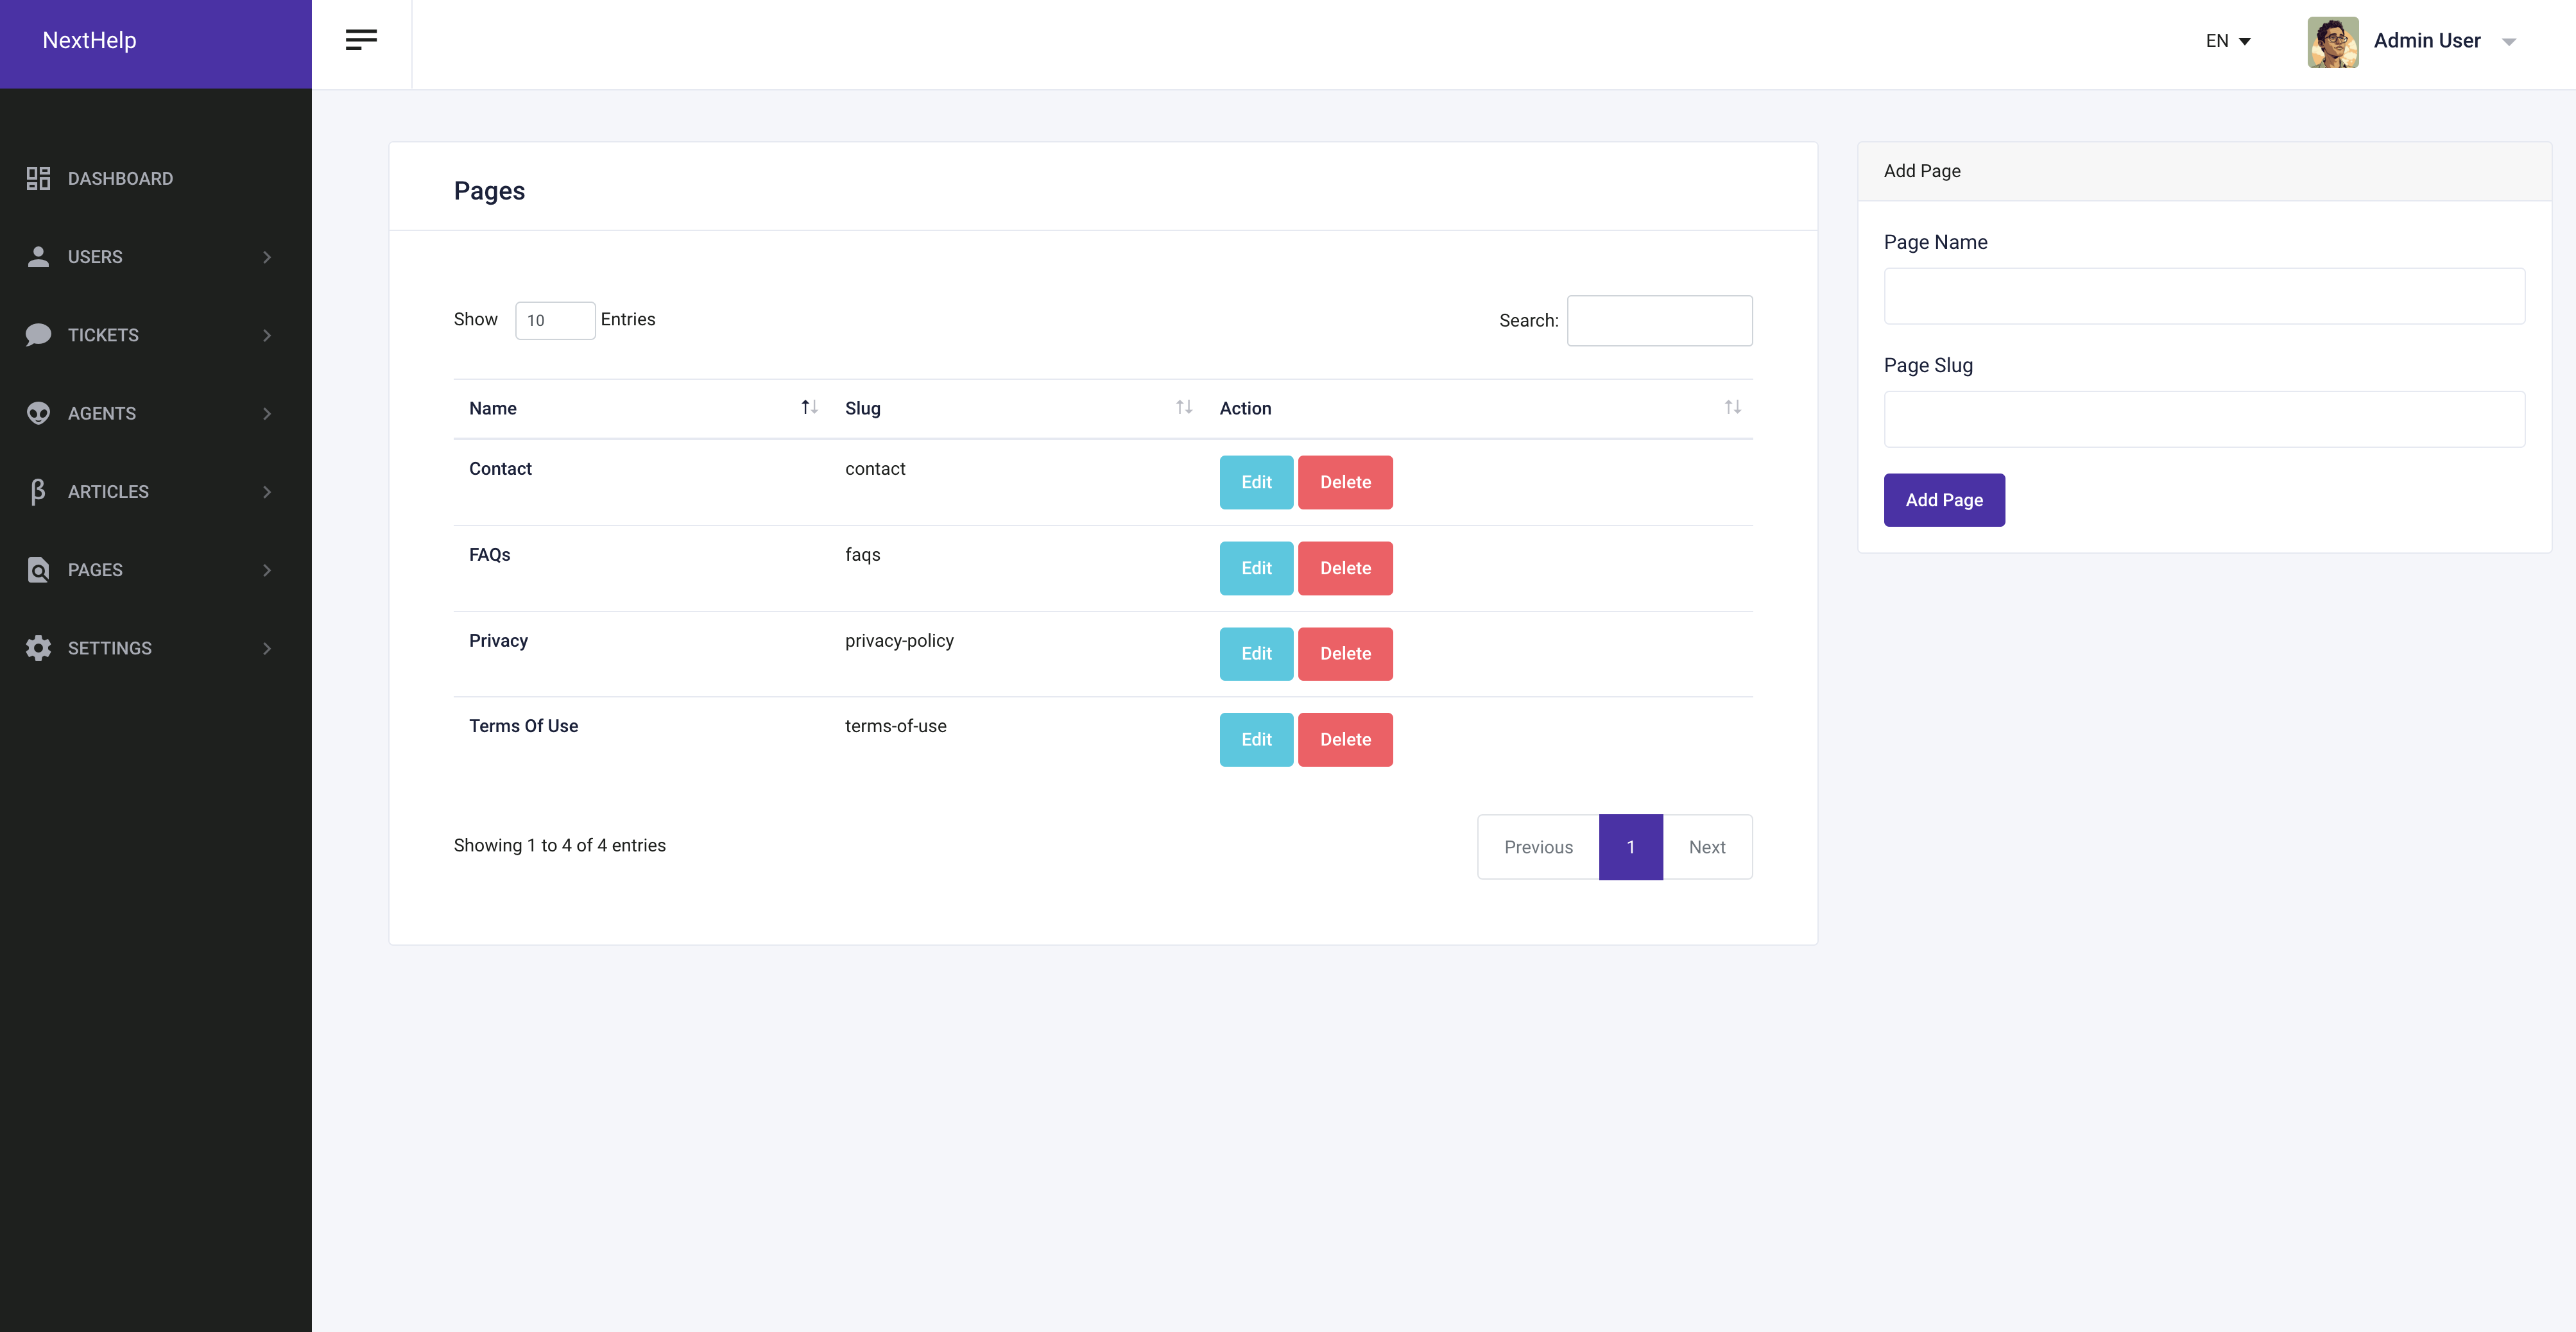
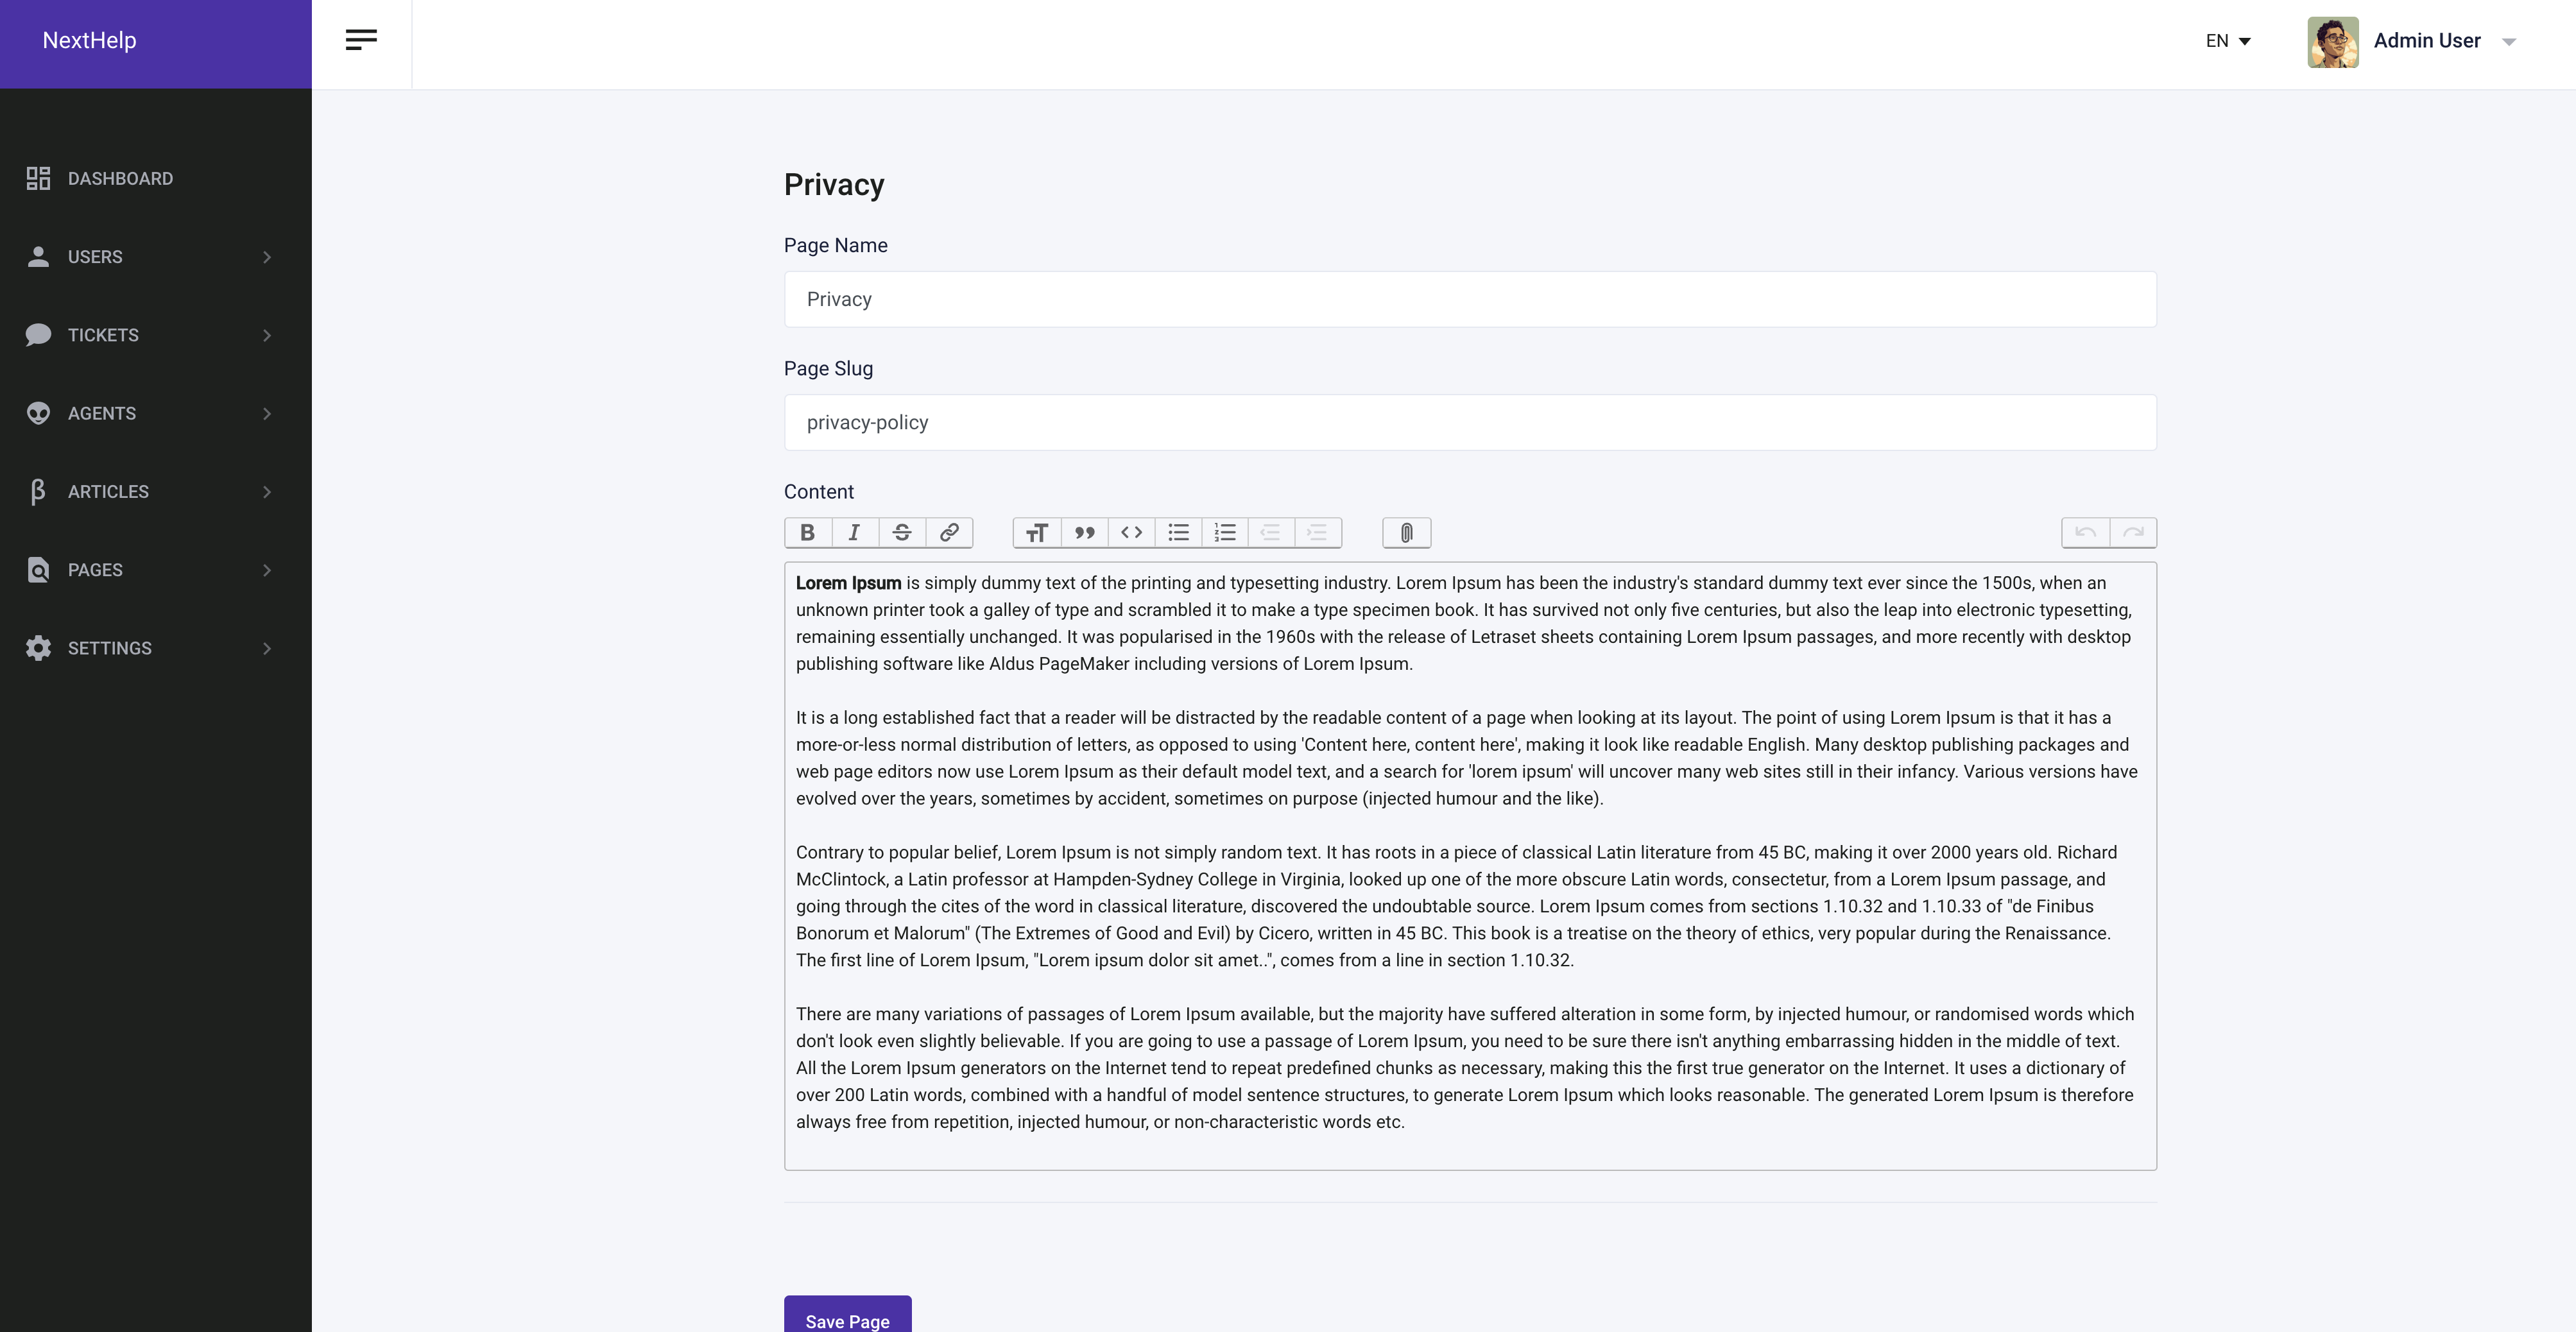
Pages
You can manage pages easily and dynamically from the admin panel. You can add, delete, edit, and manage pages.
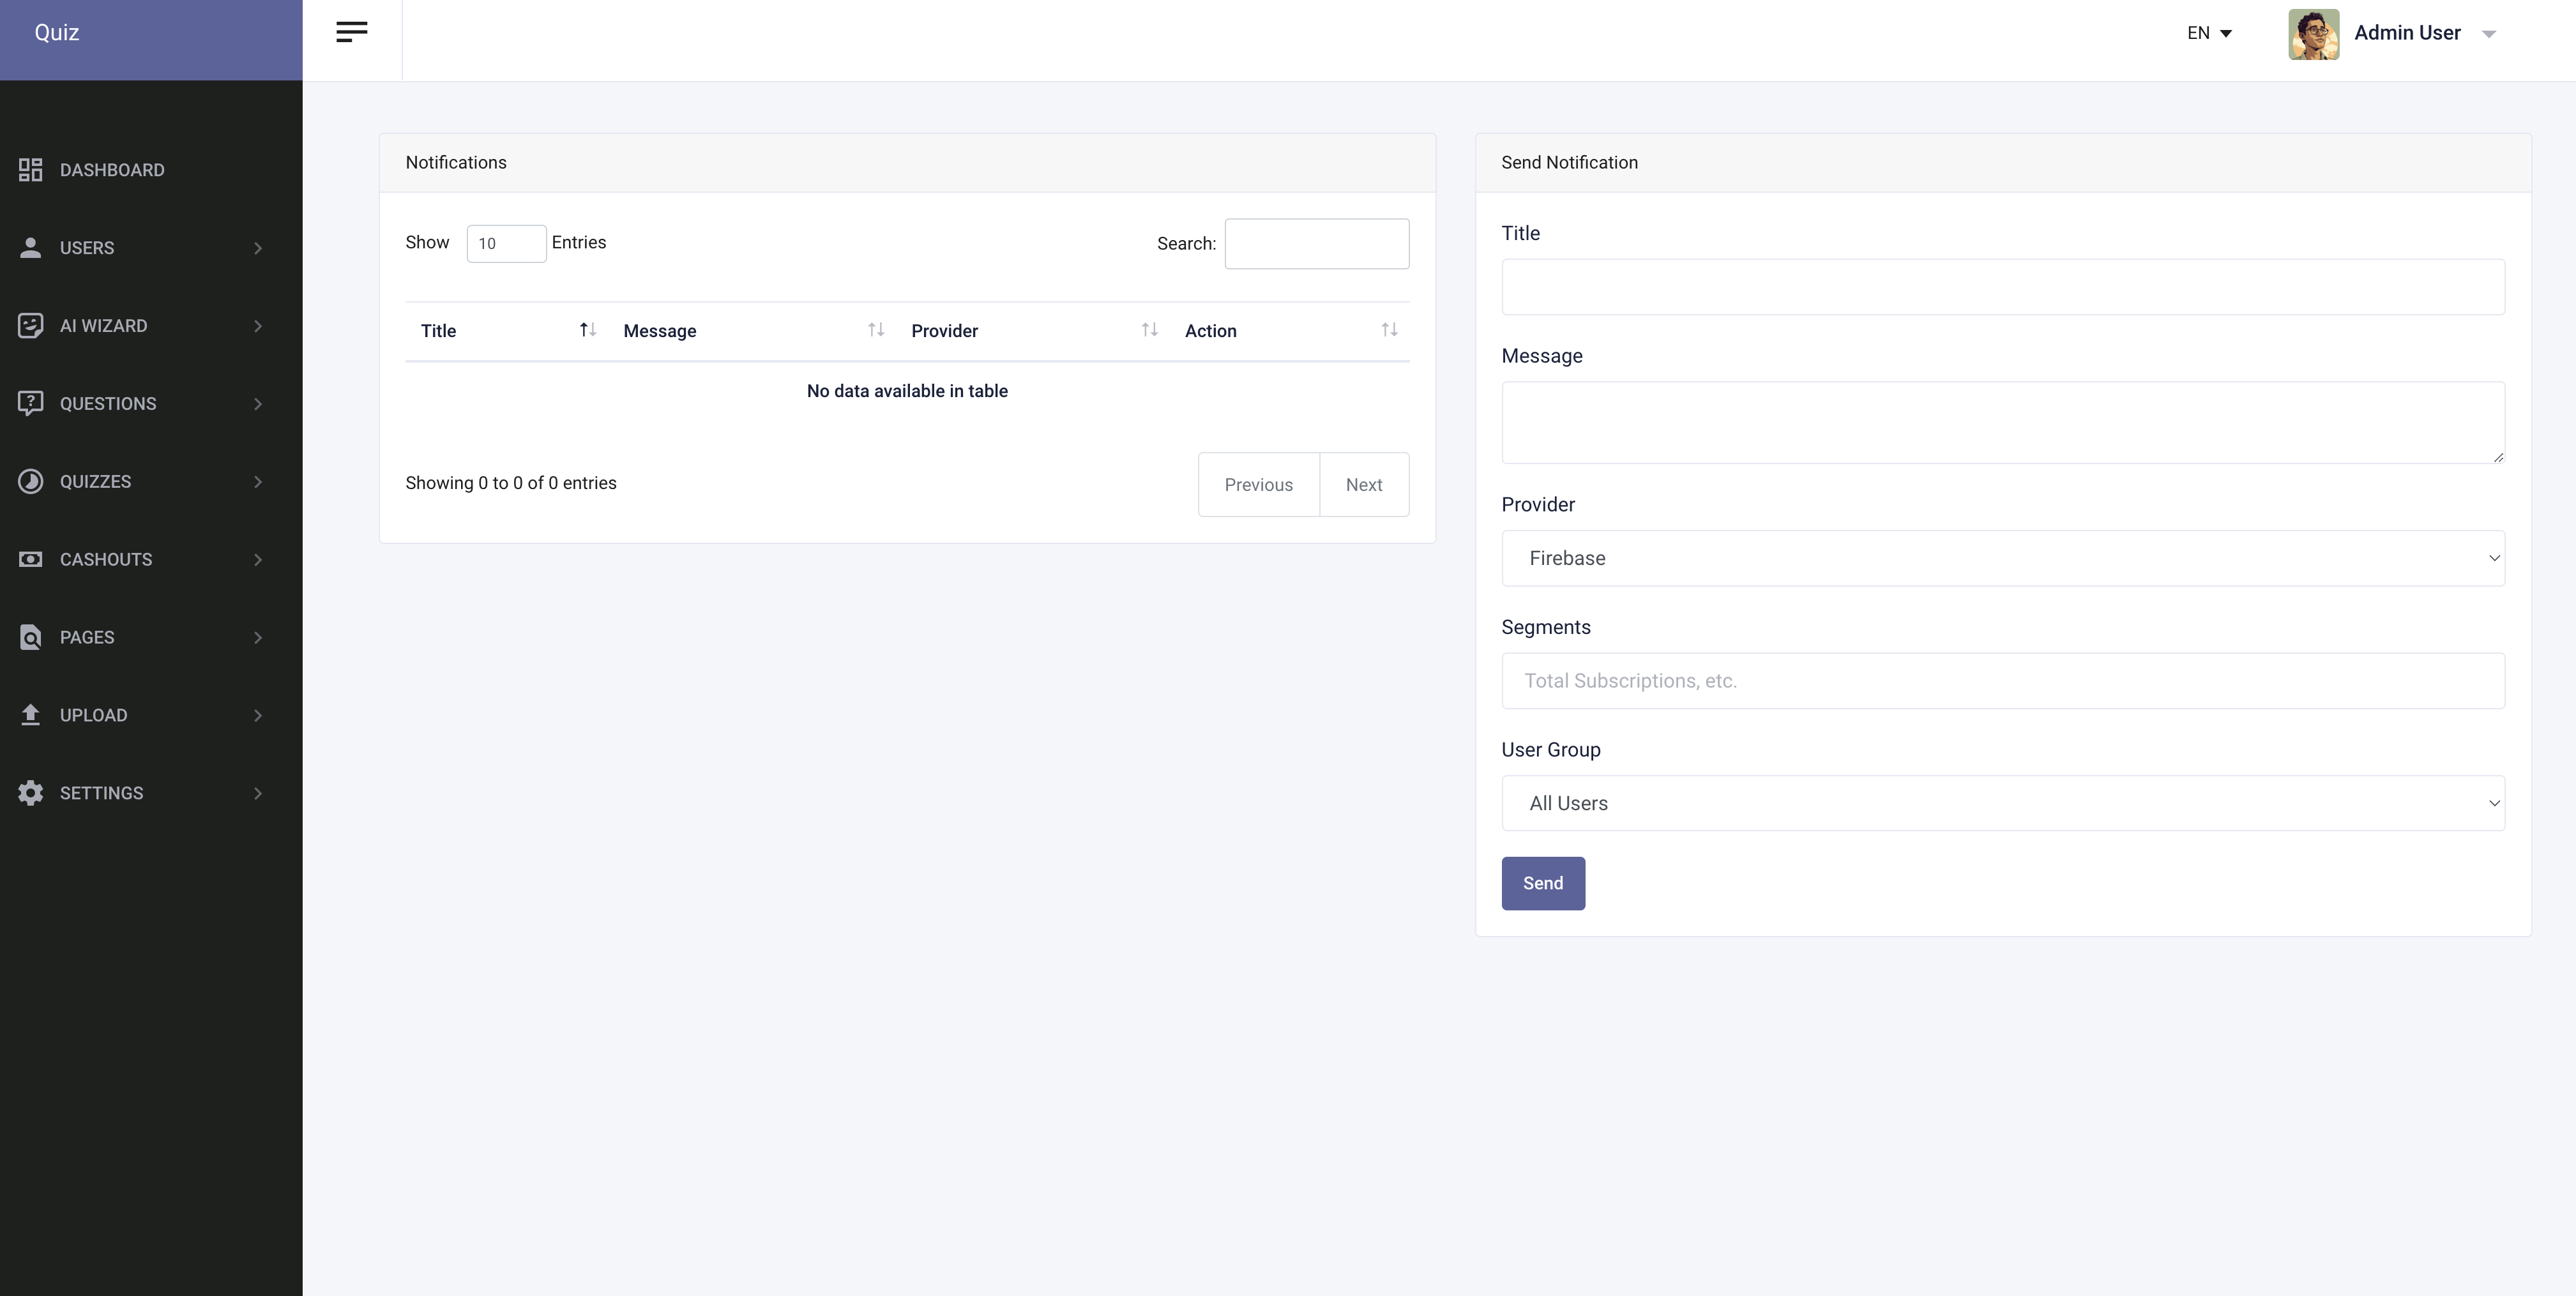
Notifications
You can send push notifications to users easily and dynamically from the admin panel. You can choose provider as Firebase or OneSignal.
FAQ
Thank you once again for purchasing NextGPT App. As mentioned at the beginning, if you find any issue please write us on morningstarcode@gmail.com we would be glad to help you.
Licences
- https://github.com/carlstype/techna-sans?tab=OFL-1.1-1-ov-file#readme
- https://github.com/tailwindlabs/tailwindcss?tab=MIT-1-ov-file#readme
- https://github.com/themefisher/sleek-bootstrap?tab=MIT-1-ov-file#readme
- https://github.com/twbs/bootstrap?tab=MIT-1-ov-file#readme
- Vectors and icons by SVG Repo